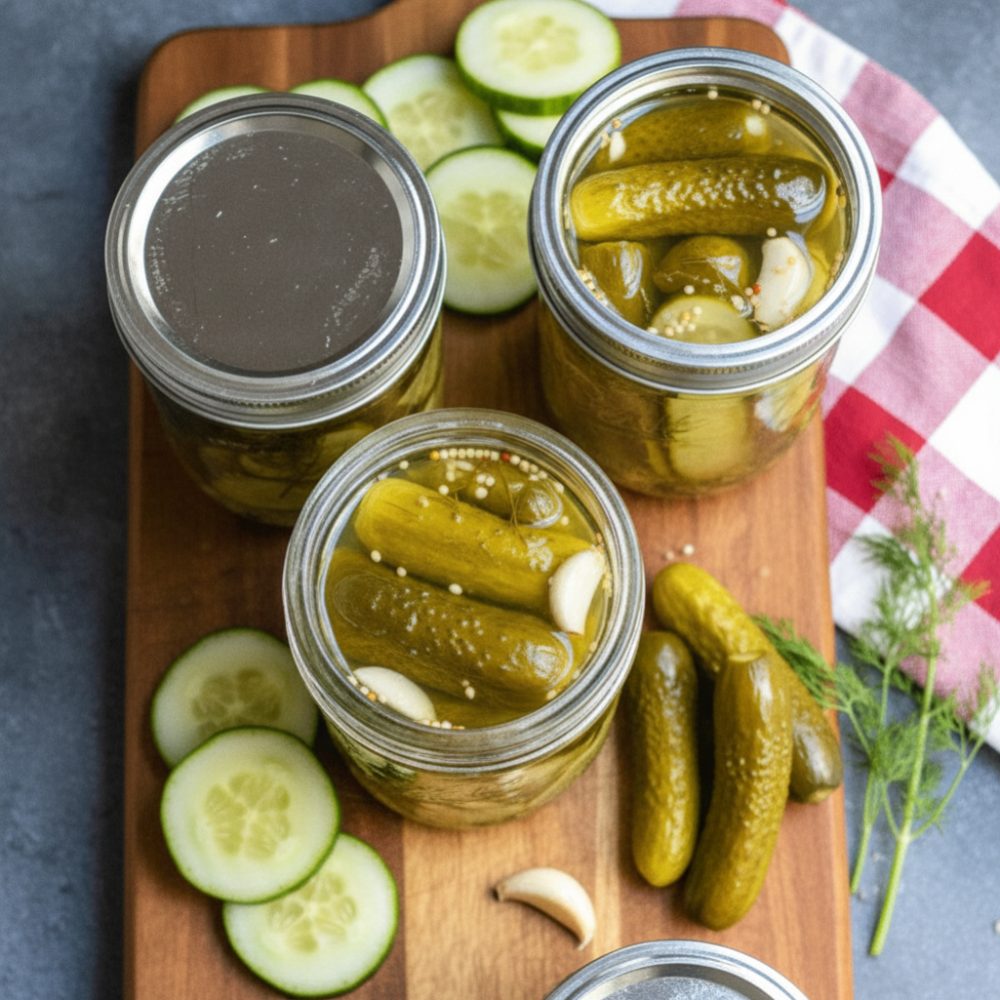
Transforming simple cucumbers into vibrant, tangy delights has never been easier. Forget the mass-produced jars lining grocery store shelves; embracing the art of refrigerator pickles means unlocking a world of unparalleled flavor and satisfying crunch. These are not your grandmother’s laborious, hot-water-bath canning pickles. Instead, we’re talking about quick pickles – a straightforward method that delivers homemade crisp dills with minimal fuss and maximum impact. In less time than it takes to decide what to order for takeout, you can have a batch of these no-can pickles chilling in your fridge, ready to elevate any meal or serve as an easy snack.
The beauty of making your own lies in the control you gain over the ingredients and the freshness of the final product. No artificial colors, no unpronounceable preservatives, just pure, bright flavor. You’ll soon discover that these mason jar pickles are not just a condiment; they’re a testament to how simple ingredients can create something truly special. Let’s dive into the satisfying world of homemade quick pickling.
Why Make Your Own Crisp Dills?
The allure of homemade crisp dills extends far beyond mere convenience. While the ease of preparation – a hallmark of any good quick pickles recipe – is certainly a major draw, the primary motivation for many culinary enthusiasts is the superior quality and personalized taste. Store-bought pickles often lack the robust flavor and invigorating crunch that defines a truly great dill pickle. They can be overly salty, too sweet, or simply lack the fresh, vibrant tang you crave.
By making your own refrigerator pickles, you become the master of your brine. You control the balance of salt, sugar, and vinegar, ensuring a flavor profile that perfectly suits your palate. The freshness of your ingredients is also a significant factor. When you use crisp, quality pickling cucumbers and fresh dill, the resulting pickles burst with a lively taste that pre-packaged alternatives simply cannot match. This homemade approach also means saying goodbye to artificial preservatives, often found in commercial products. Your no-can pickles rely on the natural preserving power of vinegar and salt, making them a cleaner, healthier option.
Beyond taste, there’s the undeniable satisfaction of creation. There is a sense of accomplishment in crafting something delicious from scratch. These mason jar pickles are not just food; they are a small culinary achievement, a vibrant addition to your refrigerator that constantly reminds you of your kitchen prowess. They offer a delightful crunch that can awaken any dish, from a humble sandwich to a gourmet burger. Furthermore, the short preparation time means you can whip up a batch whenever the craving strikes, ensuring a constant supply of these delightful easy snack items or meal enhancements.
Essential Ingredients
Crafting perfect refrigerator pickles begins with selecting the right ingredients and understanding their roles. Each component contributes significantly to the final flavor and texture of your homemade crisp dills. To create exactly one 32 oz mason jar pickles, you will need precise measurements and fresh, high-quality items.
- 4 medium Pickling cucumbers: These are critical for that signature crunch. Their smaller size and firm flesh hold up wonderfully to the pickling process, preventing a soggy outcome.
- 1 cup Water: The foundation of your vinegar brine. Filtered water is always recommended for the cleanest taste.
- 1 cup White vinegar: The star of the show. White vinegar provides the sharp, tangy acidity essential for preserving and flavoring your quick pickles. Its neutral flavor allows the dill and garlic to shine.
- 1 tbsp Kosher salt: Crucial for flavor and also contributes to the preserving action. Kosher salt is preferred because it lacks anti-caking agents found in table salt, which can sometimes cloud the brine.
- 1 tsp Granulated sugar: A touch of sugar balances the acidity of the vinegar, rounding out the flavor profile without making the pickles sweet.
- 4 cloves Garlic cloves: Smashed garlic infuses the brine with its pungent, aromatic notes, a classic companion to dill pickles.
- 2 sprigs Fresh dill: Essential for authentic dill flavor. Fresh dill offers a bright, herbaceous aroma that dried dill cannot replicate.
- 1 tsp Mustard seeds: These tiny seeds add a subtle, earthy, and peppery complexity to the vinegar brine, enhancing the overall pickle experience.
Each ingredient plays a vital part in transforming simple cucumbers into these delightful no-can pickles. The combination ensures a perfectly balanced, flavorful, and incredibly crunchy result, ready to become your go-to easy snack.
Step-by-Step Instructions
Making refrigerator pickles is a straightforward process, broken down into a few simple steps. Precision in following these instructions guarantees a batch of homemade crisp dills that are consistently delicious and perfectly crunchy.
- Prepare the Cucumbers: Begin by thoroughly washing your 4 medium pickling cucumbers. Once clean, slice them into either spears or chips, depending on your preference. Spears are excellent for snacking and adding to sandwiches, while chips are ideal for burgers. Ensure the slices are uniform for even pickling.
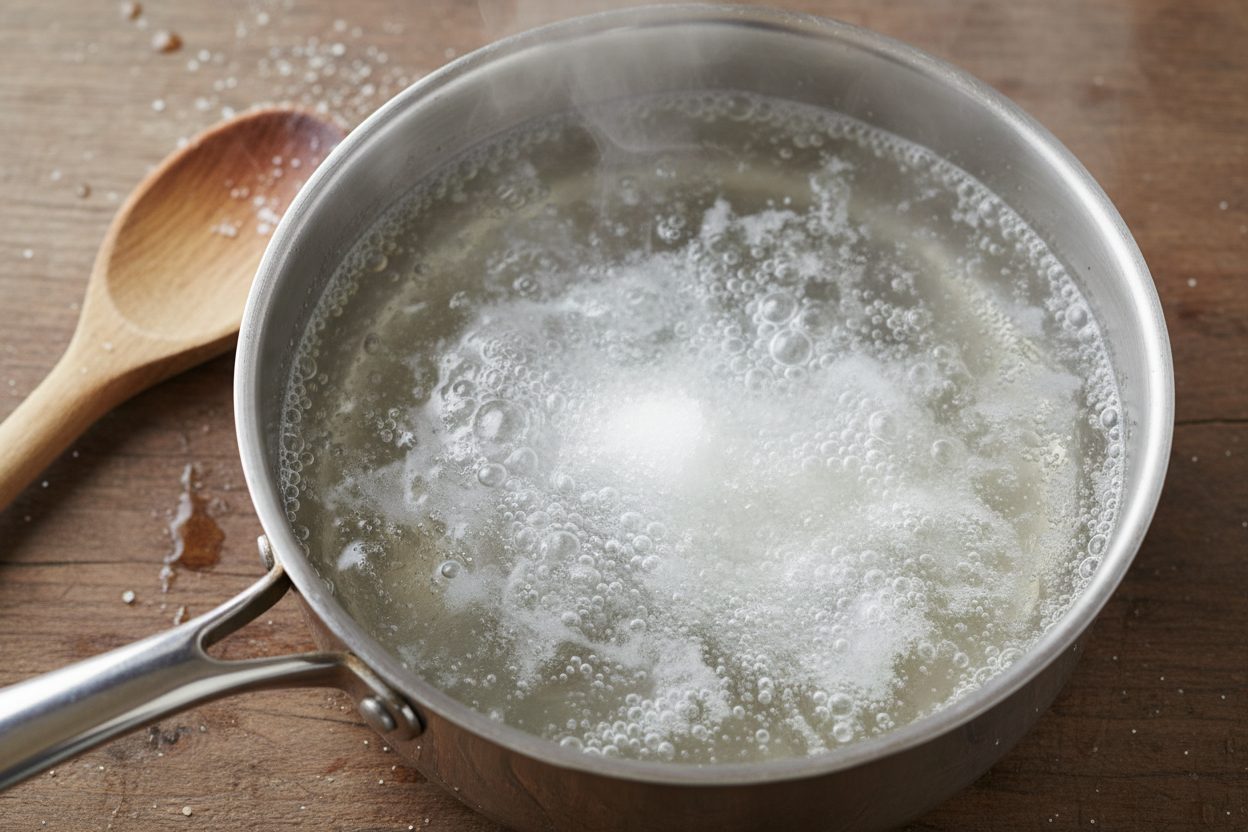
- Craft the Brine: In a small saucepan, combine 1 cup water, 1 cup white vinegar, 1 tbsp kosher salt, and 1 tsp granulated sugar. Place the saucepan over medium-high heat and bring the mixture to a boil. Stir continuously until both the salt and sugar are completely dissolved into the liquid. Once dissolved, remove the saucepan from the heat and allow the vinegar brine to cool slightly. It does not need to be completely cold, but it should not be boiling hot when it touches the cucumbers, as excessive heat can soften them.
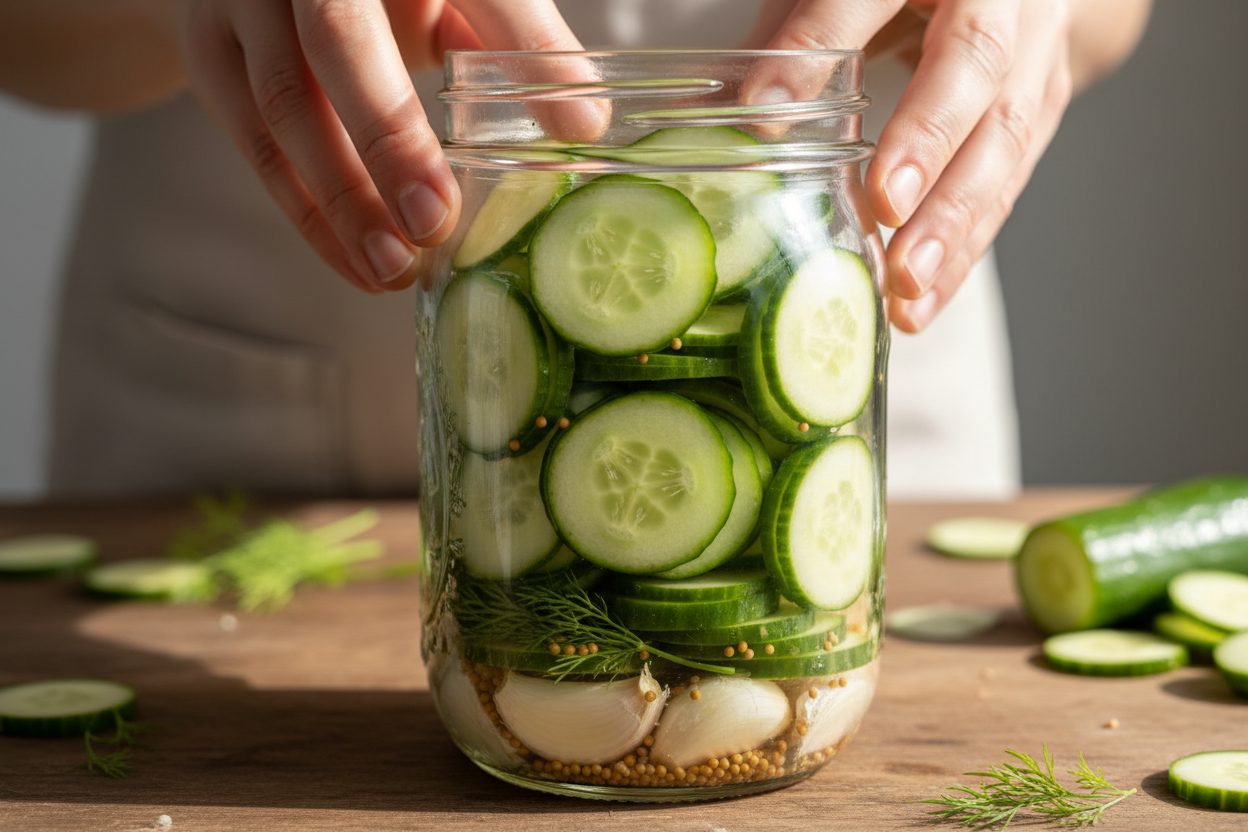
- Ready the Jar: Take a clean 32 oz mason jar. Into this jar, place your 4 smashed garlic cloves, 2 sprigs of fresh dill, and 1 tsp of mustard seeds. These aromatics will infuse the pickles with their distinctive flavors.
- Pack the Cucumbers: Carefully pack the sliced cucumbers tightly into the prepared mason jar. The goal is to fill the jar as much as possible without crushing the cucumbers, ensuring they are snug. A tight pack helps keep them submerged in the brine later.
- Pour the Brine: Slowly pour the slightly cooled vinegar brine over the packed cucumbers in the jar. Pour until the cucumbers are completely submerged. It is crucial that no part of the cucumber is exposed to air, as this could lead to spoilage.
- Seal and Chill: Securely seal the mason jar with its lid. Once sealed, transfer the jar to your refrigerator. Allow the quick pickles to chill and marinate for at least 24 hours before tasting. This waiting period allows the flavors to meld and the cucumbers to absorb the tangy brine, transforming them into delicious homemade crisp dills.
These simple steps yield fantastic results, providing you with a batch of flavorful no-can pickles ready to be enjoyed as an easy snack or alongside any meal.
Storage and Shelf Life
Proper storage is key to maintaining the crispness and flavor of your refrigerator pickles. Once prepared, your jar of homemade crisp dills must always be kept in the refrigerator. The cool temperature slows down any bacterial growth and preserves the integrity of the cucumbers, keeping them firm and flavorful. Do not store these no-can pickles at room temperature, as they have not undergone a traditional canning process.
When stored correctly in a sealed mason jar, these quick pickles will retain their delicious crunch and tangy flavor for up to one month. While they are usually consumed much faster due to their addictive nature, knowing their shelf life provides peace of mind. Always ensure the cucumbers remain fully submerged in the vinegar brine throughout their storage. If any pieces rise above the liquid, gently push them back down or add a little more brine to cover them. Enjoy your flavorful easy snack for weeks to come.
The Science Behind the Crunch: Achieving Homemade Crisp Dills
Achieving that coveted crunch in homemade crisp dills is no accident; it involves a bit of culinary science. The key factors revolve around the quality of your pickling cucumbers and the careful preparation of your vinegar brine. Firstly, fresh, firm pickling cucumbers are paramount. Older or softer cucumbers will inevitably yield softer pickles. The cell walls of fresh cucumbers are robust, and they are better equipped to withstand the pickling process.
The brine itself plays a critical role. The combination of white vinegar, kosher salt, and granulated sugar creates an acidic environment that inhibits the growth of spoilage microorganisms. More importantly for texture, this acidic environment also helps to preserve the pectin in the cucumber’s cell walls. Pectin is a natural polysaccharide that acts like a glue, giving vegetables their firm structure. When exposed to heat for too long, or to an imbalanced brine, pectin can break down, leading to limp pickles.
Our method of bringing the brine to a boil briefly and then letting it cool slightly before pouring it over the cucumbers is intentional. Pouring extremely hot brine directly onto the cucumbers can shock them, potentially leading to a softer texture. By allowing it to cool, we minimize this thermal shock. The immediate refrigeration then halts enzymatic activity that could lead to softening, locking in the crispness. The salt also draws out some water from the cucumbers through osmosis, concentrating their natural crispness. This careful balance ensures each bite of your refrigerator pickles delivers a satisfying snap, making them truly homemade crisp dills and a perfect easy snack.
Versatility and Serving Suggestions
Beyond being an easy snack straight from the jar, refrigerator pickles offer incredible versatility in the kitchen. Their bright, tangy flavor and delightful crunch can elevate a myriad of dishes, making them a staple in any food lover’s fridge. These homemade crisp dills are far more than just a simple condiment; they are an ingredient that adds character and zest.
Consider them an essential component of sandwiches and burgers. A few slices of these quick pickles can cut through the richness of meats and cheeses, providing a refreshing counterpoint. They are particularly good on a classic deli sandwich, a juicy beef burger, or even a simple grilled cheese. Their acidity brightens the overall flavor profile. Chopped finely, they can be folded into a creamy potato salad or a hearty egg salad, adding a textural pop and a tangy lift that transforms these classics.
These no-can pickles also make a fantastic accompaniment to heavier, richer meals. Serve them alongside slow-cooked dishes or barbecue to provide a much-needed acidity that cleanses the palate. They are excellent with roasted beef, or as part of a charcuterie board, where their sharp flavor contrasts beautifully with cured meats and cheeses. Don’t forget their role in a vibrant side salad; thin slices can be tossed with greens and a light vinaigrette for an extra dimension of flavor and crunch. Even a simple plate of grains or lentils can be enlivened with a spoonful of chopped mason jar pickles. Their adaptability means they are always a welcome addition, proving their worth beyond just being a delicious easy snack.
Tips for the Perfect Batch of Quick Pickles
While making refrigerator pickles is inherently simple, a few expert tips can ensure your homemade crisp dills are consistently outstanding. Attention to these details elevates a good batch into a truly exceptional one.
- Choose the Right Cucumbers: As emphasized, the type of cucumber matters greatly. Always opt for fresh, firm pickling cucumbers, often labeled as “Kirby” or “Persian” cucumbers. Avoid larger, waxy salad cucumbers, as their higher water content and thinner skin make them prone to becoming soggy. Select those that feel heavy for their size and have no soft spots.
- Cleanliness is Paramount: Although these are no-can pickles and not for long-term shelf stable storage, maintaining cleanliness is still crucial. Ensure your mason jar and lid are thoroughly washed and sanitized. This prevents any unwanted bacteria from affecting the flavor or shelf life of your quick pickles.
- Uniform Slicing: Whether you choose spears or chips, strive for uniform thickness. This ensures that all cucumber pieces absorb the vinegar brine at the same rate, resulting in consistently flavored and textured pickles throughout the jar.
- Brine Temperature: The instruction to cool the brine slightly is vital. Pouring scalding hot brine directly over the cucumbers can cause them to soften prematurely. Allowing it to cool to warm or room temperature helps maintain their crispness.
- Tight Packing: Pack the cucumbers as tightly as possible into the mason jar without damaging them. This minimizes air pockets and helps ensure all pieces remain submerged in the brine, which is essential for proper pickling and preservation.
- Patience for Flavor: While these are quick pickles, the minimum 24-hour chilling period is non-negotiable for flavor development. For an even more intense and melded taste, allow them to sit for 48-72 hours. The flavors deepen significantly with a little extra time.
By adhering to these simple but effective tips, you will consistently produce batches of refrigerator pickles that are not just good, but truly remarkable. Enjoy the satisfaction of creating these homemade crisp dills, perfect for any occasion or just as an easy snack.
Ready to dive deeper into the world of simple, delicious home cooking? Join our community for more recipes, tips, and culinary inspiration.
Follow our Facebook page
https://www.facebook.com/profile.php?id=61568538666337
Crisp Homemade Quick Pickles
Ingredients
- 4 medium Pickling cucumbers Sliced into spears or chips
- 1 cup Water Filtered if possible
- 1 cup White vinegar 5% acidity
- 1 tbsp Kosher salt Do not use table salt
- 1 tsp Granulated sugar For balancing acidity
- 4 cloves Garlic cloves Smashed
- 2 sprigs Fresh dill Whole sprigs
- 1 tsp Mustard seeds Yellow or brown
Instructions
- Wash and slice cucumbers into spears or chips.
- Combine 1 cup water, 1 cup white vinegar, 1 tbsp kosher salt, and 1 tsp sugar in a small saucepan. Bring to a boil until salt and sugar dissolve, then let cool slightly.
- Place 4 smashed garlic cloves, 2 sprigs fresh dill, and 1 tsp mustard seeds in a clean 32 oz mason jar.
- Pack the sliced cucumbers tightly into the jar.
- Pour the cooled brine over the cucumbers, ensuring they are fully submerged.
- Seal the jar and chill for at least 24 hours before eating.
For more daily recipes and tips, follow us on Facebook!
Click here to join our community!