Introduction to Quick Pickling
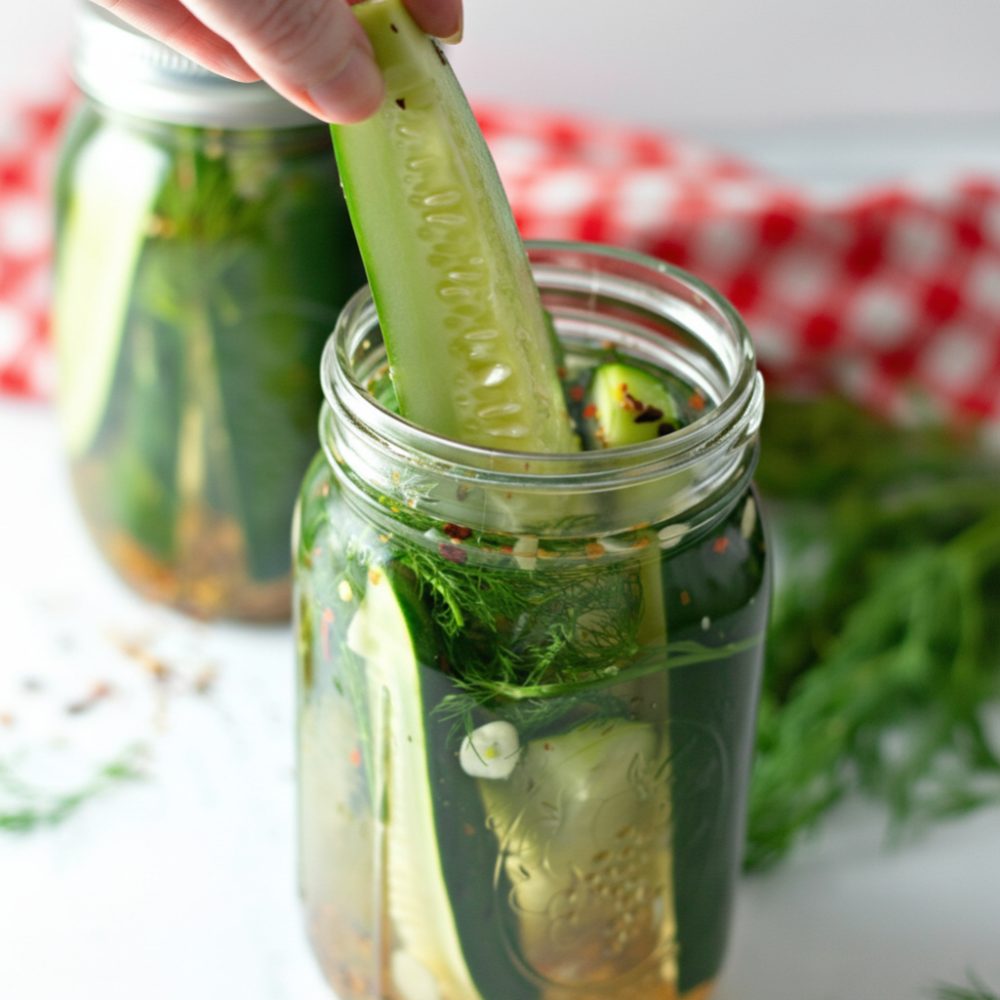
Making your own pickles at home does not require complicated equipment or hours of processing. This guide focuses on refrigerator dill pickles, an easy pickling recipe perfect for anyone seeking crisp, tangy cucumber spears without the commitment of traditional canning methods. These are truly homemade quick pickles, bypassing the need for a water bath and making them accessible to even novice cooks. You get all the fresh, vibrant flavor of classic dill pickles with minimal effort. This method is ideal for those who prefer no canning pickles, allowing you to enjoy fresh, crunchy results in just 24 hours. The process is simple, efficient, and yields exceptionally delicious results every time. Forget store-bought versions; these crispy garlic dill cucumbers offer a superior texture and taste that truly stands out.
Selecting the Best Cucumbers
The foundation of great pickles begins with the right cucumbers. For refrigerator dill pickles, choosing the correct variety is paramount to achieving that desirable firm, crunchy fridge pickles texture. We recommend Kirby cucumbers or small Persian cucumbers. These varieties are superior due to their ideal skin thickness and relatively low moisture content. Their smaller size means they have fewer seeds, which can contribute to a mushy texture. Selecting firm, unblemished cucumbers is crucial; avoid any that show signs of softness or yellowing. For this recipe, you will need approximately 1.5 lbs of Kirby cucumbers. When preparing them, wash them thoroughly under cold water, gently scrubbing away any dirt. Trimming both ends of the cucumber before slicing into spears helps prevent bitterness and also prepares them for optimal brine absorption. Starting with prime produce ensures your fresh dill cucumber spears will be perfectly crisp and flavorful.
Understanding the Brine Ratio
The magic of pickling lies in the brine, and for refrigerator dill pickles, a balanced vinegar brine for cucumbers is key. Our recipe uses a standard 2:1 ratio of filtered water to distilled white vinegar. This specific ratio is carefully chosen to create the perfect acidic environment. Distilled white vinegar provides a sharp, clean tang that is characteristic of classic dill pickles, without clouding the flavor or color of the cucumbers. The acidity of the vinegar acts as a natural preservative, inhibiting bacterial growth and contributing significantly to the pickles’ shelf life in the refrigerator.
Beyond the vinegar, Kosher salt plays a vital role. We use 2 tablespoons of Kosher salt, which not only seasons the pickles but also helps draw moisture out of the cucumbers, contributing to their crispness. The salt also enhances the flavors of the dill and garlic. A small amount of granulated sugar, precisely 1 tablespoon, is included to balance the sharpness of the vinegar and the saltiness, rounding out the overall taste profile. This balance ensures your homemade quick pickles have a complex, satisfying flavor without being overwhelmingly sour. The interaction between these ingredients is what allows the cucumbers to transform into tangy, crispy garlic dill cucumbers.
Essential Ingredients
Creating the perfect batch of refrigerator dill pickles requires a few simple, fresh ingredients. Each component contributes to the distinctive flavor and texture that makes these homemade quick pickles so satisfying.
- 1.5 lbs Kirby cucumbers: These are ideal for their firm texture and minimal seeds, ensuring perfectly crunchy fridge pickles. They will be sliced into spears for easy packing and eating.
- 2 cups filtered water: The base of our pickling brine, filtered water ensures a clean taste, free from impurities that might affect flavor.
- 1 cup distilled white vinegar: Provides the essential acidity for preservation and the characteristic tangy flavor of refrigerator dill pickles.
- 2 tbsp Kosher salt: Crucial for seasoning and contributing to the crispness of the cucumbers. Kosher salt dissolves easily and has a clean taste.
- 1 tbsp granulated sugar: Balances the tartness of the vinegar and the saltiness, enhancing the overall flavor profile.
- 4 cloves smashed garlic: Adds a pungent, aromatic depth that is fundamental to crispy garlic dill cucumbers. Smashing the cloves releases their flavor more effectively.
- 4 sprigs fresh dill: The star herb, providing the classic, bright, and slightly grassy flavor that defines dill pickles. Using fresh dill is key for superior taste.
- 1 tsp whole black peppercorns: Contributes a subtle, earthy warmth and aromatic complexity to the brine.
- 1/2 tsp red pepper flakes: Offers a gentle hint of heat, adding another layer of flavor without making the pickles overtly spicy.
These carefully selected ingredients combine to create an easy pickling recipe that truly shines, transforming fresh produce into delectable fresh dill cucumber spears.
Step-by-Step Instructions
Follow these straightforward steps to create your own batch of delicious refrigerator dill pickles. This easy pickling recipe focuses on clarity and simplicity, ensuring successful homemade quick pickles every time.
- First, prepare your cucumbers. Wash the 1.5 lbs Kirby cucumbers thoroughly under cold running water. Trim off both ends of each cucumber. Then, slice them carefully into spears or thick coins, depending on your preference. Ensure they are uniform in size for even pickling.
- Next, prepare the pickling brine. In a small saucepan, combine the 2 cups filtered water, 1 cup distilled white vinegar, 2 tbsp Kosher salt, and 1 tbsp granulated sugar. Place the saucepan over medium-high heat. Bring the mixture to a rolling boil, stirring continuously until both the salt and sugar have completely dissolved into the liquid. This ensures your vinegar brine for cucumbers is perfectly seasoned.
- Remove the saucepan from the heat immediately after the salt and sugar have dissolved. It is critical to allow the brine to cool down to room temperature before proceeding. Pouring hot brine over cucumbers can result in soft, unappealing pickles. Patience here is key for achieving crispy garlic dill cucumbers.
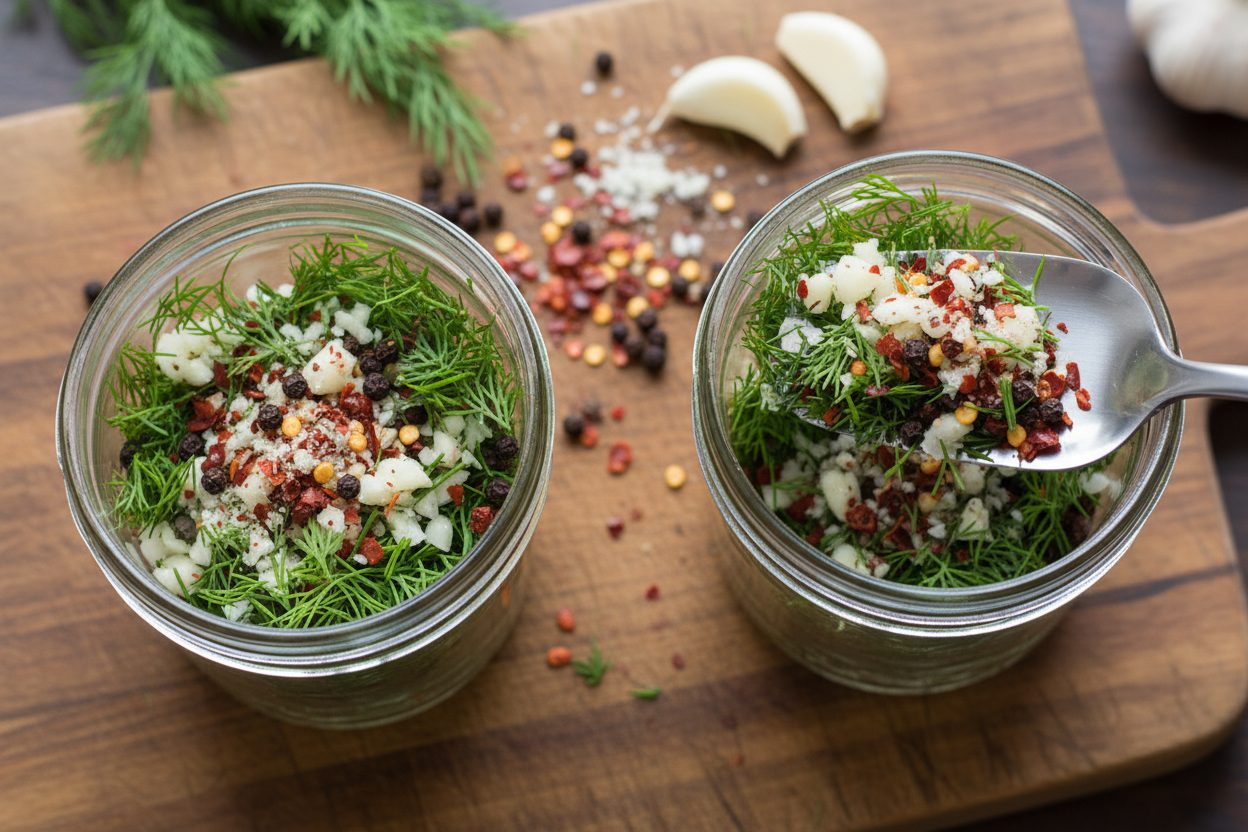
- While the brine cools, prepare your jars. Divide the 4 smashed garlic cloves, 4 sprigs fresh dill, 1 tsp whole black peppercorns, and 1/2 tsp red pepper flakes evenly between two clean glass pint jars. Place these aromatics at the bottom of each jar.
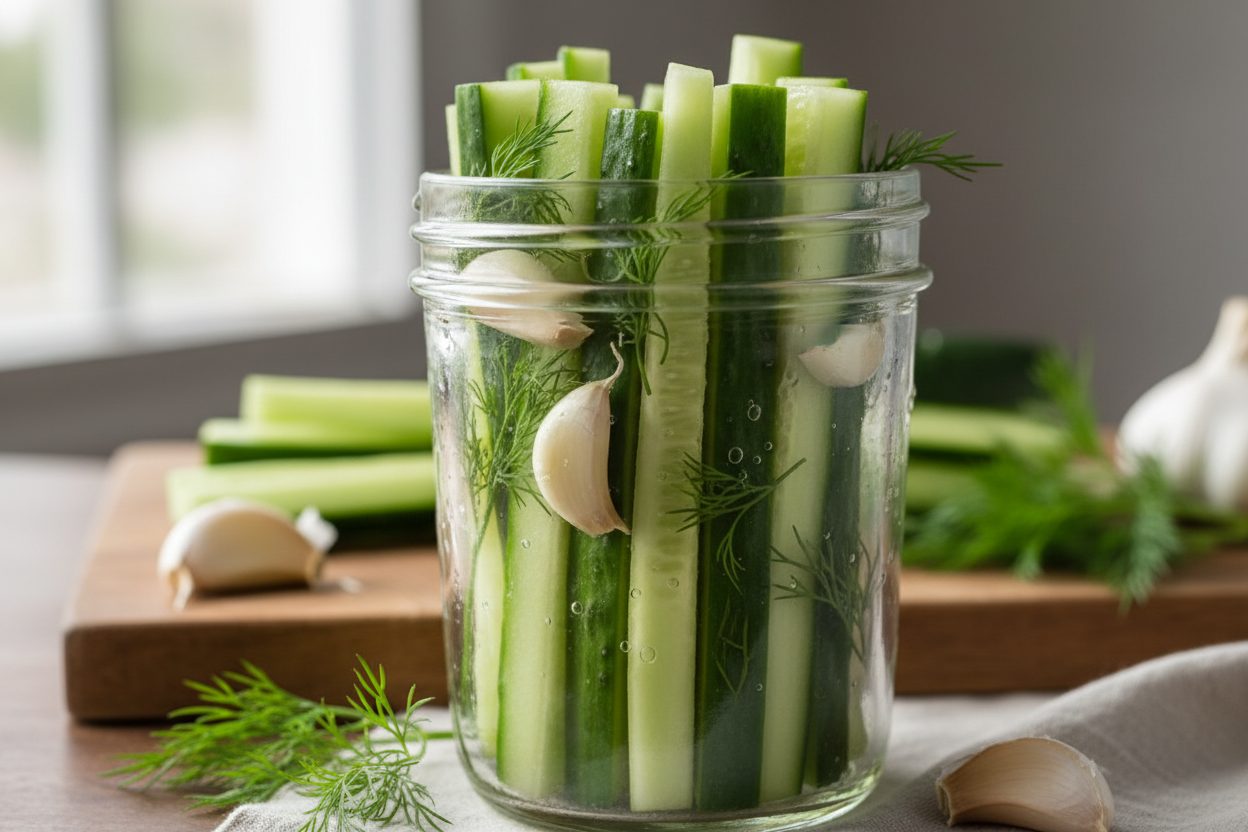
- Pack the prepared cucumber slices tightly into the jars. Stand the fresh dill cucumber spears upright, or layer the coins, ensuring they are packed snugly. This prevents them from floating too much once the brine is added.
- Once the brine has completely cooled to room temperature, carefully pour it over the packed cucumbers in each jar. Make sure the cucumbers are entirely submerged in the liquid. Leave approximately half an inch of headspace at the top of each jar to allow for expansion and easy sealing.
- Secure the lids tightly onto the jars. Place the sealed jars in the refrigerator. Allow them to refrigerate for at least 24 hours before serving. This crucial resting period allows the flavors to fully develop and the cucumbers to absorb the tangy brine, resulting in truly delectable crunchy fridge pickles.
Pro Tips for Maximum Crunch
Achieving that signature crisp texture in your refrigerator dill pickles is a hallmark of a successful easy pickling recipe. Here are a couple of expert tips to ensure your homemade quick pickles are always perfectly crunchy.
“The secret to truly crisp pickles often lies in meticulous preparation and understanding the delicate balance of ingredients.”
First, always trim the blossom end of the cucumber. This seemingly small step makes a significant difference. The blossom end of a cucumber contains enzymes that can cause softening of the pickle. By trimming this part, you remove these enzymes, drastically reducing the chances of soft, unappetizing pickles. This ensures your fresh dill cucumber spears maintain their structural integrity throughout the pickling process.
Second, it is imperative to ensure your brine is completely cooled before pouring it over the vegetables. This step cannot be overstated. Pouring hot or even warm brine over fresh cucumbers will effectively “cook” them, leading to a mushy texture. The goal is to allow the cucumbers to slowly absorb the cool, flavorful vinegar brine for cucumbers, maintaining their inherent crispness. Waiting until the brine reaches room temperature guarantees that your crispy garlic dill cucumbers will have that satisfying snap. Adhering to these simple practices will elevate your no canning pickles to professional standards.
Storage and Shelf Life
Proper storage is essential to maintain the quality, flavor, and crispness of your refrigerator dill pickles. These homemade quick pickles are not shelf-stable like traditionally canned items, meaning they must always be stored in the refrigerator. After the initial 24-hour pickling period, keep your jars tightly sealed. This prevents air exposure and helps maintain the integrity of the brine and the freshness of the cucumbers.
For optimal crispness and flavor, store the jars in the coldest part of your fridge. This is typically the back of the bottom shelf. When stored correctly, your crunchy fridge pickles will stay perfectly crisp and delicious for up to one month. After this period, they may begin to lose some of their crispness, and the flavor might diminish slightly. Always use clean utensils when removing pickles from the jar to avoid introducing contaminants. If you notice any unusual smells, discoloration, or signs of mold, it is best to discard the batch. Enjoying your fresh dill cucumber spears within the recommended timeframe ensures the best experience.
Frequently Asked Questions
Making refrigerator dill pickles is generally straightforward, but a few common questions often arise. Addressing these can help ensure your easy pickling recipe experience is smooth and successful.
Can I use apple cider vinegar?
While distilled white vinegar is specified in this easy pickling recipe for its clean, sharp acidity and clear color, you can technically use apple cider vinegar. However, be aware that apple cider vinegar has a distinct, fruity flavor profile and a darker color. This will significantly alter the taste and appearance of your homemade quick pickles, giving them a less traditional “dill pickle” character. For the classic crispy garlic dill cucumbers taste, sticking to distilled white vinegar is highly recommended. If you do opt for apple cider vinegar, ensure it has an acidity level of at least 5%.
Do I need to sterilize the jars first?
For refrigerator dill pickles, which are essentially no canning pickles, full sterilization of jars is not strictly necessary as it would be for shelf-stable water bath canning. The high acidity of the vinegar brine for cucumbers and constant refrigeration are the primary methods of preservation. However, it is absolutely crucial that your jars and lids are meticulously clean. Wash them thoroughly in hot, soapy water, then rinse well and allow them to air dry or dry them with a clean cloth. Ensuring cleanliness prevents any unwanted bacteria from spoiling your delicious fresh dill cucumber spears.
How spicy are the red pepper flakes?
The recipe calls for 1/2 tsp of red pepper flakes. This amount provides a subtle, background warmth rather than an intense heat. It adds a pleasant complexity to the flavor profile of your refrigerator dill pickles without overwhelming the classic dill and garlic notes. If you prefer a spicier pickle, you can certainly increase the amount of red pepper flakes in future batches to suit your personal preference. Conversely, if you are sensitive to heat, you can reduce the quantity slightly or omit them entirely without compromising the core flavor of these crunchy fridge pickles.
This easy pickling recipe for refrigerator dill pickles offers a simple and rewarding way to enjoy homemade goodness. The process of making these homemade quick pickles is incredibly satisfying, and the results are truly superior to store-bought varieties. From selecting the perfect Kirby cucumbers to balancing the tangy vinegar brine for cucumbers, each step contributes to creating exquisite crispy garlic dill cucumbers. Enjoy these vibrant, fresh dill cucumber spears as a snack, alongside sandwiches, or as a crunchy addition to any meal. They are the epitome of simple, flavorful home cooking, delivering perfectly crunchy fridge pickles with minimal fuss.
If you enjoyed this recipe and want more kitchen tips, recipes, and food inspiration, be sure to follow our Facebook page: Follow us on Facebook for more delicious ideas. We love sharing our passion for food and building a community of home cooks.
Crisp Homemade Quick Pickles
Ingredients
- 1.5 lbs Kirby cucumbers sliced into spears
- 2 cups water filtered
- 1 cup white vinegar distilled
- 2 tbsp Kosher salt do not use table salt
- 1 tbsp granulated sugar optional, to balance acidity
- 4 cloves garlic smashed
- 4 sprigs fresh dill roughly chopped if large
- 1 tsp black peppercorns whole
- 1/2 tsp red pepper flakes adjust for spice preference
Instructions
- Wash the cucumbers thoroughly, trim the ends, and slice them into spears or thick coins.
- In a small saucepan, combine the water, white vinegar, Kosher salt, and sugar. Bring the mixture to a boil over medium-high heat, stirring until the salt and sugar completely dissolve.
- Remove the saucepan from the heat and allow the brine to cool to room temperature.
- Divide the smashed garlic cloves, fresh dill sprigs, black peppercorns, and red pepper flakes evenly between two clean glass pint jars.
- Pack the cucumber slices tightly into the jars.
- Pour the cooled brine over the cucumbers until they are completely submerged, leaving about half an inch of headspace at the top.
- Secure the lids tightly and refrigerate the jars for at least 24 hours before serving to allow flavors to develop.
For more daily recipes and tips, follow us on Facebook!
Click here to join our community!