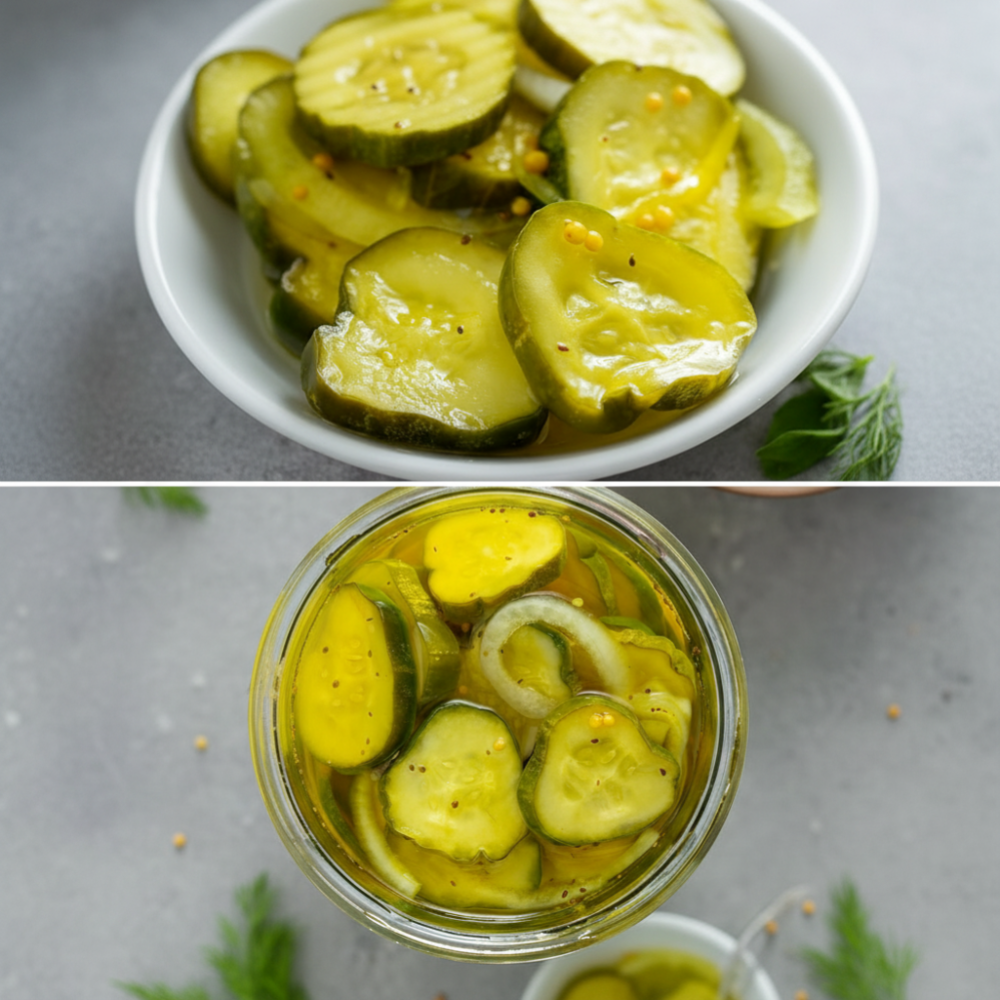
There’s a reason why Bread and Butter Pickles hold a cherished spot in culinary traditions. Their distinctive balance of sweet, sour, and subtly spiced notes provides a refreshing counterpoint to countless dishes. From humble beginnings as a way to preserve excess garden bounty, these sweet pickles have evolved into a beloved condiment, famous for their crisp texture and vibrant flavor. While commercial varieties are ubiquitous, the experience of creating your own batch of homemade cucumber slices is unparalleled. This recipe demystifies the process, guiding you toward crafting perfect Bread and Butter Pickles in your own kitchen. It’s an accessible method for anyone looking to enjoy the freshest, most flavorful zesty pickled cucumbers without complicated techniques. Preparing them at home allows you to control every aspect, ensuring a superior product that far surpasses anything you might find on a supermarket shelf.
Why You Will Love This Recipe
This recipe for Bread and Butter Pickles offers an abundance of reasons to fall in love with homemade pickling. Primarily, it’s about simplicity and satisfaction. You gain the immense pleasure of preparing your own sweet pickles without the need for extensive specialized equipment or the complexities often associated with a traditional canning recipe. This particular method yields excellent refrigerator pickles, meaning the process is streamlined and beginner-friendly, inviting even those new to preserving to achieve fantastic results. The steps are clear, concise, and designed for ease, allowing you to transform fresh ingredients into delectable pickled treats with minimal fuss.
Beyond ease, the flavor profile is a significant draw. Each thinly sliced cucumber and sweet onion absorbs a perfectly balanced brine, resulting in truly zesty pickled cucumbers. The interplay of sweetness from 1 cup of granulated sugar, tang from 1 cup of white vinegar and 0.5 cup of apple cider vinegar, and the warm, earthy notes from 1 tablespoon of mustard seeds and 0.5 teaspoon of celery seed, alongside the fresh burst of 2 tablespoons of fresh dill, creates a complex yet harmonious taste. This combination is what makes Bread and Butter Pickles so uniquely appealing.
Furthermore, their versatility in the kitchen is unmatched. These are the quintessential sandwich pickles, adding a bright, acidic crunch that cuts through the richness of deli meats, cheeses, and even grilled beef. Imagine them on a classic burger or alongside a pulled beef sandwich—they provide that essential contrasting element. They also serve as a superb side dish, bringing a refreshing zest to barbecue spreads, potlucks, or simply as an accompaniment to a weekday meal. Even as a simple snack straight from the jar, these homemade cucumber slices are incredibly satisfying. By making them yourself, you control the quality of every ingredient, ensuring a product free from unwanted additives and bursting with natural, fresh flavor. This recipe offers a pathway to enjoying superior quality Bread and Butter Pickles that are guaranteed to impress.
“Homemade Bread and Butter Pickles deliver a crisp texture and a sweet-tangy flavor that elevates any meal. The simplicity of refrigerator pickling makes this a highly rewarding culinary endeavor.”
Required Ingredients
Crafting exceptional Bread and Butter Pickles begins with selecting the right ingredients. Freshness is key, especially for your cucumbers and sweet onions, which form the heart of these homemade cucumber slices. Here is a precise list of everything you will need to create your batch of sweet pickles:
- 1 lb Cucumber, thinly sliced
- 1 cup Sweet Onion, thinly sliced
- 1.5 tbsp Kosher Salt
- 1 cup White Vinegar
- 0.5 cup Apple Cider Vinegar
- 1 cup Granulated Sugar
- 1 tbsp Mustard Seeds
- 0.5 tsp Celery Seed
- 2 tbsp Fresh Dill, chopped
These specific quantities have been carefully chosen to achieve the ideal balance of flavor and texture in your zesty pickled cucumbers. Using fresh dill, for instance, provides a much more aromatic and vibrant note than dried alternatives, contributing significantly to the overall character of these delicious refrigerator pickles.
Step-by-Step Instructions
Follow these detailed instructions carefully to achieve the best results for your Bread and Butter Pickles. Precision in each step ensures maximum flavor and the desired crisp texture.
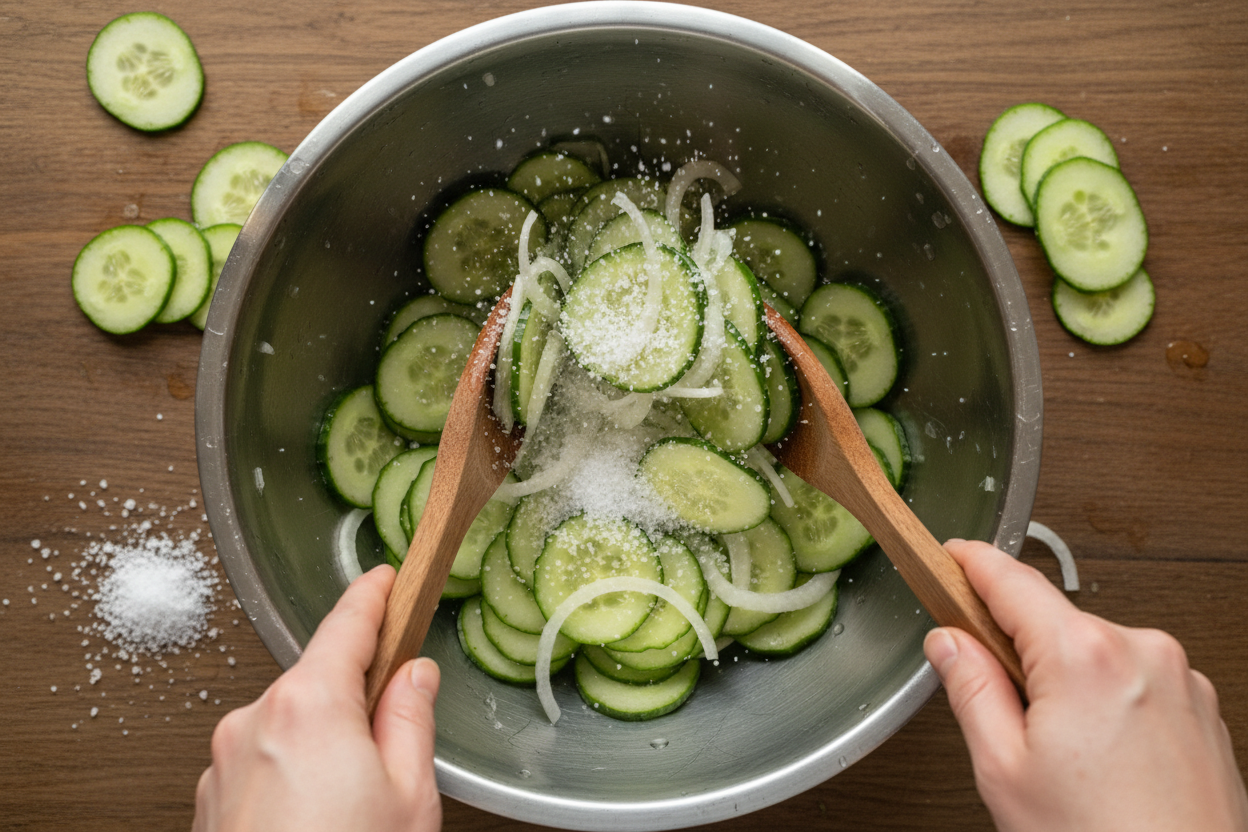
- Begin by preparing your fresh vegetables. In a large mixing bowl, combine 1 lb of thinly sliced cucumber and 1 cup of thinly sliced sweet onion. Add 1.5 tablespoons of kosher salt to the vegetables. Gently toss everything together, ensuring the salt is evenly distributed over the cucumber and onion slices. The salt will begin the process of drawing out excess moisture from the vegetables, which is crucial for achieving a crisp pickle. Cover the bowl securely and transfer it to the refrigerator. Allow the mixture to chill for 1.5 hours. This refrigeration period is important for both the moisture extraction and maintaining the vegetables’ crispness, which are hallmarks of excellent homemade cucumber slices.
- After the chilling period, remove the cucumber and onion mixture from the refrigerator. Place the contents into a colander and rinse them thoroughly under cold running water. This step is essential to remove the excess salt. Make sure to rinse until the salty residue is gone, which might take a few minutes. Once rinsed, drain the vegetables very well. You can gently press them against the colander to encourage more water to release, but avoid squeezing too forcefully to prevent bruising the delicate slices. Patting them lightly with a clean kitchen towel can also assist in drying, ensuring your sweet pickles maintain their optimal crispness and are ready for the next stage of this canning recipe.
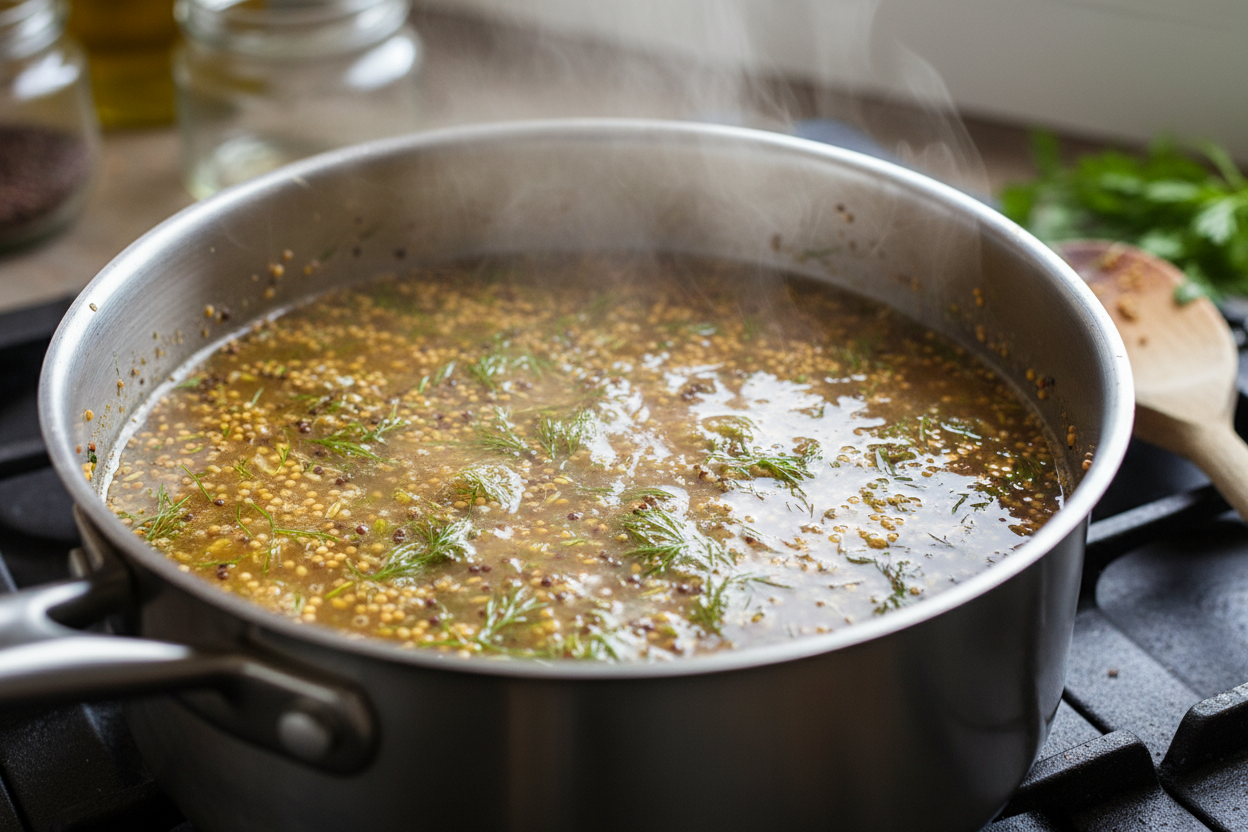
- While your vegetables are draining, prepare the pickling liquid. In a medium-sized saucepan, combine 1 cup of white vinegar, 0.5 cup of apple cider vinegar, and 1 cup of granulated sugar. To this mixture, add 1 tablespoon of mustard seeds, 0.5 teaspoon of celery seed, and 2 tablespoons of freshly chopped dill. Place the saucepan over medium heat. Bring the mixture to a gentle simmer, stirring occasionally. Continue to heat and stir until all the granulated sugar has completely dissolved into the vinegars. This creates the sweet and tangy brine that will transform your cucumbers into delicious zesty pickled cucumbers. Remove the saucepan from the heat once the sugar is fully dissolved.
- Next, prepare your jars. Ensure your glass jars are clean and sterilized. Tightly pack the drained cucumber and onion mixture into the sterilized glass jars. The goal is to pack them as densely as possible without crushing them, allowing enough room for the pickling liquid to cover everything. This maximizes the amount of homemade cucumber slices you can store within each jar.
- Carefully pour the hot vinegar liquid over the packed vegetables in each jar. Make sure the liquid completely covers the cucumber and onion slices. Leave approximately a half-inch of headspace from the top of the liquid to the rim of the jar. This headspace is important for proper sealing and storage, especially for refrigerator pickles, and helps ensure the vegetables remain fully submerged in the brine.
- Once filled, securely seal the jars with their lids. Allow the jars to cool down to room temperature on your countertop. This gradual cooling process helps the flavors meld and allows for a natural vacuum seal to potentially form, which can prolong freshness for these sandwich pickles. Once cooled, transfer the sealed jars of Bread and Butter Pickles to your refrigerator. For best flavor development, allow them to chill for at least 24 hours before enjoying. These refrigerator pickles will keep well in the refrigerator for several weeks, continuing to deepen in flavor over time.
Once your Bread and Butter Pickles have chilled, they are ready to brighten up your meals. These refrigerator pickles offer a delightful crunch and a perfectly balanced sweet and tangy flavor that enhances everything from a simple sandwich to a sophisticated charcuterie board. Making your own homemade cucumber slices is not only rewarding but also ensures you have a fresh, flavorful condiment on hand whenever you need it. The vibrant taste of these zesty pickled cucumbers will undoubtedly become a household favorite. Enjoy the fruits of your labor and savor the incredible taste of truly homemade goodness.
For more delicious recipes, cooking tips, and behind-the-scenes glimpses into our kitchen, be sure to follow us on Facebook. We love connecting with fellow food enthusiasts and sharing our culinary adventures. Join our community on Facebook today!
Zesty Sweet Cucumber Slices
Ingredients
- 1 lb Cucumber thinly sliced
- 1 cup Sweet Onion thinly sliced
- 1.5 tbsp Kosher Salt for drawing out moisture
- 1 cup White Vinegar 5% acidity
- 0.5 cup Apple Cider Vinegar optional, adds fruitiness
- 1 cup Granulated Sugar adjust to taste
- 1 tbsp Mustard Seeds whole
- 0.5 tsp Celery Seed whole
- 2 tbsp Fresh Dill chopped
Instructions
- In a large bowl, toss the sliced cucumbers, onions, and kosher salt. Cover and chill in the refrigerator for 1.5 hours to draw out excess moisture.
- Rinse the cucumber and onion mixture thoroughly under cold water and drain well.
- In a medium saucepan, combine the white vinegar, apple cider vinegar, granulated sugar, mustard seeds, celery seed, and fresh dill. Bring to a simmer over medium heat until the sugar dissolves.
- Pack the drained cucumbers and onions tightly into sterilized glass jars.
- Pour the hot vinegar liquid over the vegetables in the jars, leaving a half-inch of space at the top.
- Seal the jars with lids and let them cool to room temperature before transferring to the refrigerator.
For more daily recipes and tips, follow us on Facebook!
Click here to join our community!