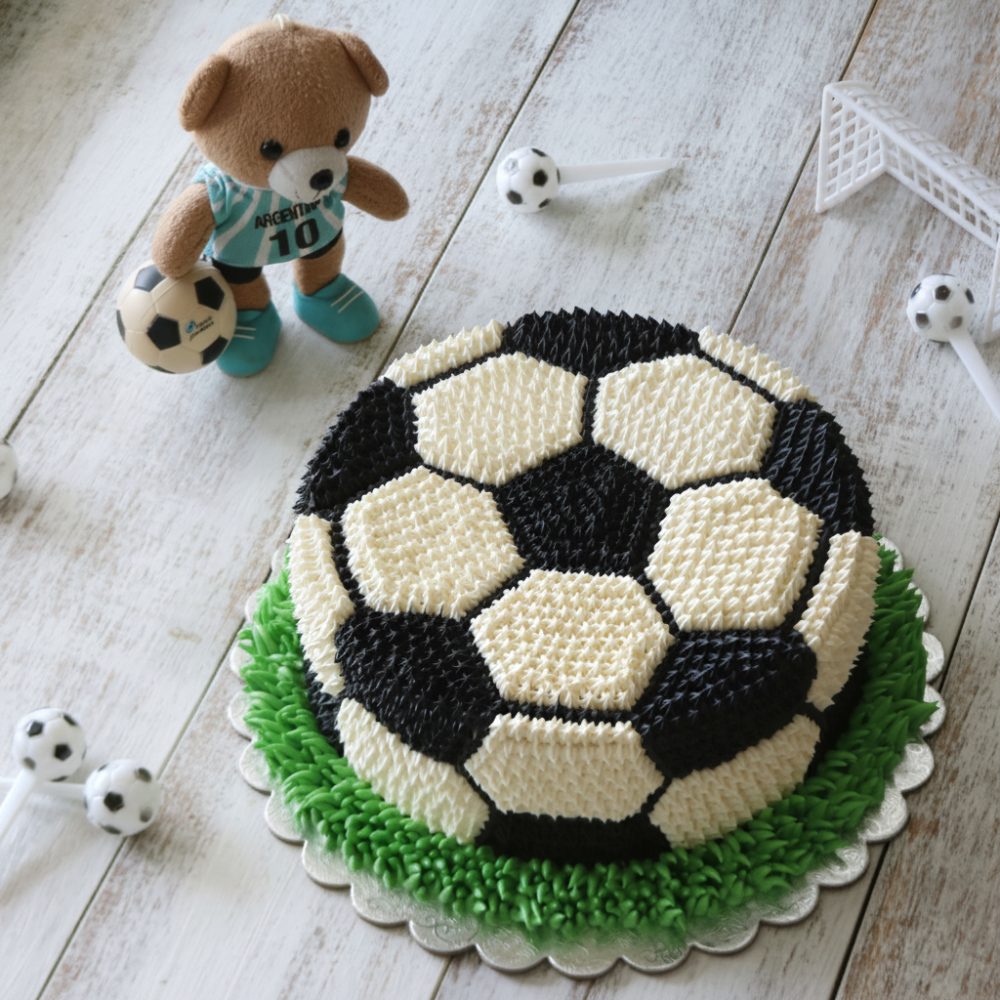
Welcome to the ultimate guide for creating a truly impressive Soccer Buttercream Cake, the perfect sports themed dessert for your next celebration. Whether you are planning a football birthday dessert for a young enthusiast or looking for a stunning centerpiece for a soccer party dessert, this detailed instruction set will help you craft a memorable cake. This guide covers how to decorate a show-stopping confection using precise piping techniques for sports cakes and classic, vibrant icing. Forget complicated fondant work; we will achieve a professional finish using only buttercream, making this an accessible project for bakers of all skill levels. The visual impact of this cake, with its iconic black and white soccer ball pattern and realistic green turf, will undoubtedly be a highlight of any gathering. Prepare to master the art of buttercream decoration and bring a delightful touch of the pitch to your dessert table.
Tools and Ingredients
Gathering all your necessary tools and high-quality ingredients before you begin is a crucial step for a smooth decorating process. For the frosting and cake base, precision in quantities ensures the best results for a stable and delicious cake.
For the Cake Base:
* Two 8-inch baked round cakes: Ensure these are fully cooled before you begin decorating. A sturdy, dense cake base works best for stacking and holding the buttercream weight.
For the Buttercream Frosting:
Our recipe yields a generous amount of smooth, pipeable buttercream, enough for both the filling, crumb coat, and intricate decorations.
* 2 cups unsalted butter: This is the foundation of our rich buttercream. Using unsalted butter allows you to control the salt content in your frosting. Ensure it is softened to room temperature for optimal creaming, but not melted.
* 6 cups powdered sugar: Also known as confectioners’ sugar, this fine sugar dissolves easily, resulting in a silky-smooth frosting. Sifting it before use can prevent lumps.
* 2 tablespoons vanilla extract: Pure vanilla extract adds depth and warmth to the buttercream flavor.
* 3 tablespoons milk: Whole milk or even heavy cream can be used to achieve the desired consistency for piping. Start with 3 tablespoons and add more drop by drop if a thinner consistency is needed.
* 1 teaspoon black food coloring: A high-quality gel or paste food coloring is essential for achieving a deep, true black without adding excessive liquid to the frosting.
* 1 teaspoon green food coloring: Similarly, a concentrated gel or paste green food coloring will create a vibrant, grassy hue for the turf effect.
Essential Decorating Tools:
* An offset spatula or palette knife: Indispensable for applying frosting smoothly and leveling layers.
* A serrated knife or cake leveler: For ensuring perfectly level cake layers.
* Piping bags: Several disposable piping bags will be needed for the different colored frostings.
* Piping tips:
* A medium round tip (e.g., Wilton 1A or 12): Useful for filling and outlining.
* A small star tip (e.g., Wilton 18 or 21): Critical for piping the black and white soccer ball pattern, creating a textured, almost stitched look.
* A buttercream grass tip (e.g., Wilton 233): Specifically designed to create realistic strands of grass around the cake’s base.
* A turntable (optional but highly recommended): Makes frosting and decorating all sides of the cake much easier.
* A hexagon cake template: This will be your guide for accurately tracing the soccer ball pattern onto the cake. Templates can be found online and printed, or even cut from parchment paper.
* Parchment paper or wax paper: Useful for creating your template and for protecting your workspace.
* Mixing bowls: Several bowls are needed for dividing and coloring the frosting.
Having these tools and ingredients ready before you start will streamline the entire decorating process, allowing you to focus on the artistic aspects of creating your stunning Soccer Buttercream Cake.
Step-by-Step Instructions
Crafting this visually appealing cake requires methodical steps and attention to detail. Follow these directions closely for the best results, ensuring a stable structure and clean, intricate decoration.
1. Prepare Your Cake Base
Begin by preparing your baked 8-inch round cakes. Using a serrated knife or a cake leveler, carefully level the baked 8-inch cakes. This ensures each layer is flat, allowing for a stable, even stack. An unleveled cake can lean or collapse. Once leveled, place the first cake layer on your chosen cake board or serving platter. Apply a generous layer of your uncolored white buttercream frosting (approximately 1/2 inch thick) evenly across the top of this first layer. Then, carefully place the second leveled cake layer on top, aligning it precisely. This creates a balanced foundation for your Soccer Buttercream Cake.
2. Crumb Coat and Chill
With your cake layers stacked, it is time for the crucial crumb coat. Take a small amount of the uncolored white frosting and apply a very thin layer over the entire cake, both the top and sides. The purpose of this “crumb coat” is to trap any loose crumbs, preventing them from mixing into your final decorative layer. Use an offset spatula to spread it as thinly and evenly as possible. Do not worry about perfection at this stage; its primary role is functional. Once applied, apply a crumb coat of white frosting over the entire cake and chill for 30 minutes in the refrigerator. This chilling period allows the crumb coat to firm up, effectively locking in any crumbs and providing a stable, smooth surface for your final layers of black and white icing and green turf.
3. Divide and Color the Frosting
While your cake chills, prepare your colored frostings. Remove the remaining uncolored white buttercream from your mixing bowl. Divide the remaining frosting into three portions. Place approximately 1 cup of frosting into a separate mixing bowl, and add 1 teaspoon of black food coloring. Mix thoroughly until a deep, consistent black is achieved. For the green, take another portion of approximately 1 cup of frosting and add 1 teaspoon of green food coloring. Mix until a vibrant, uniform green is visible. The rest of the frosting should be left white; this will be the largest portion, needed for the majority of the soccer ball’s surface. Ensure all colors are mixed well, eliminating any streaks. These distinct colors are vital for the iconic look of your Soccer Buttercream Cake.
4. Trace the Soccer Ball Pattern
Retrieve your chilled, crumb-coated cake. This firm surface is ideal for tracing. This step is where the soccer ball design truly begins to take shape. Using your pre-made hexagon cake template (or a printed template), carefully align it on the top surface of your cake. With a very light hand and a sharp, clean toothpick or the dull side of a knife, lightly trace a hexagon and pentagon pattern on the chilled cake using a template. The goal is to create a faint guide, not deep grooves. Extend these patterns slightly down the sides of the cake where the top meets the edge, to ensure the design wraps seamlessly. Accuracy here will greatly enhance the final appearance of your sports themed dessert.
5. Pipe the Black and White Pattern
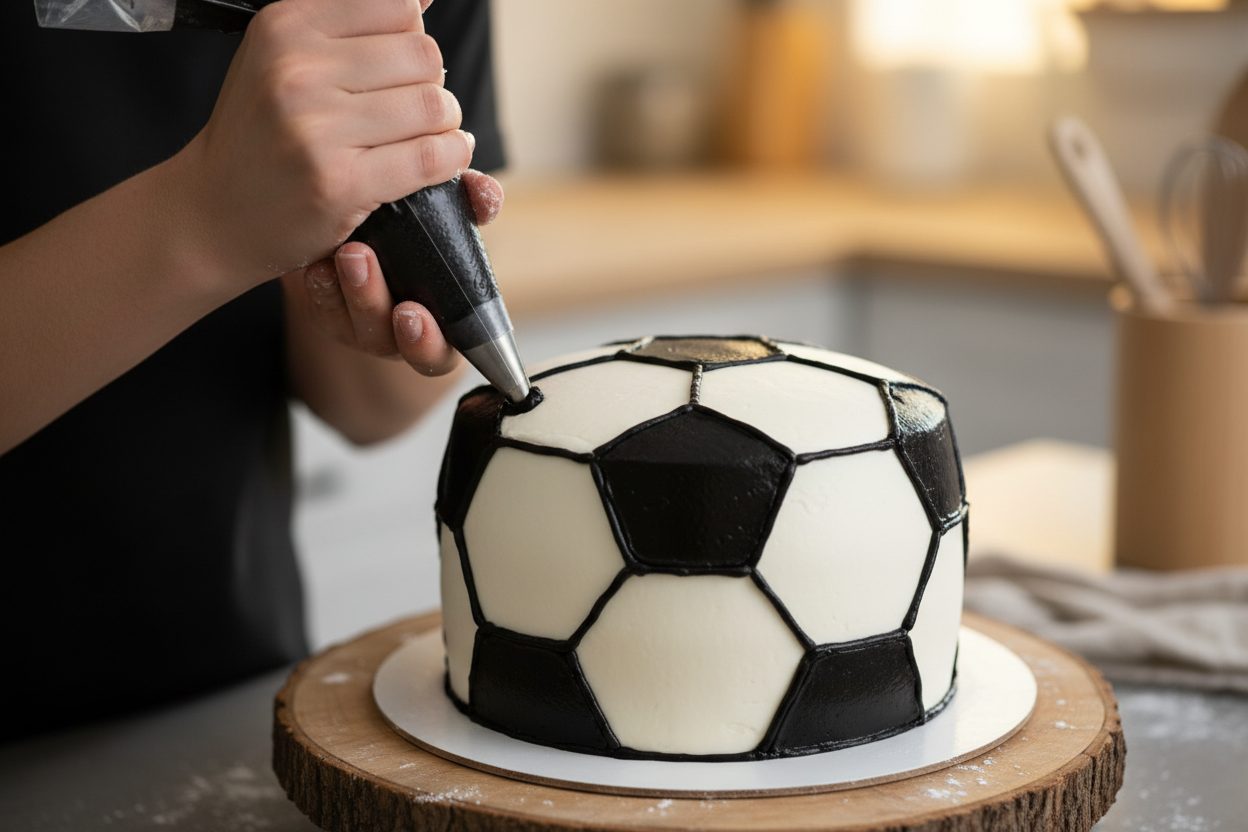
Now, for the intricate detail using precise piping techniques for sports cakes. Fit a piping bag with a small star tip (e.g., Wilton 18 or 21) and fill it with your black frosting. Carefully pipe black frosting onto the pentagons you have traced. Use small, consistent motions, starting from the center of each pentagon and working your way outwards to fill the shape. The star tip creates a distinct, textured effect. Next, clean your star tip thoroughly, or use a new piping bag fitted with the same tip. Fill this bag with your white frosting. Pipe white frosting onto the hexagons, following the same technique to fill these shapes completely. Work methodically, ensuring neat lines and full coverage. The contrast of the black and white icing is what defines the classic soccer ball pattern.
6. Create the Grass Effect
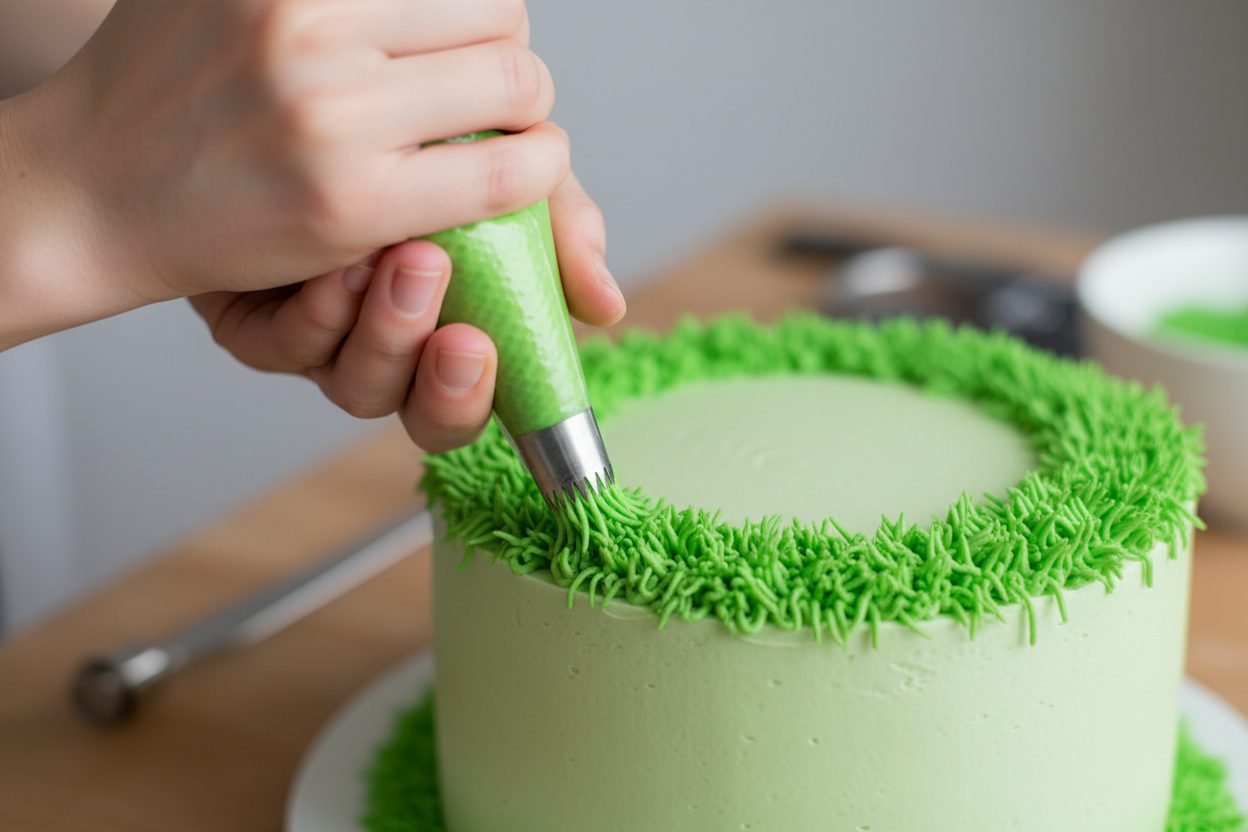
The final decorative touch brings the pitch to life. Fit a piping bag with a buttercream grass tip (e.g., Wilton 233) and fill it with your vibrant green frosting. Hold the piping bag perpendicular to the cake board, just at the base of the cake. Apply steady pressure to the bag while simultaneously pulling it upwards quickly, creating short, individual strands of green frosting that resemble grass. Pipe green frosting around the base of the cake using a grass tip to create a turf effect. Continue around the entire circumference of the cake, building up layers of “grass” to create a realistic, textured border. You can vary the height of the grass slightly for a more natural look. This completes the transformation of your cake into a true Soccer Buttercream Cake, ready for display.
Storage and Display
To ensure your beautiful Soccer Buttercream Cake remains picture-perfect and delicious, proper storage is key. Keep chilled until one hour before serving to maintain the piped design. Buttercream can soften at room temperature, especially intricate piping details and the grass effect, which could cause them to lose their crispness. Remove the cake from refrigeration approximately 60 minutes before you plan to serve it. This allows the cake to come closer to room temperature, ensuring the cake layers and buttercream are soft and palatable, offering the best flavor and texture experience. For longer storage, the cake can be kept in an airtight container in the refrigerator for up to 3-4 days. For display, place your finished soccer party dessert on a prominent cake stand, allowing its detailed black and white icing and vibrant green turf to truly shine.
We hope this guide empowers you to create an unforgettable Soccer Buttercream Cake. For more exciting dessert ideas and baking inspiration, be sure to follow our Facebook page.
Decorated Soccer Ball Cake
Ingredients
- 2 whole Baked round cakes (8-inch) Cooled completely before icing
- 2 cups Unsalted butter Softened to room temperature
- 6 cups Powdered sugar Sifted
- 2 tbsp Vanilla extract Clear vanilla preferred to keep icing white
- 3 tbsp Milk Adjust for piping consistency
- 1 tsp Black food coloring Gel food coloring works best
- 1 tsp Green food coloring Gel food coloring
Instructions
- Level the baked 8-inch cakes and stack them with a layer of frosting in between.
- Apply a crumb coat of white frosting over the entire cake and chill for 30 minutes.
- Divide the remaining frosting: dye 1 cup black and 1 cup green, leaving the rest white.
- Lightly trace a hexagon and pentagon pattern on the chilled cake using a template.
- Using a star tip, pipe black frosting onto the pentagons and white frosting onto the hexagons.
- Pipe green frosting around the base of the cake using a grass tip to create a turf effect.
For more daily recipes and tips, follow us on Facebook!
Click here to join our community!