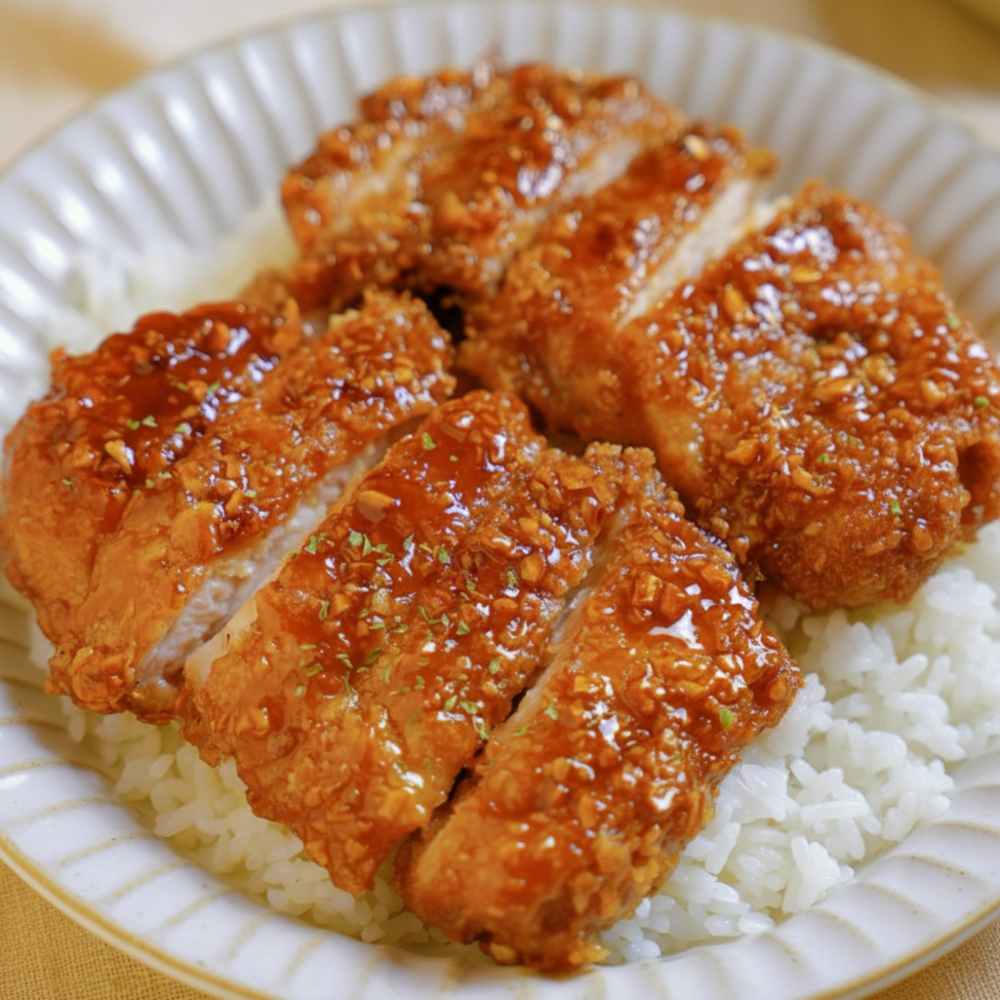
Welcome to your new favorite weeknight dinner. This recipe for Honey Garlic Crispy Chicken transforms simple ingredients into a dish that is both quick and profoundly satisfying. Forget the wait and expense of ordering in. This pan-fried poultry dish is designed for efficiency and flavor, delivering a superior experience right in your own kitchen. It is an ideal solution for a quick weeknight dinner, bringing the irresistible taste of homemade takeout to your table in under 30 minutes.
The secret to this dish lies in achieving perfectly crispy chicken skin, then coating it in a luscious, savory-sweet glaze. We will guide you through each step, ensuring that every bite of your asian-inspired poultry is packed with flavor and textural contrast. Mastering this technique means unlocking a world of delicious, home-cooked meals that rival your favorite restaurant dishes.
Ingredients Needed
Crafting exceptional flavor begins with understanding the role of each ingredient. For this Honey Garlic Crispy Chicken, the components are few, but their contributions are significant, working in harmony to create a memorable meal.
* 16 oz Chicken thighs (skin-on, boneless): Choosing skin-on, boneless chicken thighs is crucial for both flavor and texture. The skin renders down to become incredibly crispy, providing a delightful textural contrast to the tender meat. Boneless thighs cook quickly and evenly, making them perfect for a fast-paced meal. The 16 oz quantity is suitable for two to three servings, depending on appetite.
* 1/2 tsp Salt: A fundamental seasoning that enhances the natural flavors of the chicken. Proper salting ensures the meat is seasoned from within, not just on the surface.
* 1/4 tsp Black pepper: Adds a subtle warmth and a gentle aromatic bite, complementing the other flavors without overpowering them.
* 2 tbsp Cornstarch: This is the unsung hero for achieving unparalleled crispiness. A light dusting of cornstarch creates a thin, delicate crust that fries up beautifully, locking in moisture and delivering that satisfying crunch.
* 1 tbsp Cooking oil: A neutral cooking oil with a high smoke point, such as canola, vegetable, or grapeseed oil, is best for pan-frying. The 1 tablespoon quantity is just enough to get the chicken started and help render its own fat.
* 1 tbsp Garlic (minced): The aromatic foundation of our sticky garlic sauce. Freshly minced garlic provides a pungent, savory depth that is essential to the dish’s character.
* 3 tbsp Honey: Provides the primary sweetness for the glaze, contributing to its glossy texture and golden hue. Honey also helps the sauce adhere beautifully to the chicken.
* 2 tbsp Soy sauce: Delivers umami, salinity, and a rich, savory backbone to the sauce. It is a cornerstone of this asian-inspired poultry dish.
* 1 tbsp Rice vinegar: A touch of acidity from the rice vinegar balances the sweetness of the honey and the richness of the soy sauce, brightening the overall flavor profile of the sweet soy glaze.
Each ingredient plays a vital role in developing the complex flavors and textures of this outstanding Honey Garlic Crispy Chicken. Using the specified quantities ensures a balanced and delicious outcome every time.
Step-by-Step Instructions
Follow these precise steps to create your own irresistible Honey Garlic Crispy Chicken. Attention to detail at each stage ensures a successful and delicious outcome.
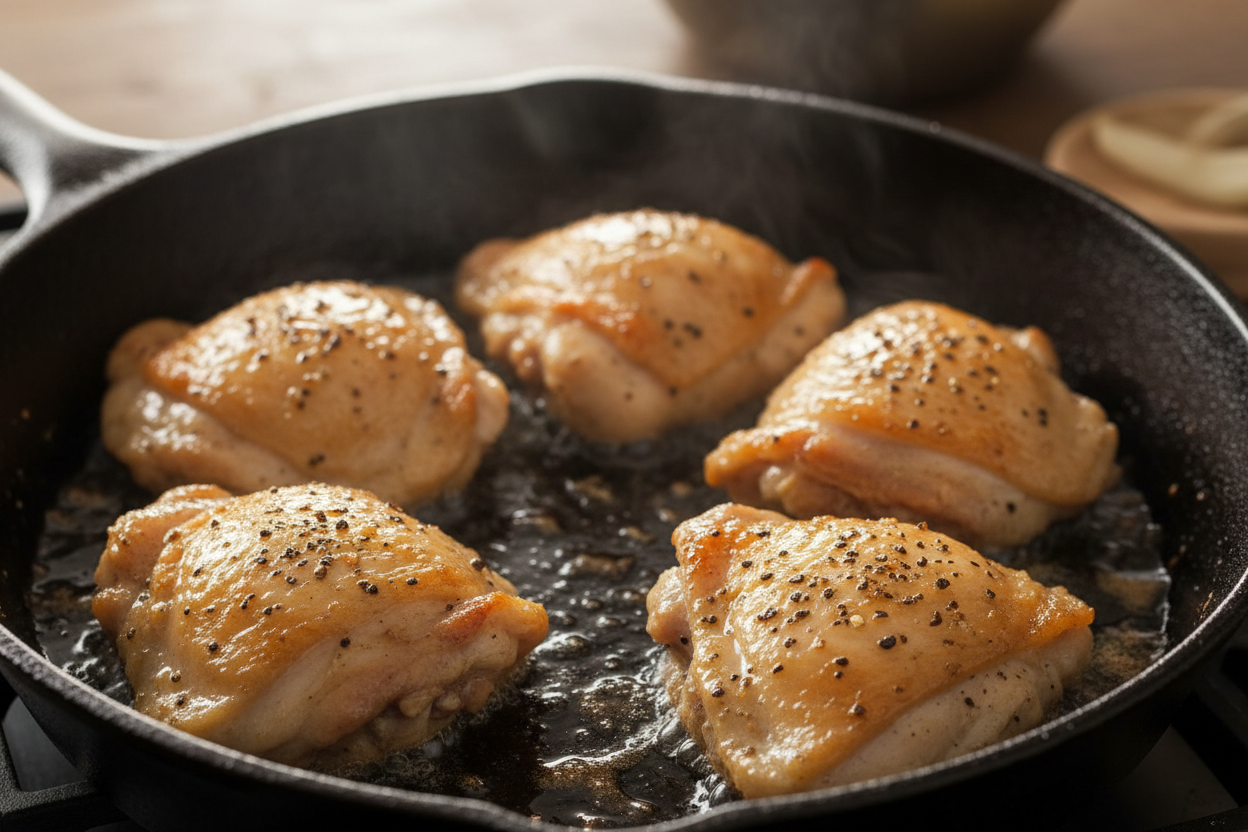
1. Prepare the Chicken: Begin by taking the 16 oz chicken thighs and patting them completely dry with paper towels. Removing excess moisture is critical for achieving optimal crispy chicken skin. Season both sides of the chicken generously with 1/2 tsp salt and 1/4 tsp black pepper. Next, dust the chicken lightly and evenly with 2 tbsp cornstarch. This thin coating is key to the extra crunch. Ensure every surface of the chicken is covered without being caked.
2. Sear the Chicken: Heat 1 tbsp cooking oil in a large skillet over medium-high heat. Once the oil shimmers, carefully place the chicken thighs into the hot pan, skin-side down. Cook for 8 to 10 minutes. During this time, resist the urge to move the chicken. Allow the skin to become deeply golden brown and incredibly crispy. This rendering of the fat is essential for texture and flavor. After the skin is perfectly crisp, flip the chicken and cook for another 5 minutes on the flesh side, ensuring it cooks through to a safe internal temperature. Remove the chicken from the pan and set it aside on a plate.
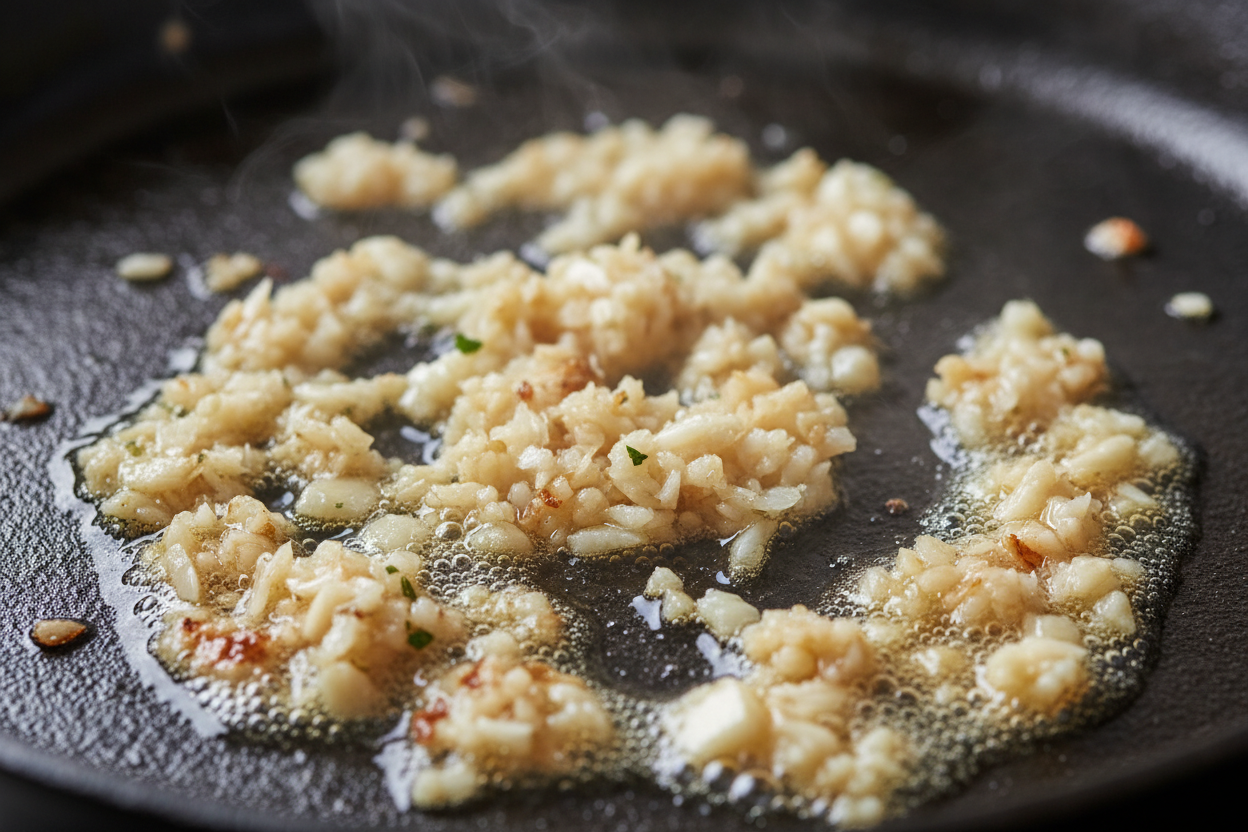
3. Sauté the Garlic: Carefully drain most of the excess fat from the skillet, leaving approximately one tablespoon of rendered fat and oil. Reduce the heat to medium-low. Add 1 tbsp of minced garlic to the pan. Sauté the garlic for 1 minute, stirring constantly, until it becomes fragrant. Be careful not to burn the garlic, as burnt garlic can taste bitter.
4. Simmer the Sauce: Pour in 3 tbsp honey, 2 tbsp soy sauce, and 1 tbsp rice vinegar into the skillet with the fragrant garlic. Stir well to combine all the ingredients. Increase the heat slightly to bring the mixture to a gentle simmer. Allow the sauce to simmer for 2 to 3 minutes, stirring occasionally. During this time, the sauce will thicken slightly, transforming into a glossy and enticing sweet soy glaze, perfect for our sticky garlic sauce.
5. Coat and Serve: Return the crispy, cooked chicken thighs to the pan. Use tongs to toss the chicken in the simmering sticky garlic sauce, ensuring each piece is thoroughly coated. Allow the chicken to warm through in the sauce for about 30 seconds to 1 minute. Remove from heat. Slice the chicken thighs against the grain into thick pieces for easier serving. Serve immediately, drizzled with any remaining sauce from the pan.
Expert Tips for Maximum Crunch
Achieving that coveted crunch in your Honey Garlic Crispy Chicken is not a matter of luck but precise technique. These expert tips will help you perfect your crispy chicken skin every time, elevating your pan-fried poultry to professional standards.
* Pat Dry, Thoroughly: This cannot be overstated. Moisture is the enemy of crispiness. Before seasoning and applying cornstarch, use multiple layers of paper towels to press out every possible drop of surface moisture from the chicken skin. The drier the surface, the crispier the skin will become during cooking. Any residual water will turn into steam, which prevents the skin from browning and crisping properly. Think of it as a crucial preparatory step that dictates the success of your texture.
* Do Not Crowd the Pan: Overcrowding the skillet significantly lowers the pan’s temperature and causes the chicken to steam rather than sear. If you try to cook too many pieces at once, the moisture released from the chicken will accumulate in the pan, creating a steamy environment. This results in flabby, rubbery skin instead of the desired crispiness. Cook the 16 oz chicken thighs in batches if your skillet is not large enough to accommodate them with ample space between each piece. Allow enough room for heat to circulate and for the steam to escape, ensuring direct contact between the chicken skin and the hot pan surface. This promotes consistent browning and effective fat rendering.
* The Role of Cornstarch: The 2 tbsp of cornstarch acts as a light, dry barrier on the chicken skin. When heated, this thin layer fries up to form an incredibly delicate and crunchy crust. It also helps to absorb any lingering surface moisture, further contributing to the crispiness. Apply it as a fine, even dusting; too much can create a gummy texture.
* Consistent Medium-High Heat: Maintaining the correct heat level is paramount. Start with medium-high heat for the initial skin-down sear. This high heat is necessary to render the fat from the skin and initiate the Maillard reaction, which is responsible for the deep golden color and rich flavor. Once the skin is crisp, reduce the heat as needed for the sauce preparation to prevent burning the garlic or over-reducing the glaze.
* Pan Choice Matters: Use a heavy-bottomed skillet, such as cast iron or a good quality stainless steel pan. These pans distribute heat more evenly and retain heat better, which is crucial for consistent browning and avoiding hot spots that could lead to uneven cooking or burning. A well-seasoned cast iron skillet also offers a naturally non-stick surface, which helps prevent the crispy skin from sticking.
* Patience During Searing: Once the chicken is skin-side down, resist the temptation to peek or move it prematurely. The 8 to 10 minutes of undisturbed cooking allows the skin to fully render its fat and develop a deep, uniform crispiness. Flipping too early can tear the skin or prevent it from reaching its full potential.
* Sauce Consistency: The sticky garlic sauce should be thick enough to coat the back of a spoon but still pourable. Simmering for 2 to 3 minutes achieves this ideal consistency for the sweet soy glaze. If the sauce becomes too thick, a splash of water or chicken broth can thin it out. If it is too thin, continue to simmer for another minute, stirring constantly. The goal is a glossy, syrupy glaze that clings to the chicken, infusing it with flavor without making the crispy chicken skin soggy.
By following these expert insights, your Honey Garlic Crispy Chicken will achieve an unmatched level of crispiness and flavor, making every bite a delight.
Serving Suggestions
This Honey Garlic Crispy Chicken is incredibly versatile and makes for a satisfying and complete meal. The rich, savory-sweet flavors of the asian-inspired poultry pair beautifully with simple, fresh accompaniments.
The classic pairing involves serving the sliced chicken over a bed of fluffy white rice. The rice absorbs the extra sticky garlic sauce, making each spoonful a harmonious blend of flavors. For a balanced meal, a side of steamed broccoli or vibrant snap peas adds a refreshing crunch and essential nutrients. The bright green of the vegetables also provides a lovely color contrast to the golden-brown chicken.
Consider elevating your presentation with a sprinkle of toasted sesame seeds over the top for added nutty flavor and visual appeal. Thinly sliced green onions, or scallions, offer a mild oniony bite and a pop of fresh color. For an extra touch of heat, a drizzle of sriracha or a pinch of red pepper flakes can be added just before serving.
Beyond these traditional suggestions, this homemade takeout dish can be enjoyed in various ways. You might serve it alongside a crisp cucumber salad dressed with a light vinaigrette, offering a cooling counterpoint to the richness of the chicken. For a heartier meal, consider serving it with a side of stir-fried noodles or quinoa. The simplicity of these accompaniments ensures the star of the show, the Honey Garlic Crispy Chicken, truly shines. This dish is designed to be a standout component in any quick weeknight dinner, providing a gourmet experience with minimal effort.
This Honey Garlic Crispy Chicken recipe offers a perfect blend of convenience, flavor, and texture. It is a reliable choice for anyone seeking a delicious, easy-to-make meal that satisfies the craving for homemade takeout. The journey from simple ingredients to a plate of perfectly crispy chicken skin coated in a delectable sticky garlic sauce is both rewarding and swift. Embrace this recipe as your new staple for an unforgettable quick weeknight dinner.
For more inspiring recipes, cooking tips, and culinary adventures, make sure to follow our Facebook page. You can find us and join our community at our official Facebook page. We look forward to sharing more delicious ideas with you.
Easy Sticky Garlic Chicken
Ingredients
- 16 oz Chicken thighs (skin-on, boneless) Patted dry
- 1/2 tsp Salt For seasoning
- 1/4 tsp Black pepper For seasoning
- 2 tbsp Cornstarch For dusting
- 1 tbsp Cooking oil For pan-frying
- 1 tbsp Garlic Minced
- 3 tbsp Honey Local preferred
- 2 tbsp Soy sauce Low sodium
- 1 tbsp Rice vinegar Unseasoned
Instructions
- Pat the chicken thighs dry with a paper towel. Season both sides with salt and black pepper, then dust lightly with cornstarch for extra crunch.
- Heat the cooking oil in a large skillet over medium-high heat. Place the chicken skin-side down and cook for 8 to 10 minutes until deeply golden and crispy. Flip and cook for another 5 minutes, then remove from the pan.
- Drain most of the excess fat from the skillet, leaving about one tablespoon. Reduce heat to medium-low, add minced garlic, and sauté for 1 minute until fragrant.
- Pour in the honey, soy sauce, and rice vinegar. Simmer for 2 to 3 minutes until the glaze thickens slightly.
- Return the crispy chicken to the pan, tossing it in the sticky sauce to coat. Slice and serve immediately over hot rice.
For more daily recipes and tips, follow us on Facebook!
Click here to join our community!