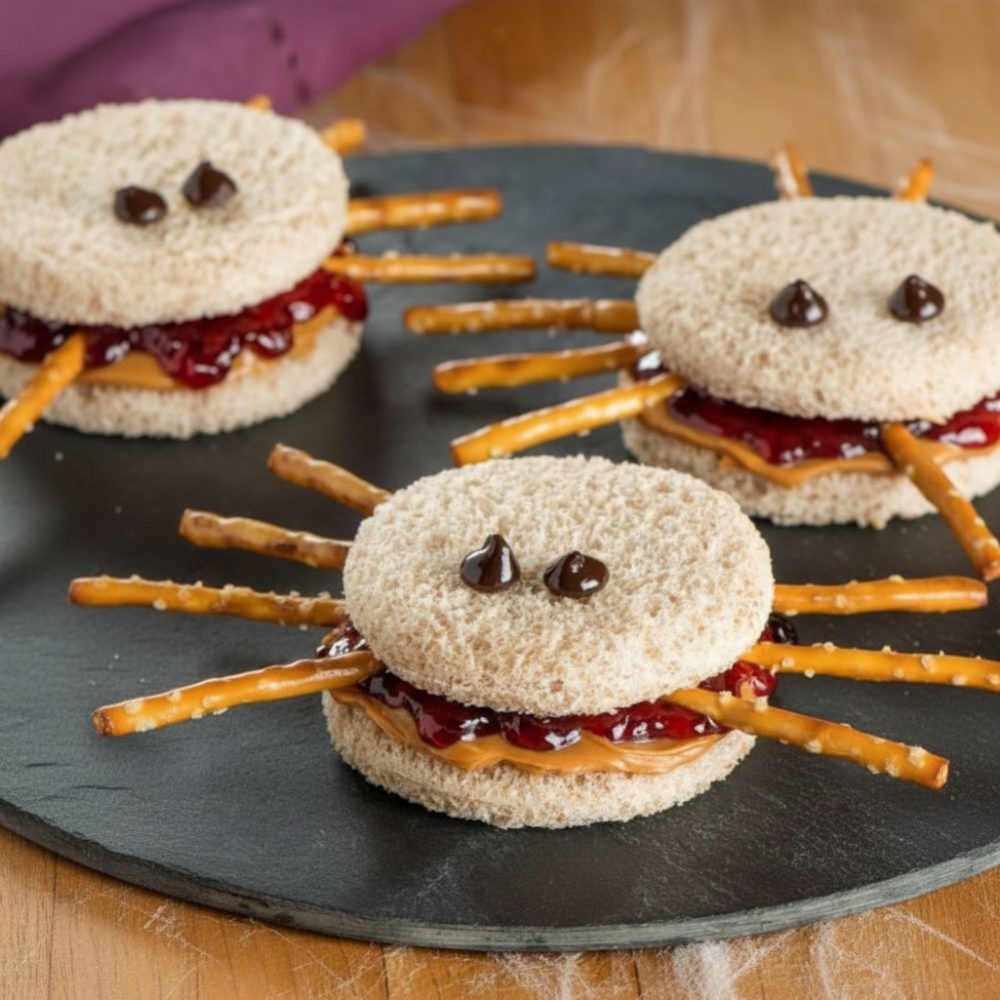
Fun and Creepy Spider PB&J Treats for Kids
October brings a special kind of excitement, especially for families looking for creative ways to celebrate the season. One of the most beloved and universally appealing snacks, the classic peanut butter and jelly sandwich, can be transformed into something truly spectacular for Halloween. These Halloween Spider Sandwiches are not just food; they are an experience, turning a simple meal into a delightful, slightly spooky surprise that children adore. They are perfect for school lunches, after-school snacks, or even as a unique addition to any Halloween gathering. We are talking about fun, edible arachnids that will bring smiles, not screams, to young faces.
Why These Spooky Snacks Are Perfect for October
When the air gets crisp and pumpkins appear on every Bœufh, the desire for themed food grows. These creepy treats for kids fit the bill perfectly. They offer a simple yet effective way to engage children in the Halloween spirit without requiring elaborate cooking or baking skills. Unlike many complex holiday recipes, these spider sandwiches are incredibly easy to assemble, making them a fantastic activity for kids to help with. This simplicity makes them an ideal choice for busy parents looking for fun October lunch ideas that stand out from the everyday. They are also a fantastic option for those seeking no bake Halloween snacks, eliminating the need for oven time and keeping kitchen cleanup to a minimum. The visual appeal of these edible spiders makes them an instant hit, transforming a mundane sandwich into a playful character. They provide a familiar taste with an unexpected, festive twist, ensuring even picky eaters are likely to give them a try. Their compact nature also makes them easy to transport for school or outdoor fall activities.
Essential Ingredients for Arachnid Themed Snacks
Crafting these delightful arachnid themed snacks requires a few basic ingredients, most of which are likely already in your pantry. The beauty of this recipe lies in its simplicity and accessibility. You will need:
- Bread: 12 slices, whole wheat or white, depending on preference. The type of bread affects the final texture and taste.
- Peanut Butter: 1/2 cup, creamy or crunchy. Creamy offers a smooth, uniform spread, while crunchy adds textural interest.
- Grape Jelly: 1/4 cup. The classic complement to peanut butter, providing sweetness and a vibrant color.
- Pretzel Sticks: 24 pieces. These will form the spider’s legs, offering a salty crunch that contrasts with the soft sandwich.
- Candy Eyes: 12 pieces, small. Essential for bringing your spiders to life with a playful, slightly eerie gaze.
- Chocolate Frosting: 2 tablespoons, store-bought. This acts as the edible “glue” for attaching the candy eyes securely.
These specific quantities are designed to yield 6 spooky spider sandwiches, perfect for a small gathering or several days of themed lunches. Each ingredient plays a crucial role in both the taste and the visual impact of these charming Halloween treats.
Step-by-Step Guide to Assembling Your Creepy Treats
Creating these Halloween Spider Sandwiches is a straightforward process, making it enjoyable for all skill levels. Follow these steps to bring your edible spiders to life:
- Begin by laying out all 12 slices of bread on a clean work surface. This allows for an assembly-line approach.
- Take 6 slices of bread and spread 1 tablespoon of peanut butter evenly over each one. Ensure coverage extends close to the edges for a full sandwich.
- On the remaining 6 slices of bread, spread 1/2 tablespoon of grape jelly evenly. The jelly should be spread thinly enough to avoid excessive dripping but thick enough for flavor.
- Now, assemble your base sandwiches. Place one jelly-covered slice directly on top of each peanut butter-covered slice, forming 6 complete sandwiches.
- Using a round cookie cutter, approximately 2-3 inches in diameter, or the rim of a drinking glass, cut out two circles from each assembled sandwich. Press firmly to ensure clean cuts. This process will yield a total of 12 sandwich “bodies.”
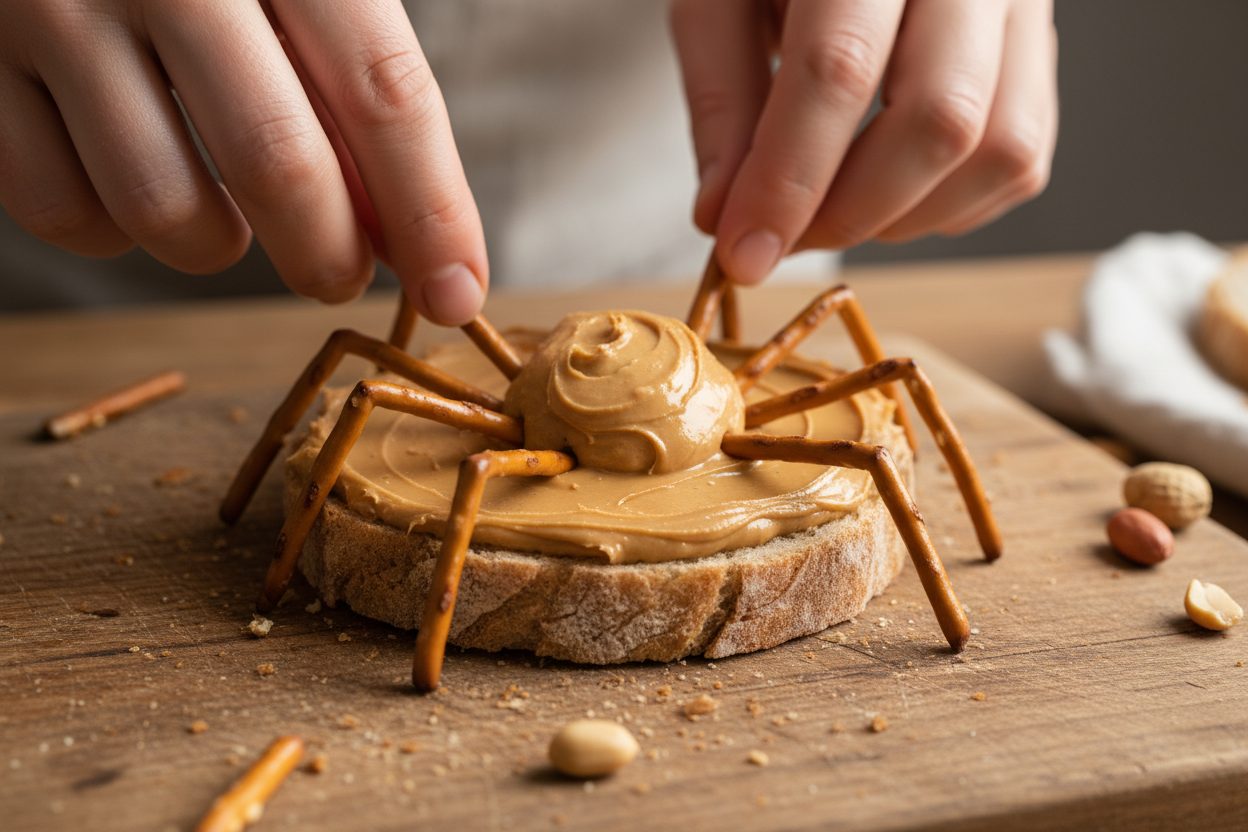
- To form each spider, arrange two sandwich circles side-by-side on a serving plate. Position them so they slightly overlap. One larger circle will serve as the spider’s body, and a slightly smaller one can be the head, even if they are the same size, the arrangement creates the illusion.
- For the legs, carefully insert 4 pretzel sticks into each side of the larger “body” circle. This creates the characteristic 8 spider legs. Gently push them in just enough to hold without breaking the bread.
- Take a small dab of the chocolate frosting. This frosting acts as a strong, edible adhesive. Use it to attach two candy eyes to the smaller, “head” circle of each spider. Position them appropriately to give your spiders personality.
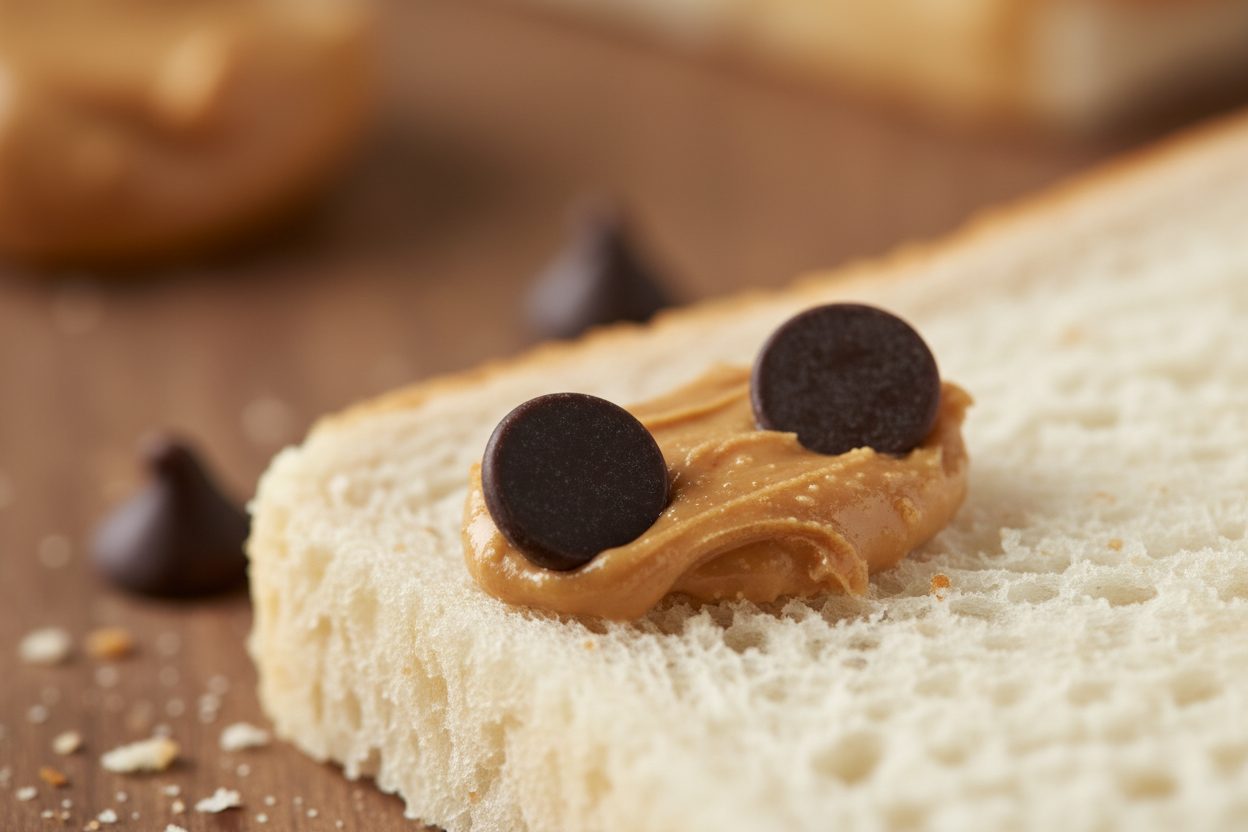
- Repeat steps 6 through 8 for all 6 spiders, ensuring each one has its full set of legs and eyes.
- Serve your spooky PB&J creations immediately to enjoy their freshness, or prepare them for storage as outlined below.
This systematic approach ensures consistent, attractive results for all your creepy treats for kids.
Creative Variations: Beyond Peanut Butter and Jam
While the classic peanut butter and grape jelly combination is a guaranteed crowd-pleaser, these arachnid themed snacks are incredibly versatile. You can easily adapt the recipe to suit different tastes, dietary needs, or simply to add more variety to your Halloween party food spread. These variations are optional and can be introduced once you are comfortable with the basic recipe.
- Nut-Free Options: For those with peanut allergies, sunflower seed butter (sunbutter) or almond butter makes an excellent substitute for peanut butter. Always check labels to ensure they are safe for your specific needs.
- Jelly Alternatives: Instead of grape jelly, consider using strawberry jam, raspberry preserves, or even apple butter for different flavor profiles. A thin layer of cream cheese could also work for a savory-sweet twist.
- Decorative Frosting: While chocolate frosting is ideal for the eyes, you could use a small amount of black gel icing or melted chocolate chips for a similar effect. You could also pipe tiny fangs or a mouth onto the “head” for added detail.
- Leg Variations: If pretzel sticks are not preferred or available, thin carrot sticks, celery sticks, or even chocolate-covered pretzel rods (cut to size) can be used as spider legs.
- Eye Customization: Beyond standard candy eyes, consider using mini chocolate chips (pointy side out) or small dots of white and black frosting for a homemade eye effect.
- Shape Experimentation: While round bodies are traditional, you could experiment with oval cookie cutters for a different spider body shape, or even small heart shapes for a more whimsical approach.
These variations allow for endless creativity, ensuring your Halloween Spider Sandwiches can be customized to delight everyone.
Storage and Make-Ahead Tips for Halloween Party Food
Preparing Halloween party food often involves a degree of planning, especially when hosting or packing school lunches. These Halloween Spider Sandwiches can be made ahead of time, making your event day less stressful. Proper storage ensures they remain fresh and appealing.
“For optimal freshness, assemble spider bodies up to 12 hours in advance and add delicate elements like pretzel legs and candy eyes just before serving.” – Expert Snack Prep Tip
Here are some specific tips for storing and making these spooky treats in advance:
- Prepare Components Separately: If making a large batch, you can spread the peanut butter and jelly on the bread slices, cut out the circles, and store them layered between parchment paper in an airtight container in the refrigerator for up to 24 hours.
- Assemble Just Before Serving: The pretzel sticks can become soft if inserted too far in advance, losing their crunch. Similarly, the candy eyes might bleed slightly if they are in contact with the frosting for too long, especially in humid conditions. For the best texture and appearance, it is recommended to add the pretzel legs and candy eyes no more than 1-2 hours before serving.
- Airtight Containers: Once fully assembled, if you must store them for a short period (e.g., for a school lunch), place the sandwiches in an airtight container. This prevents the bread from drying out and the pretzels from becoming overly soft. They are best consumed within a few hours of full assembly.
- Avoid Freezing: Due to the nature of peanut butter and jelly sandwiches, freezing is generally not recommended as it can alter the texture of the bread and make the jelly watery upon thawing. These are best enjoyed fresh or shortly after preparation.
- Room Temperature Serving: While stored in the fridge, these sandwiches are typically served at room temperature. If they’ve been refrigerated, allow them 15-20 minutes to warm slightly before eating for the best flavor and texture.
Following these guidelines will help ensure your Halloween Spider Sandwiches are as delightful when served as they were when first assembled. They remain a simple, effective solution for no bake Halloween snacks for any occasion.
Frequently Asked Questions
People often have questions when preparing new themed treats, even simple ones like these creepy treats for kids. Here are some common inquiries:
Can I use different types of bread for Halloween Spider Sandwiches?
Yes, absolutely. While whole wheat and white bread are common choices, you can use brioche for a richer taste, gluten-free bread for dietary needs, or even bread with fun shapes if you have specialized cutters. Ensure the slices are sturdy enough to hold the fillings and pretzel legs.
How do I make the candy eyes stick securely?
The small dab of chocolate frosting is the key. It acts as an edible glue. Apply just a tiny amount to the back of each candy eye before pressing it gently onto the bread. The frosting will set slightly, holding the eyes in place. If chocolate frosting is unavailable, a thick royal icing or even a small bit of cream cheese can work in a pinch.
My pretzel sticks are breaking when I insert them. What can I do?
This can happen if the bread is very fresh and soft, or if you apply too much force. Try to use bread that is a day or two old, as it is slightly firmer. Alternatively, use a toothpick to gently poke a small starter hole where you intend to insert the pretzel stick. This creates a path, making insertion easier and reducing breakage. Remember to use only 24 pieces of pretzel sticks for the 6 sandwiches.
Are these Halloween Spider Sandwiches suitable for a large party?
Yes, they are an excellent choice for a large Halloween party food spread. They are easy to scale up in quantity and can be partially prepared in advance, as mentioned in the storage tips. Their novelty makes them a standout item on any snack table, and they appeal to both children and adults who enjoy a bit of whimsy.
What if I don’t have a round cookie cutter?
No problem. A drinking glass with a similar diameter can be used as a substitute. Simply press the rim of the glass firmly into the sandwich to cut out the circles. You can also use a knife to cut square sandwiches into approximate circles, though they may not be as uniform.
These frequently asked questions cover common concerns, ensuring you can confidently create your own batch of delightful spooky PB&J arachnids.
***
We hope this guide inspires you to create your own batch of delightful Halloween Spider Sandwiches. These no bake Halloween snacks are a perfect way to add a touch of festive fun to your October days. For more creative recipe ideas, tips, and behind-the-scenes glimpses into our kitchen adventures, be sure to follow us on social media. We love sharing our passion for food and hearing from our community.
Follow us on Facebook for more fun recipes and food inspiration!
Spooky Spider PB&J Sandwiches
Ingredients
- 4 slices White bread Use a round cookie cutter to cut into circles
- 2 tbsp Peanut butter Smooth or creamy works best
- 2 tbsp Strawberry jam Can substitute with grape jelly
- 16 sticks Pretzel sticks Break in half if they are too long
- 4 chips Chocolate chips Used for the eyes
Instructions
- Cut the bread using a round cookie cutter to form the main body.
- Spread peanut butter on two of the round slices and strawberry jam on the remaining two slices.
- Press 8 pretzel sticks into the peanut butter layer of each sandwich, placing 4 on the left and 4 on the right to create legs.
- Place the jam-covered bread slices on top to close the sandwiches.
- Use a tiny dab of peanut butter to attach two chocolate chips to the top of each sandwich for the eyes.
For more daily recipes and tips, follow us on Facebook!
Click here to join our community!