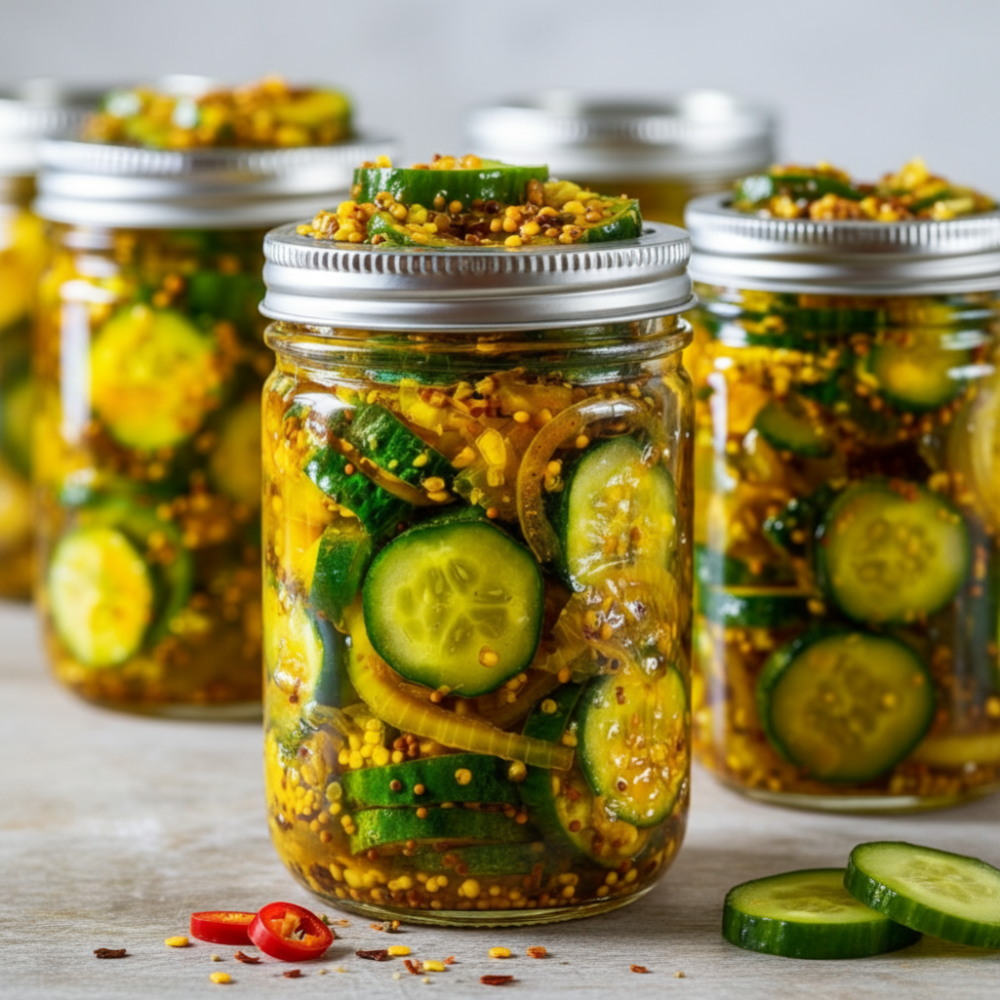
There is something uniquely satisfying about a jar of homemade preserves. Among the vast world of pickled delights, Bread and Butter Pickles stand out as a beloved classic. These sweet and tangy cucumber slices offer a burst of flavor that complements countless meals. Whether you enjoy them as crispy sandwich toppers, a side dish for barbecue, or simply as sweet pickle chips, making your own at home ensures freshness and quality. This guide will walk you through the process of water bath canning your own batch of these iconic preserves, transforming simple pickling cucumbers and sweet onions into a pantry staple.
The History Behind These Classic Sweet Preserves
The origin of Bread and Butter Pickles is a charming tale rooted in resourcefulness during the Great Depression. Farmers Omar and Cora Fanning from Illinois trademarked the name in 1923, but the concept of sweet-and-sour pickled cucumbers existed long before. The name itself is thought to come from the practice of serving these pickles on bread with butter, a simple, affordable meal during hard times. Their delightful balance of sweet, sour, and a hint of spice made them an enduring favorite, cementing their place in American culinary history as a truly versatile homemade preserve.
Choosing the Right Cucumbers and Onions for Crunch
The foundation of great Bread and Butter Pickles lies in selecting the best produce. For optimal texture and flavor, it is crucial to choose the right cucumbers. Look for pickling cucumbers, such as Kirby or Gherkin varieties, which are typically small, firm, and have thin skins. Avoid larger slicing cucumbers, as they tend to become soft during the canning process. Ensure the cucumbers are fresh, firm, and blemish-free.
For the onions, sweet onions are essential. Varieties like Vidalia or Walla Walla onions are perfect for this recipe due to their mild flavor and tender texture. Their sweetness complements the tangy brine without overpowering the delicate cucumber flavor. Slice them thinly to allow them to meld seamlessly with the cucumber slices and absorb the pickling liquid. The quality of your raw ingredients directly impacts the final crunch and taste of your tangy cucumber slices.
Essential Canning Equipment Needed
Embarking on the journey of water bath canning requires a few specific tools to ensure safety and success. Having the right equipment readily available will make the process smooth and efficient.
- Canning Jars: Pint or quart-sized canning jars with new lids and bands are ideal. Ensure they are clean and sterilized.
- Large Pot or Boiling Water Canner: A substantial pot with a lid and a rack at the bottom is necessary for the water bath canning process. This will hold the jars and allow boiling water to circulate around them.
- Jar Lifter: This tool makes it safe to handle hot jars when placing them into and removing them from the boiling water canner.
- Canning Funnel: A wide-mouth funnel helps prevent spills when filling jars with the pickles and brine, keeping jar rims clean for a proper seal.
- Bubble Remover/Headspace Tool: This helps remove trapped air bubbles from the jars after filling and ensures the correct 0.5-inch headspace is maintained.
- Ladle: For transferring hot brine into jars.
- Kitchen Towels: For cleanup and providing a stable surface for hot jars.
These tools are critical for achieving safe and properly sealed homemade preserves.
Ingredients List
Crafting a batch of these exquisite Bread and Butter Pickles requires a precise combination of fresh produce and aromatic spices. Each ingredient plays a vital role in creating the signature sweet and tangy flavor profile.
- 3 pounds pickling cucumbers, thinly sliced (about 1/4-inch thick)
- 1 pound sweet onions, thinly sliced
- 0.25 cup pickling salt
- 2 cups white vinegar
- 1 cup apple cider vinegar
- 2 cups granulated sugar
- 2 tablespoons mustard seed
- 1 teaspoon celery seed
- 0.5 teaspoon ground turmeric
“The balance of vinegars, sugar, and spices is key to the distinctive flavor of traditional Bread and Butter Pickles. Do not rush this step.”
Step-by-Step Canning Instructions
Follow these detailed steps carefully to create perfectly preserved, crunchy Bread and Butter Pickles. Attention to detail ensures both safety and the best flavor.
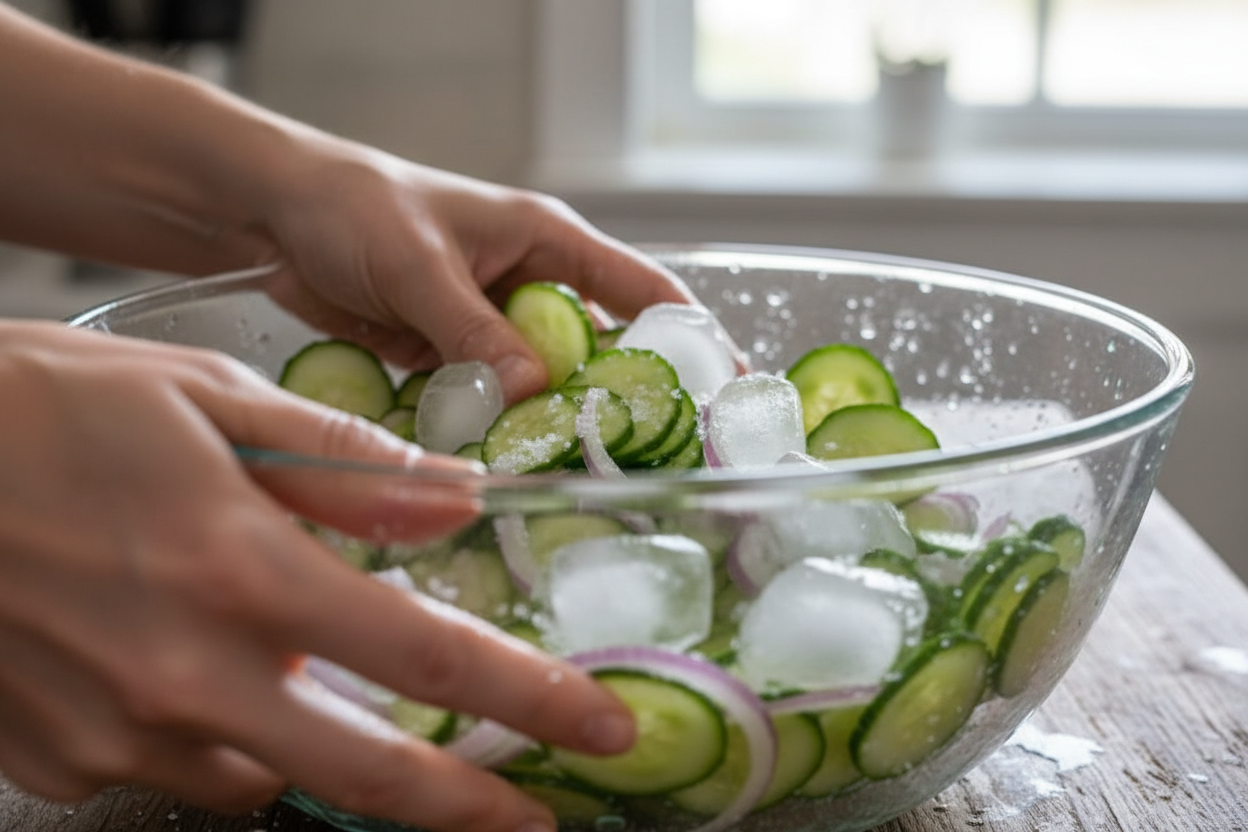
- Salt and chill vegetables for 2 hours. In a large, non-reactive bowl, combine the 3 pounds of thinly sliced pickling cucumbers and 1 pound of thinly sliced sweet onions. Sprinkle the 0.25 cup of pickling salt over the vegetables, ensuring an even coating. Toss gently to distribute the salt. Cover the bowl and refrigerate for 2 hours. This process draws out excess water, contributing to a crispier pickle.
- Rinse and drain. After 2 hours, the cucumbers and onions will have released a significant amount of liquid. Drain the vegetables thoroughly in a colander. Rinse them under cold running water to remove excess salt. Drain again very well, pressing gently to remove as much liquid as possible.
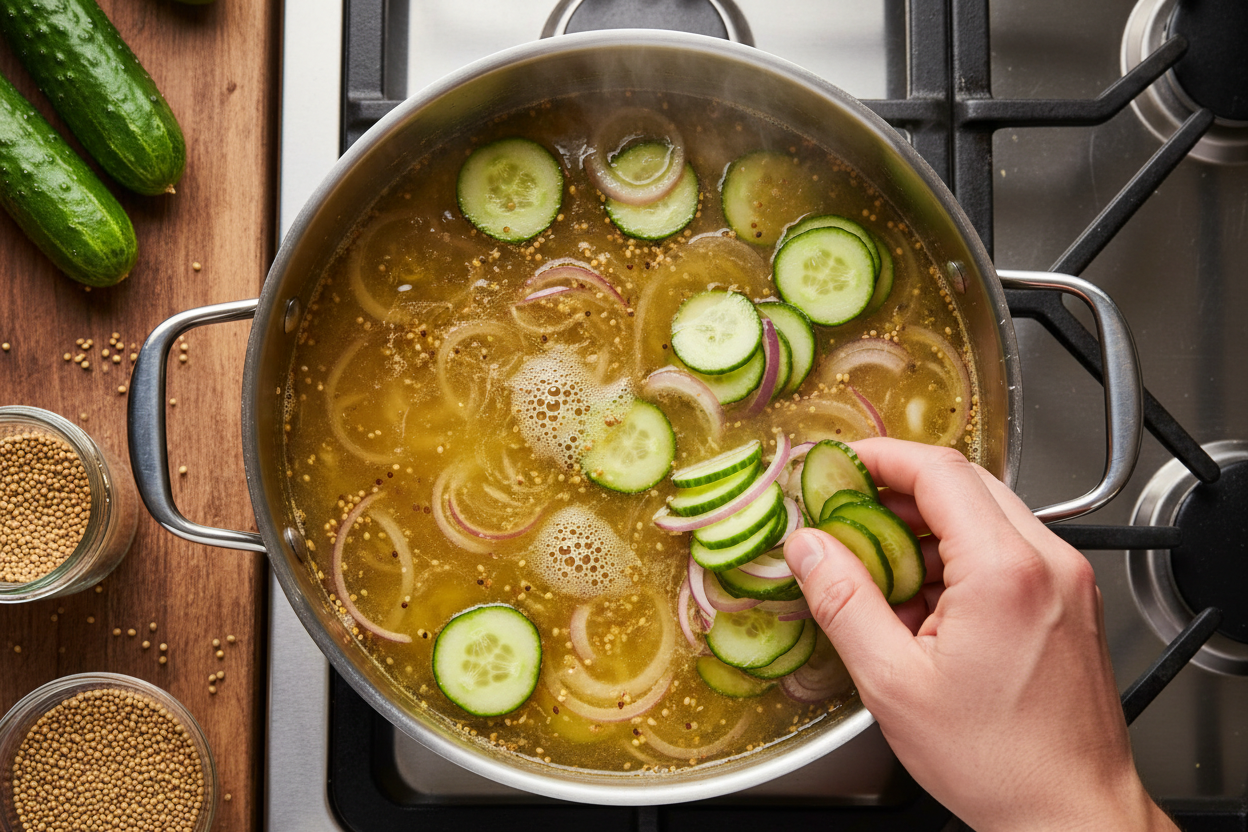
- Boil vinegars, sugar, and spices. In a large stainless steel pot, combine the 2 cups of white vinegar, 1 cup of apple cider vinegar, 2 cups of granulated sugar, 2 tablespoons of mustard seed, 1 teaspoon of celery seed, and 0.5 teaspoon of ground turmeric. Bring the mixture to a rolling boil over medium-high heat, stirring occasionally to dissolve the sugar completely.
- Simmer vegetables in brine. Add the rinsed and drained cucumber and onion mixture to the boiling brine. Reduce the heat to medium and simmer gently for 5 minutes. Do not overcook; the vegetables should just begin to turn translucent but still retain their crispness.
- Pack jars leaving 0.5-inch headspace. While the vegetables are simmering, sterilize your canning jars and prepare the lids according to the manufacturer’s instructions. Carefully ladle the hot cucumber and onion mixture into the hot, sterilized jars, ensuring an even distribution of solids and liquid. Leave a consistent 0.5-inch headspace from the rim of the jar. Use a non-metallic utensil to remove any air bubbles. Wipe the jar rims clean with a damp cloth, center new lids on the jars, and apply bands, tightening them to fingertip-tight.
- Process 10 minutes in a water bath canner. Place the filled and sealed jars into a preheated boiling water canner, ensuring the water level covers the tops of the jars by at least 1 inch. Bring the water back to a rolling boil. Process the jars for 10 minutes. Adjust processing time for altitude if necessary. After 10 minutes, turn off the heat, remove the canner lid, and let the jars stand in the hot water for 5 minutes before carefully removing them with a jar lifter. Place jars on a towel-lined surface, allowing them to cool undisturbed for 12-24 hours. Check seals: lids should be concave and not flex when pressed.
Tips for the Crunchiest Tangy Cucumber Slices
Achieving that satisfying crunch in your Bread and Butter Pickles is a hallmark of a well-made batch. Here are several tips to help ensure your tangy cucumber slices remain wonderfully crisp:
- Start with Fresh, Firm Cucumbers: As mentioned, pickling cucumbers should be used immediately after harvesting or purchase. Limp cucumbers will result in limp pickles.
- Proper Salting is Key: The initial salting step helps draw out excess water from the cucumbers, which is crucial for maintaining their crisp texture during canning. Do not skip or shorten the 2-hour chilling period.
- Thorough Rinsing and Draining: After salting, rinse the cucumbers thoroughly to remove excess salt. Then, drain them extremely well. Any residual water can dilute your brine and affect texture.
- Avoid Overcooking: During the simmering step, cook the cucumbers and onions just until they begin to change color and become slightly translucent, usually around 5 minutes. Overcooking in the brine will soften them significantly. The goal is to heat them through, not to fully cook them.
- Hot Pack Method: Packing hot vegetables into hot jars and processing them immediately helps maintain crunch by quickly creating a vacuum seal and preventing further softening.
- Cool Slowly: Allow the processed jars to cool naturally on the counter without disturbing them. Rapid cooling can sometimes affect texture.
By following these guidelines, your homemade preserves will boast an incredible crunch that makes every bite a pleasure.
Serving Suggestions for Your Homemade Pickles
Your freshly canned Bread and Butter Pickles are incredibly versatile and can elevate a variety of dishes. Their sweet, tangy, and subtly spiced flavor profile makes them an excellent accompaniment.
* Classic Sandwich Toppers: The most obvious use is as delicious sandwich toppers. Pile these sweet pickle chips onto burgers, pulled beef sandwiches, or even simple grilled cheese for an added layer of flavor and crunch.
* Barbecue Companion: They cut through the richness of grilled meats like beef ribs, sausages, or beef brisket, offering a refreshing contrast.
* Cheese Boards: Add a bowl of these tangy cucumber slices to your next cheese and charcuterie board. They pair wonderfully with sharp cheddar, creamy goat cheese, or smoked gouda.
* Salad Enhancer: Chop them finely and add them to potato salad, tuna salad, or egg salad for a bright, zesty kick.
* Snack Straight from the Jar: Sometimes, the best way to enjoy these homemade preserves is simply straight from the jar as a satisfying, crunchy snack.
* Cocktail Garnish: Use a spear as a garnish for a dirty martini or a Bloody Mary for a unique twist.
Frequently Asked Questions
Here are some common questions about making and storing your homemade preserves.
Q: How long do homemade Bread and Butter Pickles last?
A: Properly sealed and processed Bread and Butter Pickles will last for at least one year when stored in a cool, dark place. Once opened, store them in the refrigerator and consume within a few weeks for best quality.
Q: Why did my pickles turn soft?
A: Soft pickles are often a result of using older or non-pickling cucumbers, overcooking them in the brine, or improper processing. Ensuring cucumbers are fresh, following the salting and simmering times precisely, and not over-processing in the water bath canner helps maintain crispness.
Q: Can I adjust the sweetness or spice level?
A: This recipe provides a balanced sweet and tangy flavor. While you can subtly adjust the sugar for personal preference, significant changes to sugar or vinegar ratios can impact the safety of the preservation. For spice, you can slightly increase the mustard seed or celery seed, but stick to the provided measurements for consistent results in your sweet pickle chips.
Q: Do I need to sterilize my jars?
A: For any recipe processed for less than 10 minutes, sterilizing jars is recommended. For recipes processed for 10 minutes or more in a boiling water canner, the jars are sterilized during the canning process itself. However, ensuring they are clean and hot when filled is always crucial.
Making your own Bread and Butter Pickles is a rewarding experience, providing you with delicious homemade preserves ready for any meal. The effort invested in selecting quality ingredients and following proper water bath canning techniques results in a truly satisfying product. Enjoy these perfectly crunchy and flavorful sweet pickle chips with family and friends.
For more delicious recipes, tips, and behind-the-scenes glimpses into our kitchen adventures, be sure to follow our Facebook page. Follow our Facebook page to stay connected.
Easy Homemade Sweet Pickle Chips
Ingredients
- 3 lbs Pickling cucumbers Sliced into 1/4-inch thick rounds
- 1 lb Sweet onions Thinly sliced
- 0.25 cup Pickling salt Do not use table salt
- 2 cups White vinegar 5% acidity
- 1 cup Apple cider vinegar 5% acidity
- 2 cups Granulated sugar
- 2 tbsp Mustard seed
- 1 tsp Celery seed
- 0.5 tsp Ground turmeric
Instructions
- Toss sliced cucumbers and onions with pickling salt in a large bowl. Cover with ice and let sit for 2 hours to draw out moisture.
- Rinse the vegetables thoroughly under cold water and drain well.
- In a large pot, combine white vinegar, apple cider vinegar, granulated sugar, mustard seed, celery seed, and ground turmeric. Bring to a boil.
- Add the drained cucumbers and onions to the boiling brine. Heat just until the mixture returns to a simmer, then remove from heat immediately to preserve crunch.
- Pack the hot vegetables into sterilized canning jars, leaving 0.5 inch of headspace. Pour the hot brine over the vegetables, maintaining the headspace.
- Wipe jar rims, apply lids and bands, and process in a boiling water bath canner for 10 minutes. Remove and let cool undisturbed for 24 hours.
For more daily recipes and tips, follow us on Facebook!
Click here to join our community!