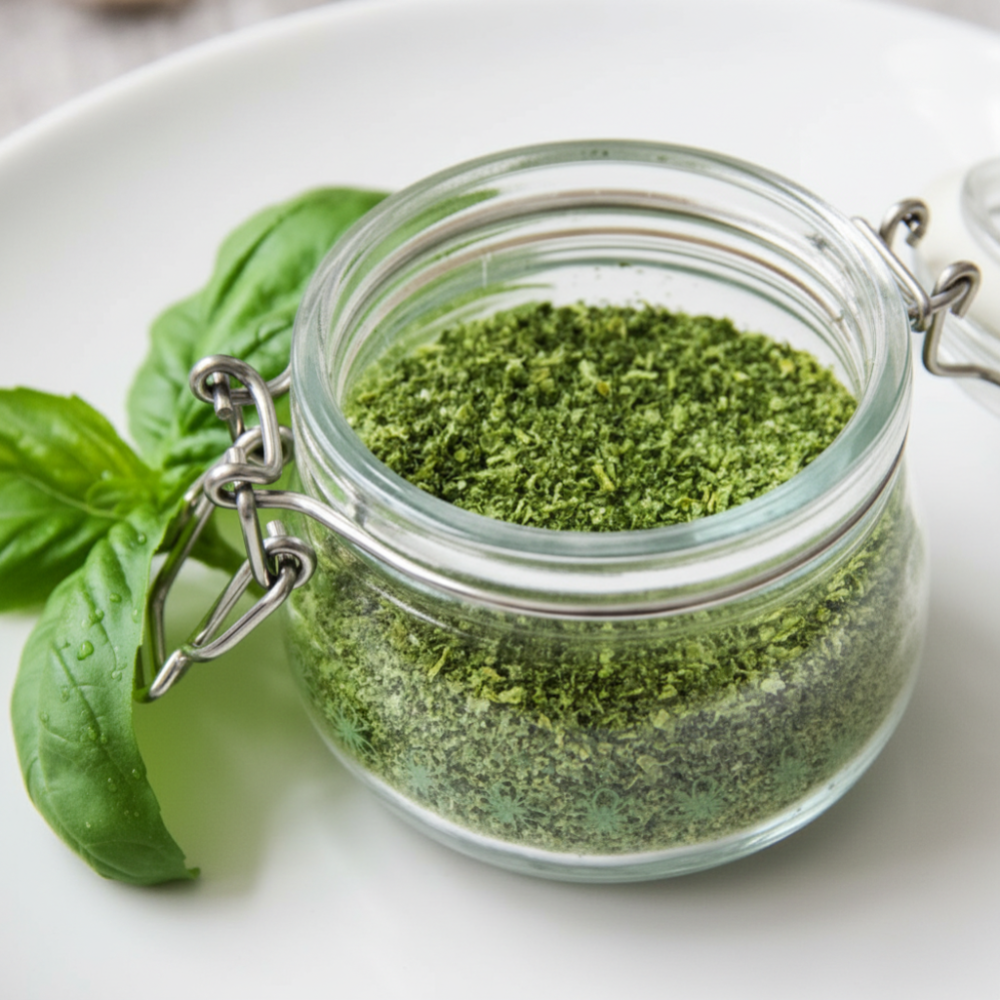
Capturing the essence of summer basil and extending its vibrant flavor throughout the year is a simple kitchen achievement. This guide details how to create your own homemade basil salt, a versatile herb-infused seasoning that takes less than 30 minutes of active preparation time. It is a brilliant strategy for preserving fresh herbs, transforming a seasonal abundance into a year-round pantry staple. Forget the delicate shelf life of fresh basil; this method locks in its aromatic intensity, ready to enhance countless dishes.
Why Make Homemade Flavored Sea Salt?
The culinary advantages of a well-made homemade flavored sea salt are numerous. Beyond just taste, it offers a distinct freshness and purity often missing from commercial blends. This particular basil salt stands out as a sophisticated yet simple homemade finishing salt, elevating everyday meals with minimal effort. Its bright, herbaceous notes are a perfect complement to a wide range of ingredients.
- Elevates Simple Dishes: A sprinkle of basil salt can transform a plain slice of ripe tomato, making its natural sweetness sing.
- Enhances Salads: Incorporate it into salad dressings or directly onto greens for a burst of aromatic flavor. It adds depth without the need for additional fresh herbs.
- Perfect for Meats: Whether seasoning poultry before roasting or sprinkling on grilled beef or fish, this seasoning brings a fresh, savory dimension.
- Control Over Ingredients: By making your own, you ensure only quality ingredients are used, free from anti-caking agents or artificial flavors.
- Year-Round Freshness: It allows you to enjoy the distinctive taste of fresh basil long after its growing season has ended. This preservation method keeps the essence of summer within reach.
This method of preserving fresh herbs goes beyond mere functionality. It is about creating a truly special ingredient that reflects care and quality. The subtle garlic undertone, if you choose to include it, adds another layer of savory complexity, making the basil salt even more adaptable to various recipes.
Ingredients for Basil Salt
Creating this aromatic homemade herb seasoning requires only a few key components. The quality of each ingredient directly impacts the final product’s flavor and longevity.
- 1 cup fresh basil leaves, packed: Select vibrant, green leaves without blemishes. Packing them ensures you get a dense amount of basil for intense flavor.
- 1 cup coarse kosher or sea salt: The texture of coarse kosher salt or a good quality sea salt is crucial here. Its larger crystals help with the grinding process in the food processor and provide an excellent base for absorbing the basil’s essential oils. Fine salt tends to clump more easily.
- 0.5 tsp garlic powder (optional): This addition provides a subtle savory depth that complements the basil beautifully without overpowering it. It is entirely optional, allowing you to tailor the salt to your preference.
These precise quantities ensure a balanced flavor profile where the basil’s freshness is prominent, supported by the salinity of the salt. The optional garlic powder is a nuanced addition, intended to enhance, not dominate.
Step-by-Step Instructions
Making your own basil salt is a straightforward process, primarily relying on the efficient food processor method. Following these steps precisely will yield a perfectly blended and preserved seasoning.
Step 1: Wash and thoroughly dry the leaves.
Begin by washing 1 cup of fresh basil leaves under cool running water to remove any dirt or debris. The most critical step here is to dry the leaves thoroughly. Excess moisture can lead to clumping and significantly reduce the shelf life of your finished basil salt. Use a salad spinner to remove the majority of the water, then spread the leaves on a clean kitchen towel or paper towels to air dry for an hour or two, or gently pat them until completely dry. This meticulous drying ensures the basil’s essence is concentrated and the salt acts as a proper preservative.
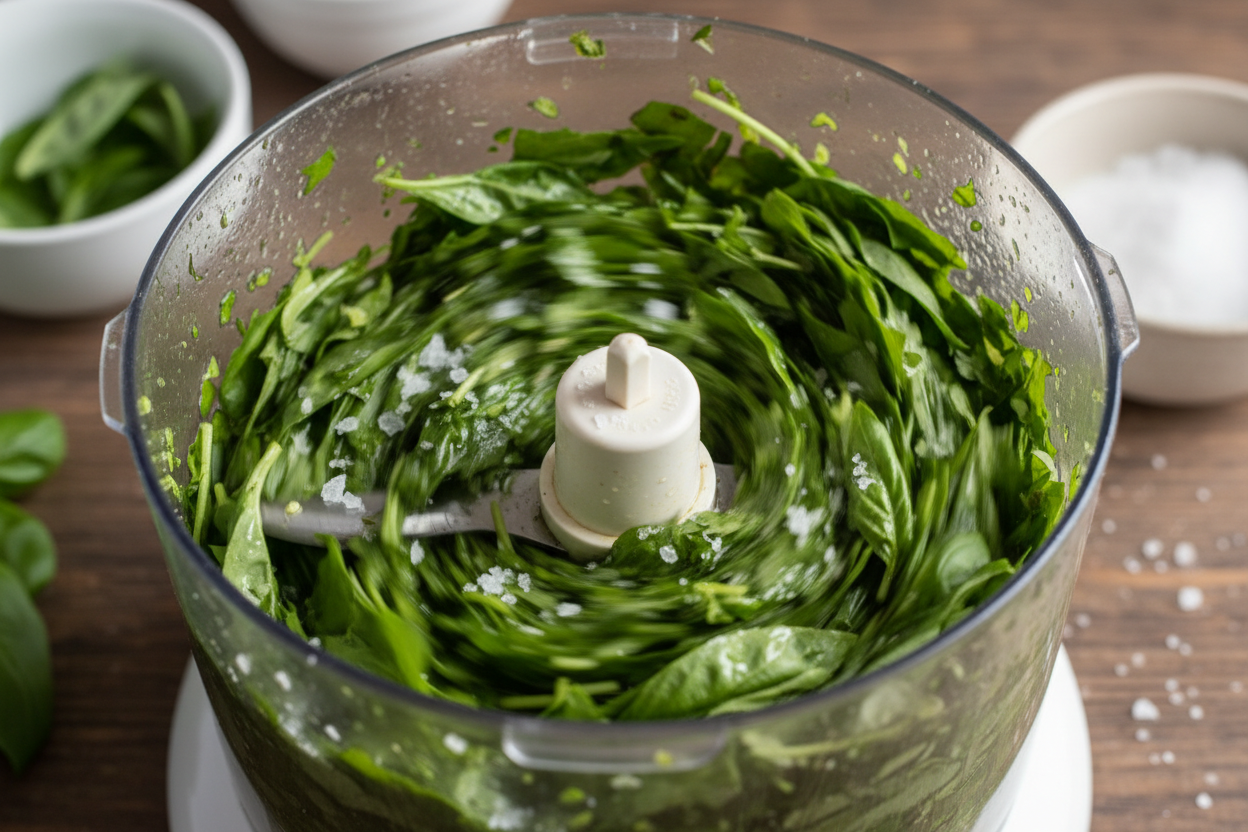
Step 2: Pulse herbs and coarse crystals in a food processor until combined.
Once the basil leaves are completely dry, place them into the bowl of a food processor. Add 1 cup of coarse kosher salt (or coarse sea salt) and the optional 0.5 tsp of garlic powder. Secure the lid and pulse the mixture. Start with short bursts, then continue pulsing until the basil is finely chopped and evenly distributed throughout the salt. The goal is a consistent, vibrant green mixture where no large basil pieces remain, but it should not be a fine powder. The food processor method efficiently breaks down the basil and combines it with the salt, ensuring thorough integration of flavors.
Step 3: Spread the green mixture on a parchment-lined baking sheet.
Line a baking sheet with parchment paper. This prevents sticking and makes cleanup easier. Evenly spread the green basil-salt mixture onto the prepared baking sheet in a thin, uniform layer. A thin layer is crucial for proper and even dehydration in the oven. Avoid creating thick piles, as these areas will take longer to dry and may not dehydrate sufficiently, risking spoilage.
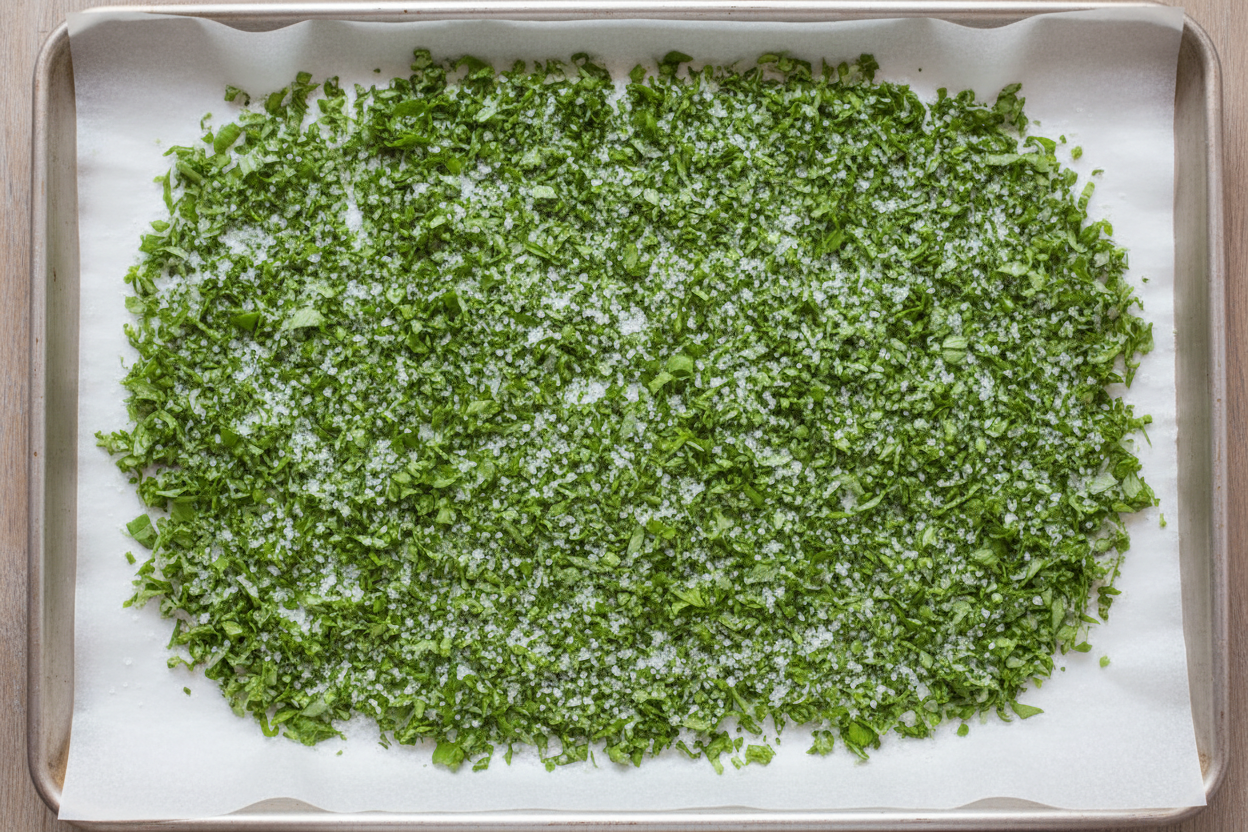
Step 4: Bake at 225 degrees F for 20 minutes to remove moisture.
Preheat your oven to 225 degrees Fahrenheit (107 degrees Celsius). Place the baking sheet with the basil-salt mixture into the preheated oven. Bake for precisely 20 minutes. The purpose of this low-temperature baking is to gently remove any remaining moisture from the basil and salt mixture. This dehydration process is vital for the long-term preservation of the basil salt. The low temperature ensures that the basil’s delicate flavor and vibrant color are retained, rather than cooked away.
Step 5: Cool, break up clumps, and store in an airtight container.
After 20 minutes, carefully remove the baking sheet from the oven. The mixture will likely be warm and might have some clumps. Allow the basil salt to cool completely on the baking sheet at room temperature. As it cools, any remaining moisture will continue to evaporate. Once cool, use your fingers or a fork to gently break up any clumps, ensuring a loose, granular texture. Transfer the finished basil salt into a clean, dry airtight container. This step is critical for maintaining its freshness and preventing moisture reabsorption.
Storage Tips for Basil Salt
Proper storage is essential for maximizing the shelf life and preserving the potent flavor of your homemade herb seasoning. Follow these guidelines to ensure your basil salt remains fresh and aromatic for as long as possible.
- Cool, Dark Place: Always store your basil salt in a cool, dark pantry or cupboard. Exposure to light and heat can degrade the basil’s delicate essential oils, causing the flavor to diminish and the vibrant green color to fade over time.
- Airtight Container: The container you choose must be airtight. Glass jars with tight-fitting lids are ideal. This prevents moisture from the air from being absorbed by the salt, which would lead to clumping and could compromise the preservative quality of the salt. It also keeps out any unwanted odors.
- Avoid Humidity: Keep the container away from sources of humidity, such as above a stove or near a sink. Humidity is the enemy of dry seasonings.
- Label and Date: Though not strictly part of the preparation, labeling your container with the date of creation is a practical step. This helps you keep track of its freshness.
- Longevity: When stored correctly, your basil salt will maintain its peak flavor and aroma for up to 6 months. While it will still be safe to use beyond this period, its potency may gradually lessen.
Adhering to these simple storage practices ensures that every pinch of your homemade finishing salt delivers the fresh, herbaceous punch you intended.
Frequently Asked Questions (FAQ)
How long does this herb seasoning last?
When prepared following the instructions for moisture removal and stored correctly in a cool, dark, airtight container, this basil salt will last for up to 6 months. The drying process and the inherent preservative qualities of salt are key to its longevity. If you notice any signs of moisture, a faded color, or a significant loss of aroma, it might be time to prepare a fresh batch. Optimal flavor is experienced within the first few months after preparation.
Can I use dried leaves instead?
For this specific recipe, using fresh basil leaves is paramount. The method described is designed for preserving fresh herbs, capturing their vibrant color, intense aroma, and delicate oils that are characteristic of fresh basil. Using dried basil leaves instead would result in a very different product. Dried basil has a muted color and a less pungent, more earthy flavor compared to fresh basil. While you could combine dried basil with salt, it would not yield the same bright, fresh, and aromatic homemade flavored sea salt that this recipe aims to produce. The true essence of this basil salt lies in transforming fresh, aromatic basil into a stable, long-lasting seasoning.
Making your own basil salt is a rewarding culinary endeavor, offering a convenient way to infuse your cooking with the bright, unmistakable flavor of basil year-round. This versatile herb-infused seasoning is a testament to the power of simple ingredients and thoughtful preparation.
For more culinary inspiration and fresh recipe ideas, make sure to follow our community on Facebook. You can find us and connect with other food enthusiasts by clicking here: Follow Our Facebook Page.
Quick Homemade Basil Salt
Ingredients
- 1 cup Fresh basil leaves Packed, washed and completely dried
- 1 cup Coarse sea salt or Kosher salt Do not use fine table salt
- 0.5 tsp Garlic powder Optional, for extra flavor
Instructions
- Wash and thoroughly dry the fresh herbs using a salad spinner and paper towels.
- Place the leaves and coarse crystals into a food processor. Pulse until well blended and the mixture turns a bright green color.
- Spread the blended mixture evenly onto a baking sheet lined with parchment paper.
- Bake at 225 degrees Fahrenheit for 20 minutes to dry out any residual moisture from the fresh leaves.
- Allow the mixture to cool completely, break up any small clumps with a fork, and transfer to an airtight glass jar.
For more daily recipes and tips, follow us on Facebook!
Click here to join our community!