
As autumn leaves begin to fall, signaling cooler temperatures and the call for comforting flavors, our kitchens often become a sanctuary for warming aromas. Among the most cherished autumn baked goods, scones hold a special place. Today, we are focusing on a recipe that elevates the classic scone: Sourdough Pumpkin Scones. These aren’t just any scones; they are a celebration of seasonal produce combined with the subtle complexity of sourdough. This recipe is perfect for those seeking delightful fall breakfast ideas or a cozy afternoon treat. The beauty of these homemade scones lies in their tender crumb, rich pumpkin flavor, and the intriguing tang from sourdough discard, creating a truly memorable experience.
The addition of sourdough discard, often considered a byproduct of sourdough baking, transforms these Sourdough Pumpkin Scones into something exceptional. It imparts a delicate chew and an unparalleled depth of flavor that complements the warm notes of pumpkin spice baking without being overly sour. For home bakers, this is a fantastic opportunity to venture into starter discard recipes, embracing a zero waste baking philosophy while producing spectacularly flaky pastry.
Why Use Starter Discard for Baking
Incorporating sourdough discard into your baking offers a multitude of benefits, extending beyond merely preventing waste. For these Sourdough Pumpkin Scones, the unfed starter plays a crucial role in enhancing both texture and flavor. Sourdough discard, particularly when unfed, contributes a distinct but mild acidity that acts as a natural leavening agent when combined with baking powder. This interaction helps create a lighter, more tender crumb that is characteristic of excellent homemade scones.
Moreover, the moisture content of the discard significantly improves the dough’s hydration. This means your flaky pastry will have improved moisture retention, ensuring the scones remain fresh and soft for longer periods. The sourdough cultures, even in their dormant state, break down some of the flour’s proteins, leading to a more digestible product and a nuanced flavor profile that is both complex and comforting. It introduces a subtle tang that beautifully balances the sweetness of the pumpkin puree and the warmth of the pumpkin spice, creating a multifaceted taste experience. This makes it an ideal ingredient for starter discard recipes and a cornerstone of smart zero waste baking practices.
Essential Ingredients
Before beginning your autumn baked goods adventure, gather these precise items. Using high-quality ingredients ensures the best possible outcome for your Sourdough Pumpkin Scones:
- 2 cups (240g) all-purpose flour: The foundation of your flaky pastry.
- 1/2 cup (100g) granulated sugar: Provides essential sweetness to balance the pumpkin and spice.
- 1 tbsp pumpkin pie spice: The key to that signature pumpkin spice baking flavor.
- 1 tbsp baking powder: Works with the sourdough discard to give the scones their lift.
- 1/2 tsp salt: Enhances all other flavors and balances sweetness.
- 1/2 cup (113g) cold unsalted butter, cubed: Crucial for creating a truly flaky pastry.
- 1/2 cup (113g) pumpkin puree: Provides moisture, color, and a rich, earthy pumpkin flavor.
- 1/2 cup (120g) sourdough discard: Your secret ingredient for tenderness and tang.
- 1/4 cup (60ml) heavy cream: Adds richness and helps bind the dough.
- 1 tsp vanilla extract: A classic enhancer for sweet baked goods.
Step-by-Step Instructions
Creating these delicate homemade scones is a straightforward process when you follow these steps carefully. Precision in technique, especially with the butter, ensures the ultimate flaky pastry.
- Prepare your workspace and oven: Preheat your oven to 400F (200C). This ensures the oven is at the correct temperature for immediate baking once the dough is ready, which is vital for perfect scones. Line a baking sheet with parchment paper. This prevents sticking and makes cleanup simple.
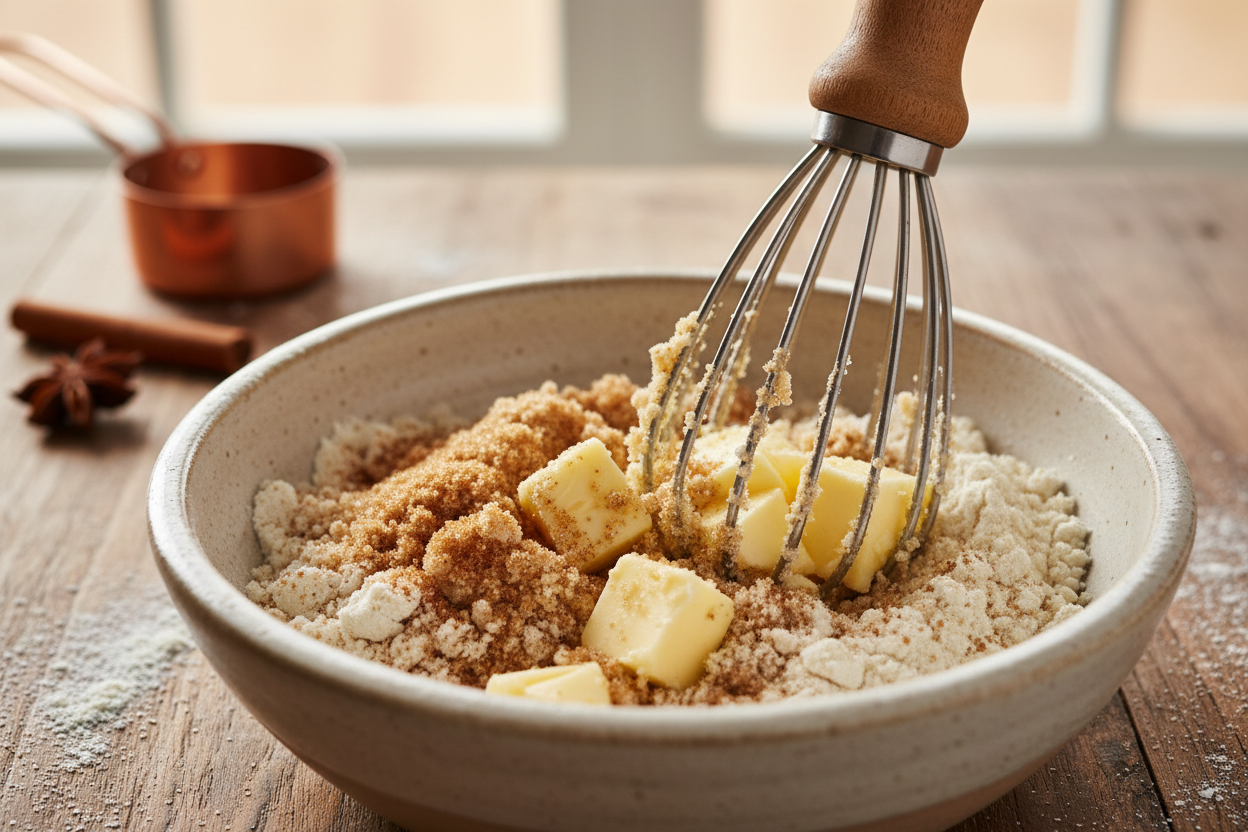
- Combine dry ingredients: In a large mixing bowl, whisk together the 2 cups (240g) of all-purpose flour, 1/2 cup (100g) of granulated sugar, 1 tablespoon of pumpkin pie spice, 1 tablespoon of baking powder, and 1/2 teaspoon of salt. Whisk thoroughly for about 30 seconds to ensure all ingredients are evenly distributed. This step is critical for consistent flavor and rise throughout your Sourdough Pumpkin Scones.
- Incorporate the cold butter: Add the 1/2 cup (113g) of cold, cubed unsalted butter to the dry ingredients. Using a pastry blender, two knives, or your fingertips, cut the butter into the flour mixture until it resembles coarse crumbs, with some pea-sized pieces of butter remaining. This technique is fundamental for creating pockets of steam during baking, which results in a light and flaky pastry. Avoid overworking the butter and dry ingredients; the goal is texture, not a smooth paste.
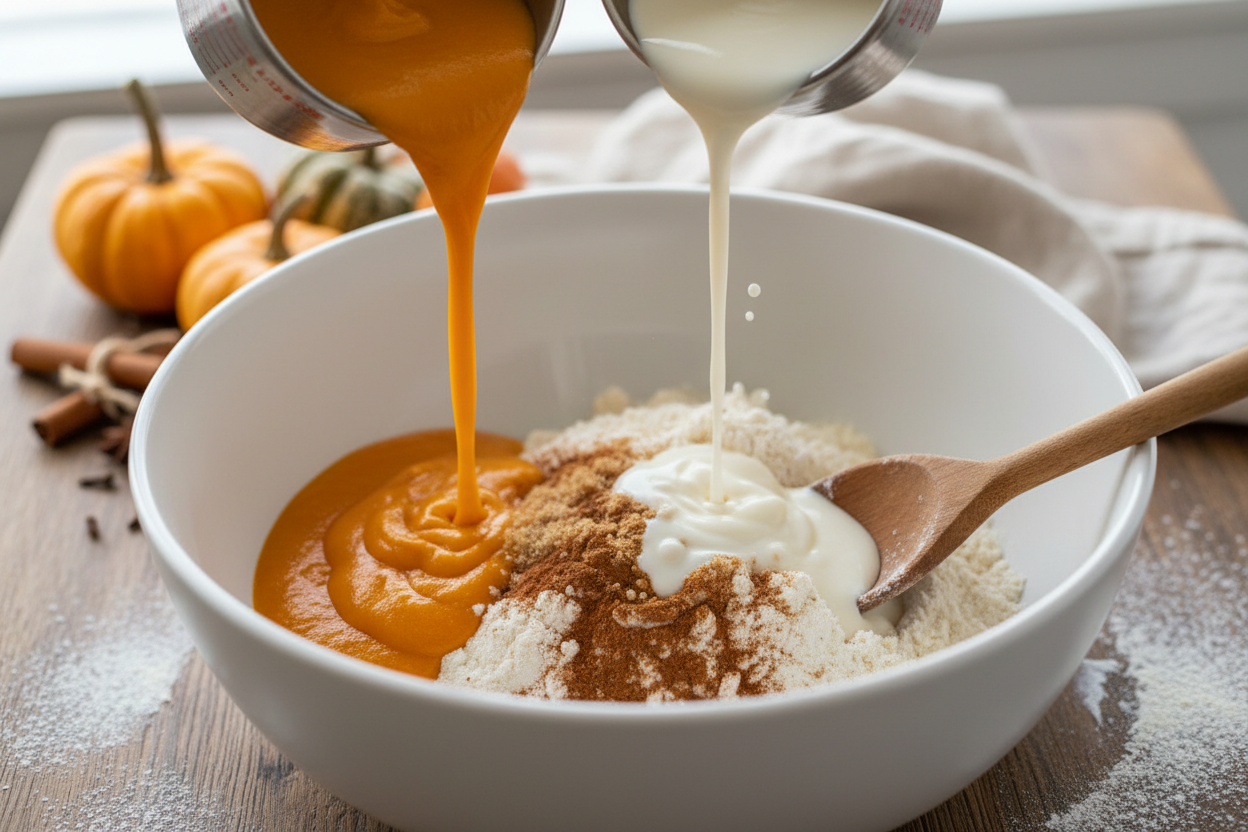
- Mix wet ingredients: In a separate medium bowl, combine the 1/2 cup (113g) of pumpkin puree, 1/2 cup (120g) of sourdough discard, 1/4 cup (60ml) of heavy cream, and 1 teaspoon of vanilla extract. Whisk these ingredients together until they are well combined and smooth.
- Gently combine wet and dry: Pour the wet ingredient mixture into the bowl with the dry ingredients. Using a spatula or your hands, gently mix until just combined. The dough will be shaggy and somewhat sticky; this is expected. Avoid overmixing at all costs, as excessive handling develops gluten, leading to tough scones rather than tender ones. Just mix until no dry streaks of flour remain. This approach ensures a delicate crumb in your autumn baked goods.
- Shape and cut the dough: Lightly flour a clean work surface. Turn the dough out onto the floured surface. Gently pat the dough into an 8-inch disc, about 1 inch thick. Do not knead it. Use a sharp knife or a bench scraper to cut the disc into 8 even wedges. A clean cut promotes a better rise.
- Prepare for baking: Carefully transfer the 8 wedges to the prepared baking sheet, spacing them slightly apart. For an extra golden crust and a touch more richness, brush the tops of the scones with a small amount of extra heavy cream.
- Bake to perfection: Place the baking sheet in the preheated oven. Bake for 15 to 18 minutes, or until the scones are golden brown on top and a toothpick inserted into the center comes out clean. The precise baking time may vary slightly depending on your oven.
- Cool and serve: Once baked, remove the Sourdough Pumpkin Scones from the oven and transfer them to a wire rack to cool slightly before serving. They are best enjoyed warm.
Pro Tips for the Flakiest Texture
Achieving truly flaky pastry in your Sourdough Pumpkin Scones relies on a few key techniques. These expert tips will help you create light, airy, and tender homemade scones every time:
Always prioritize cold ingredients. This is the golden rule for flaky baked goods.
- Keep Your Butter Cold: This cannot be stressed enough. Cold butter creates steam pockets as it melts in the oven, which is essential for flakiness. If your kitchen is warm, you can cube the butter and place it in the freezer for 10-15 minutes before using. This prevents the butter from fully incorporating into the flour, ensuring distinct layers.
- Work Quickly: Minimize the time you handle the dough. The warmth of your hands can melt the butter, compromising the flaky texture. Mix and pat out the dough with efficiency.
- Avoid Over-Kneading: Gentle handling is key. Over-kneading develops gluten, which leads to tough, dense scones instead of light, tender ones. Mix until just combined, even if the dough looks a little shaggy.
- Use a Sharp Knife for Cutting: A clean, sharp cut prevents the edges of the scones from sealing, which can inhibit their rise. Press straight down rather than dragging the knife through the dough.
- Don’t Twist the Cutter: If using a round cutter for your homemade scones, press straight down and pull straight up. Twisting seals the edges and prevents proper expansion and flakiness. Since we are cutting wedges for this recipe, ensure your knife technique is a clean, swift cut.
- Chill Before Baking (Optional but Recommended): For an even flakier result, place the cut scones in the refrigerator for 15-30 minutes before baking. This re-chills the butter, enhancing its ability to create steam and lift during baking.
Proper Storage and Freezing Instructions
Once your delectable Sourdough Pumpkin Scones have cooled, proper storage ensures their freshness and allows you to enjoy them over several days or even weeks. These autumn baked goods are best enjoyed fresh, but they store well too.
Storage of Baked Scones:
Store baked scones in an airtight container at room temperature for up to three days. To refresh them, a quick warm-up in a toaster oven or microwave for 10-20 seconds can bring back some of their original tenderness and warmth. Avoid refrigerating baked scones, as this can dry them out and alter their texture.
Freezing Unbaked Scones:
For ultimate convenience, you can freeze unbaked scones. After shaping and cutting the dough into 8 wedges, arrange them on a parchment-lined baking sheet and place them in the freezer. Once completely frozen solid (this takes a few hours), transfer the frozen wedges to a freezer-safe bag or airtight container. They can be stored in the freezer for up to a month. When ready to bake, there is no need to thaw them. Simply place the frozen scones on a prepared baking sheet, brush with extra cream, and bake at 400F (200C), adding an extra 3-5 minutes to the baking time (about 18-23 minutes total), or until golden brown and cooked through. This method is perfect for preparing quick fall breakfast ideas on busy mornings.
These Sourdough Pumpkin Scones represent the very best of autumn baked goods. With their perfect balance of warmth, spice, and that unique sourdough tang, they are sure to become a cherished addition to your recipe collection. Embrace the season and the rewarding process of zero waste baking with these exceptionally flaky pastry delights. Share your creations and connect with other baking enthusiasts by following us on Facebook!
Find more delicious recipes and baking tips:

Flaky Autumn Pumpkin Pastries with Sourdough Discard
Ingredients
- 2 cups All-purpose flour Plus more for dusting
- 1/2 cup Granulated sugar White sugar
- 1 tbsp Pumpkin pie spice Store-bought or homemade
- 1 tbsp Baking powder Ensure it is fresh
- 1/2 tsp Salt Fine sea salt
- 1/2 cup Unsalted butter Cold and cut into small cubes
- 1/2 cup Pumpkin puree Pure pumpkin, not pie filling
- 1/2 cup Sourdough discard Unfed, straight from the fridge
- 1/4 cup Heavy cream Plus extra for brushing tops
- 1 tsp Vanilla extract Pure extract preferred
Instructions
- Preheat your oven to 400F (200C). Line a large baking sheet with parchment paper.
- In a large bowl, whisk together the flour, sugar, pumpkin pie spice, baking powder, and salt.
- Cut the cold cubed butter into the dry ingredients using a pastry blender or your fingers until the mixture resembles coarse crumbs.
- In a separate medium bowl, whisk together the pumpkin puree, sourdough discard, heavy cream, and vanilla extract until smooth.
- Pour the wet mixture into the dry ingredients. Stir gently with a wooden spoon or spatula until just combined. Do not overmix.
- Turn the dough out onto a lightly floured surface. Gently pat it into an 8-inch disc. Cut the disc into 8 equal wedges.
- Transfer the wedges to the prepared baking sheet, leaving space between each. Brush the tops lightly with additional heavy cream.
- Bake for 15 to 18 minutes, or until the edges are lightly golden brown. Let cool on the pan for 5 minutes before transferring to a wire rack.
For more daily recipes and tips, follow us on Facebook!
Click here to join our community!