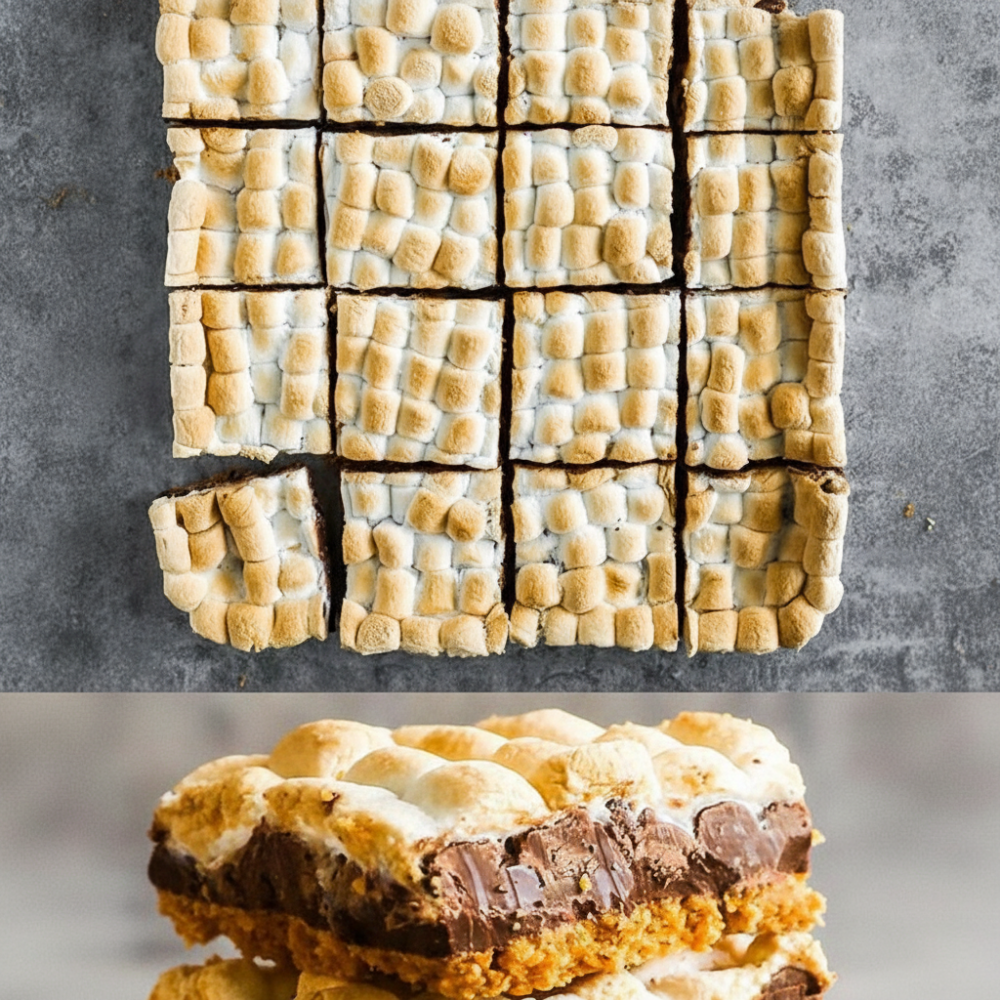
Imagine the irresistible aroma of toasted marshmallows, the snap of a graham cracker, and the melty richness of chocolate. This classic campfire dessert often requires an open flame and an outdoor setting. However, you do not need to venture into the wilderness to enjoy these flavors. This guide brings the beloved experience indoors, transforming simple ingredients into a delightful treat. You can now enjoy that cherished outdoor taste right from your own kitchen. These S’more Bars offer all the nostalgic comfort in an easy-to-make, portable form. They are the perfect solution for satisfying that craving for a warm, gooey, chocolatey snack without any fuss.
These S’more Bars represent the ultimate in indoor marshmallow dessert convenience. They deliver the full s’mores experience in a neat, shareable square. No more burnt fingers over a flickering fire or battling smoke. Instead, a warm oven and a few basic ingredients create a batch of perfect easy baked treats. These bars are ideal for gatherings, school lunches, or a quiet evening at home. They provide comfort and satisfaction with minimal effort. The structured layers ensure every bite captures the essence of a traditional s’more.
Why You Only Need Four Ingredients
The simplicity of these S’more Bars lies in their minimal ingredient list. This is true 4-ingredient baking at its finest. Each component plays a crucial role, building layers of flavor and texture that perfectly mimic the classic campfire treat. There is no need for complex mixtures or obscure items. Just four readily available ingredients combine to create something truly special.
The foundation begins with graham cracker crumbs. These provide the characteristic crunch and subtle honey-like sweetness of the s’mores base. The crackers are crushed to a fine texture, ensuring a cohesive and sturdy crust. This layer offers a satisfying contrast to the softer toppings.
Next, melted butter acts as the binder for the graham cracker crumbs. It infuses the crust with a rich, buttery flavor and helps it set into a firm base. The butter ensures the crust holds together without crumbling. It also contributes to the golden-brown finish during baking. This simple addition elevates the cracker base from loose crumbs to a proper foundation.
The heart of any s’more is the chocolate. For these bars, rich chocolate chips create a decadent, gooey layer. When heated, these chips melt into a smooth, luxurious blanket over the crust. They provide the deep, sweet chocolate flavor essential to the s’mores experience. The specific type of chocolate chip can influence the final taste, allowing for a personalized touch even within the four-ingredient constraint.
Finally, fluffy marshmallows crown these delightful bars. These marshmallows puff up and toast to a golden perfection in the oven. They develop a slightly crisp exterior and a wonderfully gooey, melted interior. This caramelization provides the iconic toasted marshmallow taste and texture that defines a s’more. Together, these four ingredients create a harmonious blend of textures and tastes.
Step-by-Step Baking Guide
Creating these simple S’more Bars is straightforward. Following these steps ensures a delicious batch of bars every time. Precision in measurements and timings is key to achieving the desired outcome.
Step 1: Prep
Begin by preheating your oven. Set the temperature to 350F (175C). Proper oven temperature is critical for achieving the correct texture for both the crust and the marshmallows. While the oven preheats, prepare your baking pan. You will need an 8×8 or 9×9 inch baking pan. Line this pan completely with parchment paper. Allow the parchment paper to hang over the edges of the pan. These overhangs will serve as convenient handles later, making it easy to lift the entire batch of S’more Bars out for cooling and slicing. This step is crucial for non-stick removal.
Step 2: The Crust
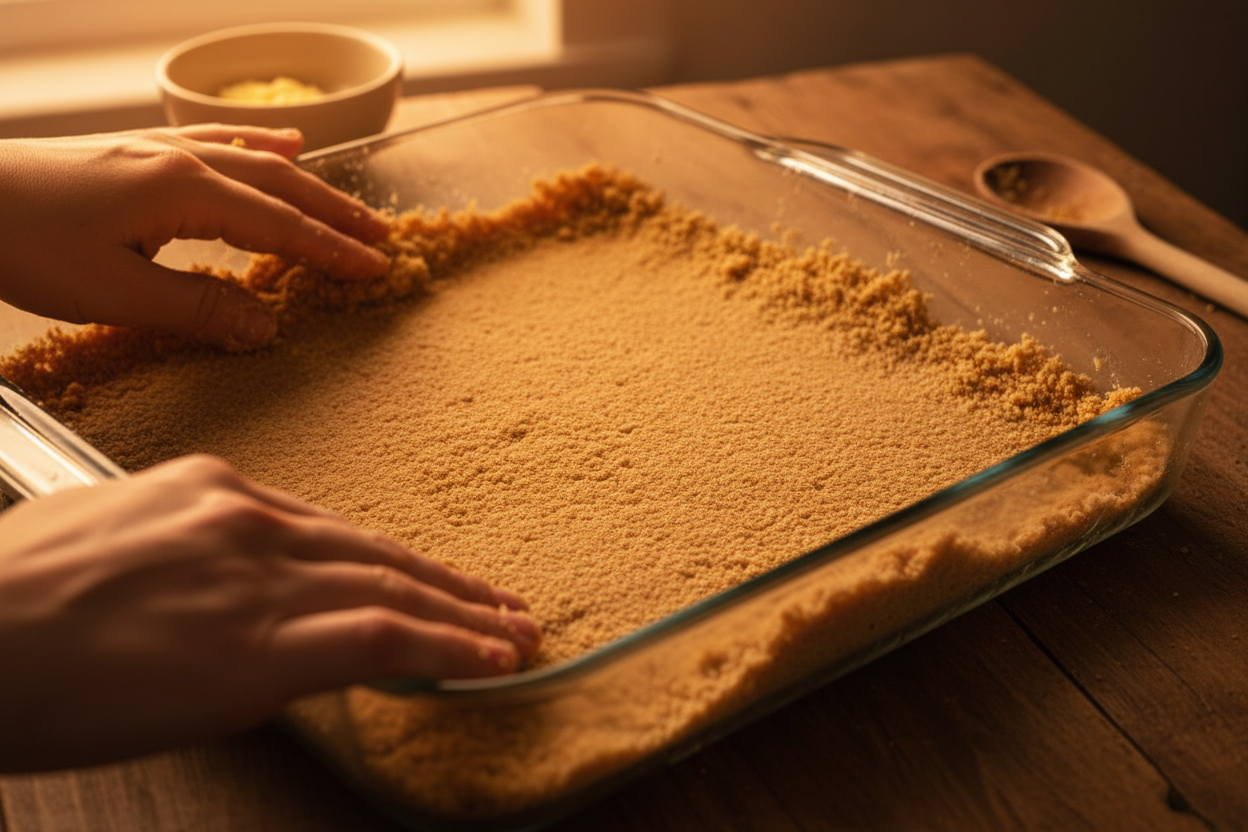
In a medium-sized mixing bowl, combine 2 cups of graham cracker crumbs. These crumbs should be fine and evenly crushed for a consistent crust texture. Add 1/2 cup of melted butter to the graham cracker crumbs. Use a spoon or spatula to mix these two ingredients thoroughly until all the crumbs are moistened and coated by the butter. The mixture should resemble wet sand.
Transfer this graham cracker mixture into the bottom of your prepared baking pan. Using the back of a spoon or your clean fingers, press the mixture down firmly and evenly into the bottom of the pan. Ensure there are no loose spots and that the crust forms a compact, solid layer. This firm pressing prevents the crust from crumbling after baking.
Bake the crust in the preheated oven for 8-10 minutes. This initial bake helps to set the crust and develop a lightly golden color and a subtle toasted flavor. Once baked, remove the pan from the oven. Keep the oven on, as the bars will return shortly. The crust will be warm and fragrant.
Step 3: The Chocolate Layer
Immediately after removing the warm crust from the oven, sprinkle 2 cups of chocolate chips evenly over its surface. Distribute the chocolate chips to cover the entire crust from edge to edge. Do not stir or press them down.
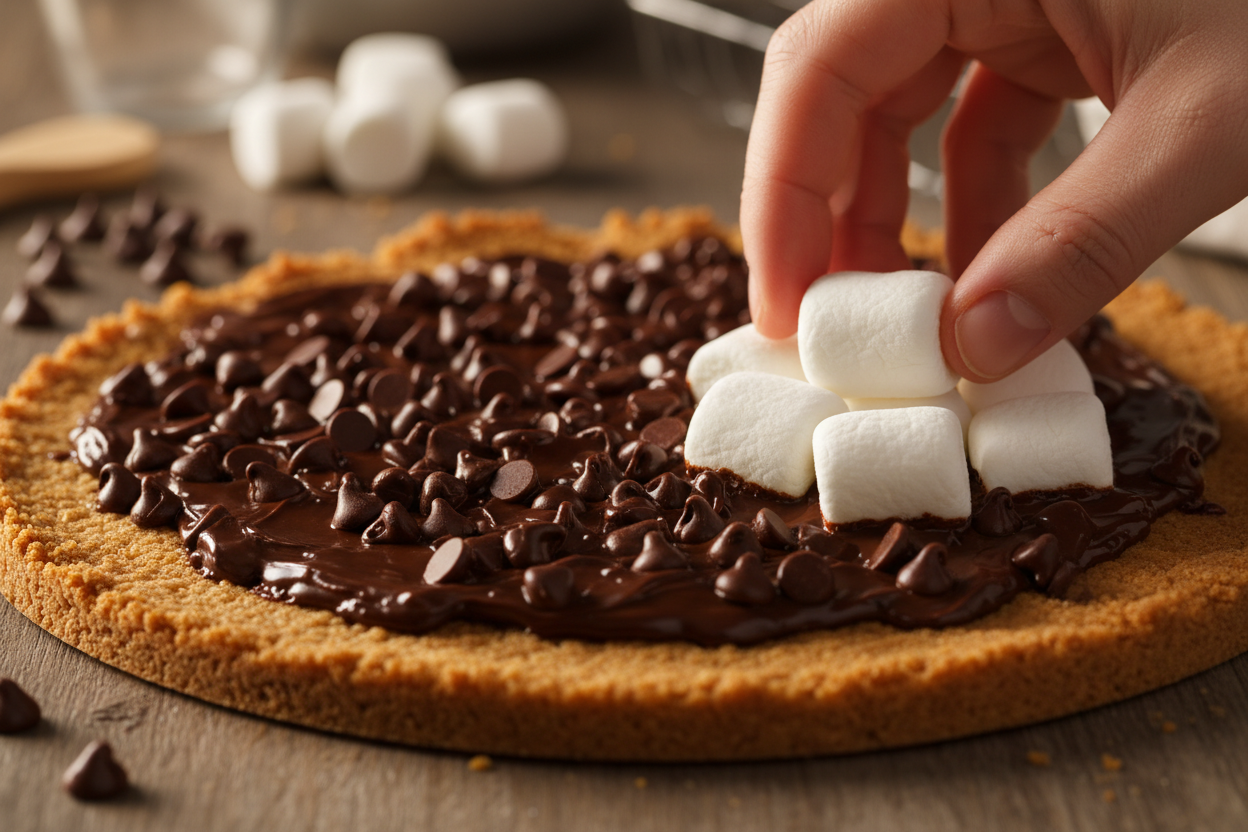
Allow the pan to sit undisturbed for approximately 2 minutes. The residual heat from the warm crust will begin to soften the chocolate chips. This short resting period encourages the chocolate to melt slightly, creating a smooth and gooey layer when spread. After 2 minutes, use the back of a spoon or an offset spatula to gently spread the now-softened chocolate chips into an even layer. This creates the rich, fudgy middle section of your S’more Bars.
Step 4: The Marshmallow Topping
Once the chocolate layer is spread, top it evenly with 3 cups of marshmallows. Distribute the marshmallows across the entire surface of the chocolate. You can use mini marshmallows for a more uniform coverage, or larger ones cut in half. The goal is to create a full layer that will puff and toast beautifully.
Return the baking pan to the preheated oven. Bake for an additional 10-15 minutes. During this time, keep a close watch on the marshmallows. They will begin to puff up significantly and develop a beautiful toasted golden brown color on top. The exact baking time can vary based on your oven and personal preference for marshmallow toastiness. Remove the pan from the oven once the marshmallows reach your desired golden-brown hue. They will be sticky and warm.
Step 5: Cooling
This step is critical for perfectly formed S’more Bars. It is tempting to cut into these warm, gooey treats immediately, but patience is essential. Let the S’more Bars cool completely at room temperature. This cooling process typically takes about 2 hours. During this time, the chocolate layer will firm up, and the marshmallows will set. Allowing them to cool fully ensures clean, neat cuts when slicing. Attempting to slice them while warm will result in a sticky, messy outcome where layers may pull apart.
Tips for Clean Slicing
Cutting through sticky, toasted marshmallows can be challenging. A few simple techniques ensure beautiful, clean slices every time. These tips help maintain the integrity of each bar.
First, ensure the S’more Bars are completely cooled. As mentioned, this means waiting at least 2 hours after baking. Trying to cut them warm will always lead to a sticky mess.
Next, prepare your knife. The best tool for this job is a large, sharp chef’s knife or a serrated knife. Heat the knife by running it under very hot water for a few seconds. Immediately wipe it dry. Then, lightly coat both sides of the blade with a neutral-flavored oil, such as vegetable or canola oil. The hot, oiled blade will glide through the sticky marshmallows and set chocolate without excessive pulling or sticking. Reheat and re-oil the knife as needed between cuts.
When cutting, use a firm, decisive motion. Press straight down through the layers rather than dragging the knife. For very sticky sections, you may need to apply slight pressure and gently rock the blade. Clean the knife periodically with a hot, oiled cloth to prevent buildup. This preparation and technique will yield perfectly defined squares or rectangles.
“Patience during cooling and a properly prepared knife are the secrets to perfectly sliced S’more Bars. Rushing this step compromises the integrity and appearance of these delightful treats.”
Storage Instructions
Once your S’more Bars are cooled and sliced, proper storage keeps them fresh and delicious for several days. These baked campfire treats are best enjoyed within a few days of preparation.
Store the bars in an airtight container. This prevents them from drying out and protects them from absorbing other odors. Place a piece of parchment paper between layers of bars if stacking them to prevent sticking. Keep the container at room temperature. There is no need to refrigerate these bars. Refrigeration can cause the chocolate to harden too much and may alter the texture of the marshmallows, making them chewy rather than soft.
For longer storage, S’more Bars can be frozen. Wrap individual bars tightly in plastic wrap, then place them in an airtight, freezer-safe container or bag. They can be frozen for up to 1 month. Thaw frozen bars at room temperature before serving. These storage methods ensure your easy baked treats remain a delightful snack whenever a craving strikes.
These S’more Bars bring the essence of a memorable outdoor experience directly into your home kitchen. Their simple preparation, use of only four core ingredients, and comforting flavors make them an instant favorite. Enjoy the convenience of this wonderful indoor marshmallow dessert.
For more inspiring recipes and baking tips, make sure to follow our community on Facebook. We share daily updates and engage with fellow baking enthusiasts. Follow our Facebook page here for all the latest deliciousness.
4-Ingredient S'more Bars
Ingredients
- 2 cups graham cracker crumbs Crushed fine for the crust.
- 1/2 cup butter Melted.
- 2 cups chocolate chips Semi-sweet or milk chocolate.
- 3 cups marshmallows Mini marshmallows work best for even layering.
Instructions
- Preheat oven to 350F (175C) and line an 8x8 or 9x9 inch baking pan with parchment paper.
- In a medium bowl, mix graham cracker crumbs and melted butter until it resembles wet sand.
- Press the graham cracker mixture firmly into the bottom of the prepared baking pan to form an even crust.
- Bake the crust for 8-10 minutes until lightly golden. Remove from oven.
- Sprinkle the chocolate chips evenly over the warm crust. Let sit for 2 minutes to soften slightly.
- Top evenly with marshmallows.
- Return to the oven and bake for 10-15 minutes, or until the marshmallows are puffed and toasted golden brown.
- Let the bars cool completely before slicing (about 2 hours) to ensure clean cuts.
For more daily recipes and tips, follow us on Facebook!
Click here to join our community!