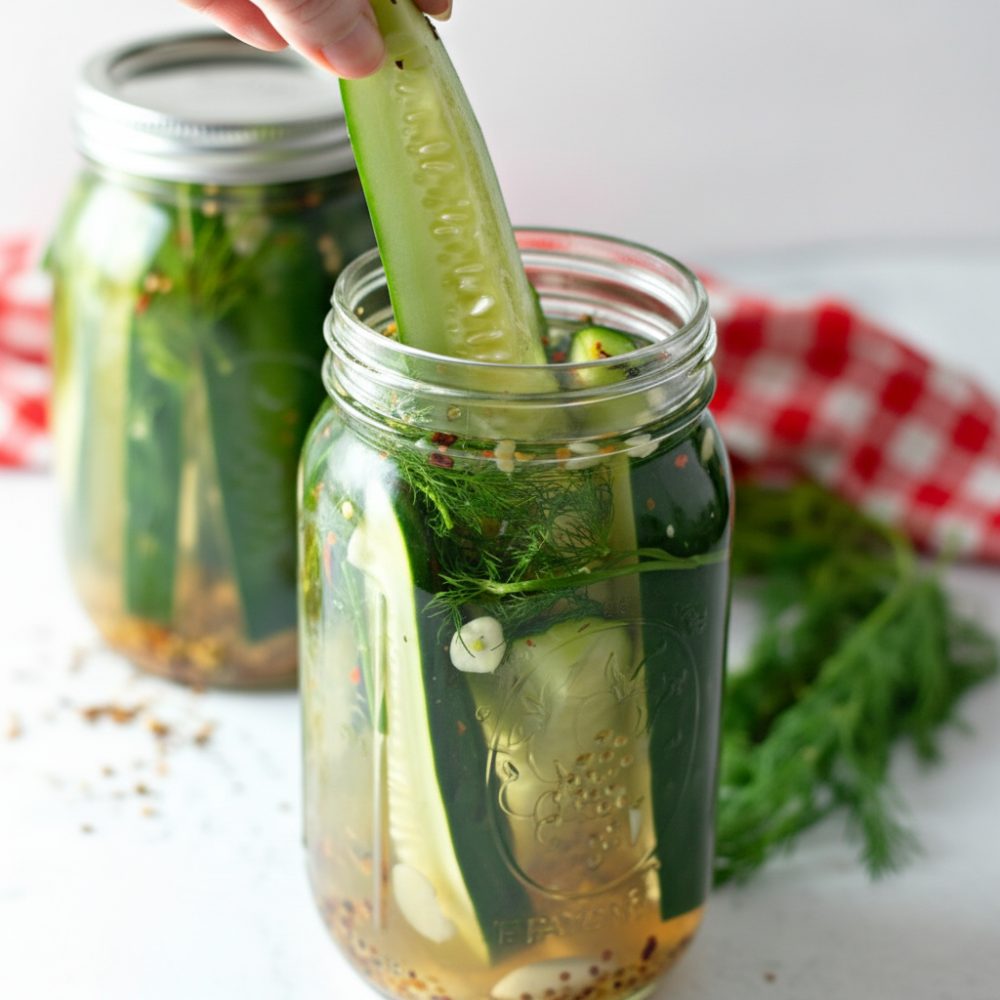
There is an undeniable satisfaction that comes from making your own food from scratch. When it comes to preserving the crispness and vibrant flavor of fresh produce, few methods are as rewarding and straightforward as crafting your own refrigerator dill pickles. Forget complicated canning processes; this approach makes enjoying homemade pickles incredibly accessible. You are just a few simple steps away from a jar full of tangy, garlicky, and perfectly crunchy dill spears or chips, ready to elevate any meal or snack.
Why You Will Love This Quick Pickling Recipe
Making homemade pickles does not need to be an intimidating endeavor. This particular method eliminates the need for special canning equipment, pressure canners, or extensive processing times. It is a true “set it and forget it” kind of preparation, perfect for those new to pickling or anyone seeking a speedy solution for preserving fresh cucumbers. The beauty of this quick pickling recipe lies in its simplicity and the immediate gratification it offers. Within just 24 hours, you can have crisp, flavorful pickles ready for enjoyment. These are genuine no-canning pickles, meaning they are stored in the refrigerator and maintain a superior crunch that traditional canned pickles often lose during the heating process. The flavors develop beautifully over a few days, integrating the sharp tang of the vinegar brine with the aromatic notes of fresh dill and garlic. It is an ideal way to capture the essence of summer cucumbers and enjoy them long after the harvest season.
Essential Ingredients
Achieving the perfect tangy crunch in your refrigerator dill pickles starts with selecting high-quality, fresh ingredients. Each component plays a crucial role in the final flavor profile and texture. Here is what you will need:
- 1 lb Cucumbers (Kirby or Persian): These varieties are specifically chosen for their thin skins and minimal seeds, which contribute to a firm, crisp pickle. Ensure they are fresh and free from blemishes.
- 1 cup Water: Forms the base of your brine, helping to dilute the vinegar to the perfect pickling strength.
- 1 cup White vinegar: The cornerstone of any good pickle. White vinegar, with its 5% acidity, provides the necessary tang and acts as a preserving agent for your easy pickle brine.
- 1 tbsp Kosher salt: Essential for flavor and drawing moisture from the cucumbers, contributing to their crunch. Avoid iodized table salt, as it can make the brine cloudy and add an off-flavor.
- 4 sprigs Fresh dill: The star herb for classic dill pickles. Fresh dill offers a bright, herbaceous, and slightly grassy flavor that is synonymous with authentic dill pickles.
- 4 cloves Garlic (smashed): Smashing the garlic cloves releases their aromatic compounds more effectively, infusing the brine with a pungent, savory depth.
- 1 tsp Mustard seeds: These small seeds add a subtle peppery bite and a warm, earthy undertone to the brine.
- 1 tsp Black peppercorns: Contributes a mild, spicy complexity, rounding out the flavor of the garlic dill spears.
Step-by-Step Instructions
Follow these precise steps to create your own batch of irresistible fresh dill cucumbers. The process is designed to be straightforward, ensuring excellent results every time.
- Begin by thoroughly washing your 1 lb of cucumbers under cold running water. Once clean, decide whether you prefer spears or chips. For spears, slice the cucumbers lengthwise into quarters or eighths, depending on their size. For chips, slice them into ¼-inch thick rounds. Crucially, always trim and discard the blossom end of each cucumber. This small detail is vital for preventing soft pickles.
- Next, prepare your easy pickle brine. In a medium saucepan, combine 1 cup water, 1 cup white vinegar, and 1 tbsp kosher salt. Gently heat the mixture over medium heat, stirring occasionally, until the salt has completely dissolved. It is important not to boil the brine aggressively, just warm it enough to dissolve the salt. Once dissolved, remove the saucepan from the heat and allow the brine to cool down entirely. This cooling step is critical for maintaining the crispness of your cucumbers.
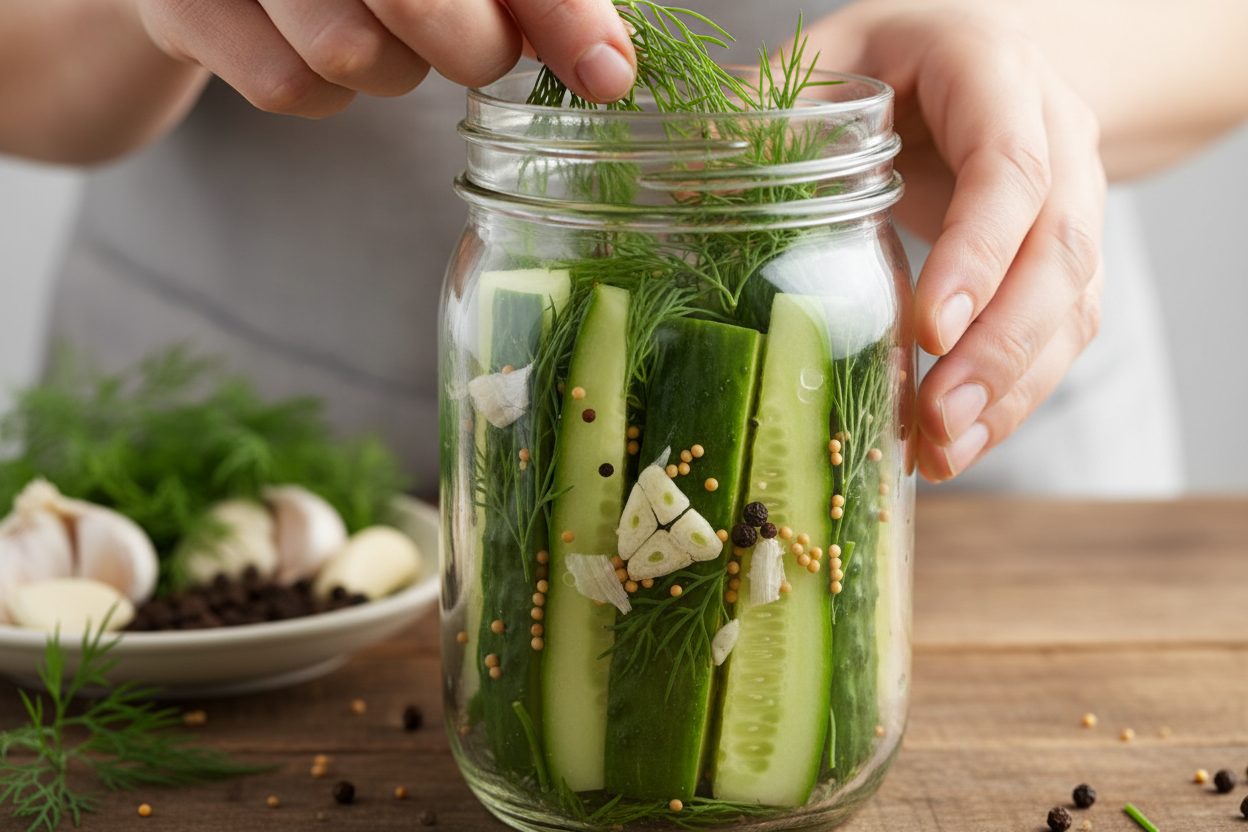
- While the brine is cooling, prepare your jar. Take a clean 32-ounce glass jar. Tightly pack the prepared cucumber slices into the jar. Distribute the 4 sprigs of fresh dill, 4 smashed garlic cloves, 1 tsp mustard seeds, and 1 tsp black peppercorns evenly among the cucumbers. Packing them snugly helps prevent the cucumbers from floating and ensures maximum contact with the brine.
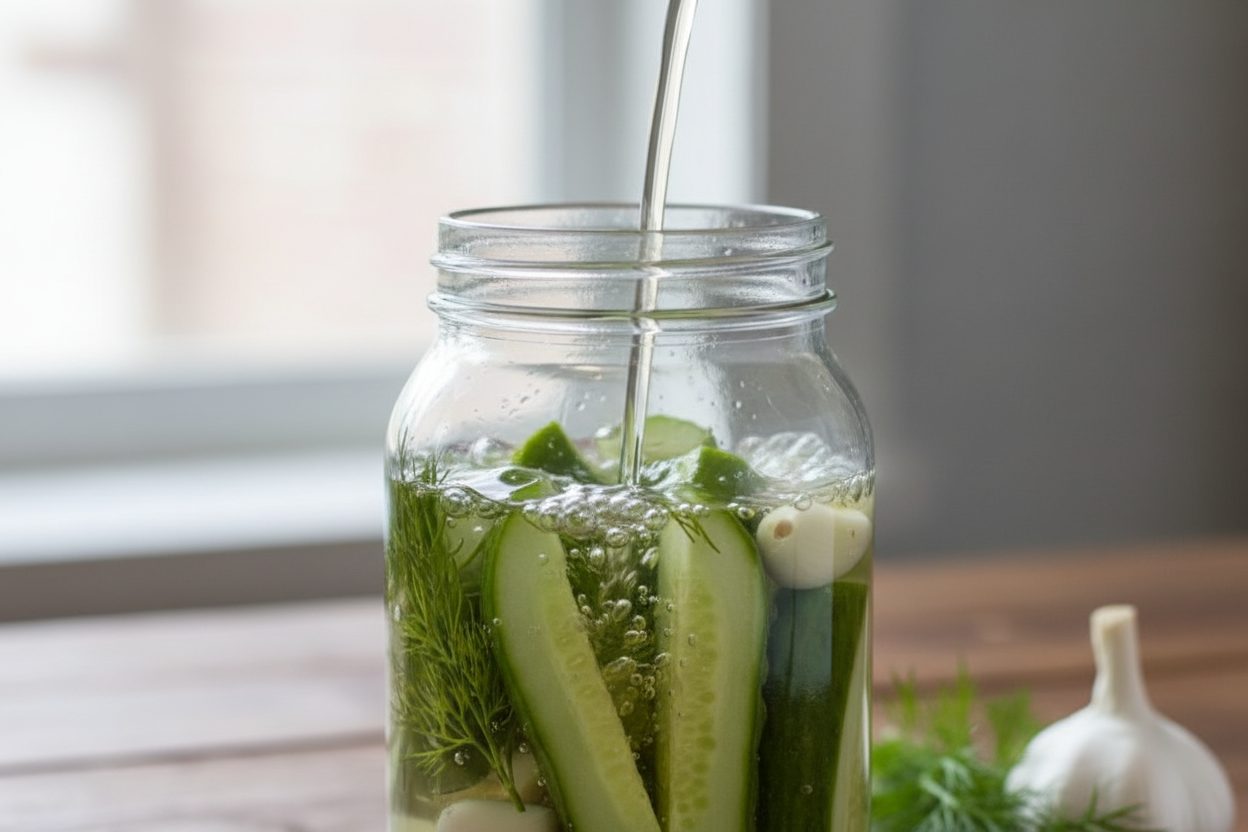
- Once the brine has reached room temperature or is completely cool, carefully pour the liquid over the packed ingredients in the jar. Ensure that the cucumbers are fully submerged in the brine. If any cucumber pieces are exposed to the air, they may not pickle properly and could spoil.
- Seal the jar tightly with its lid. Place the sealed jar in the cold section of your refrigerator. Allow the refrigerator dill pickles to pickle for at least 24 hours before you begin enjoying them. The flavor and crunch will improve even further over the next few days.
Pro Tips for Maximum Crunch
The quest for the ultimate crunchy pickle is a common one, and a few simple tricks can make all the difference in your batch of garlic dill spears.
- Trim the Blossom End: This is perhaps the most important tip. Cucumbers have a stem end and a blossom end. The blossom end contains enzymes that, if left intact, can cause your pickles to soften significantly. Always slice off about ¼ inch from the blossom end of each cucumber before pickling.
- Cool the Brine Completely: Resist the urge to pour warm brine over your cucumbers. Hot brine will partially cook the cucumbers, leading to a softer texture. A completely cool brine ensures the cucumbers retain their raw, firm state, resulting in a satisfying crunch once pickled.
- Use Fresh, Firm Cucumbers: Overripe or soft cucumbers will never become crunchy pickles, regardless of the pickling method. Always choose firm, unblemished Kirby or Persian cucumbers for the best results.
- Pack Tightly: A tightly packed jar minimizes air pockets and ensures that all cucumber surfaces are submerged in the brine, which is key for uniform pickling and crispness.
Storage and Shelf Life
Because these are no-canning pickles, proper refrigeration is essential for their safety and longevity. Keep your jar of refrigerator dill pickles tightly sealed and stored in the coldest section of your refrigerator. When stored correctly, they are best consumed within 4 to 6 weeks. While they might remain safe to eat for a bit longer, their peak flavor and crunchy texture will start to diminish after this period. Always use a clean utensil when removing pickles from the jar to prevent introducing contaminants that could shorten their shelf life.
Frequently Asked Questions
Here are answers to some common questions about making and enjoying your quick pickling recipe.
- Can I reuse the brine?
- While it might be tempting to reuse the brine from a finished batch of homemade pickles, it is generally not recommended. The brine can become diluted with cucumber juices and may lose some of its acidity and preserving power, increasing the risk of spoilage. For the best safety and flavor, always use a fresh batch of vinegar brine for each new batch of pickles.
- What type of vinegar works best?
- For refrigerator dill pickles, white vinegar (5% acidity) is the ideal choice. Its clear color ensures your pickles retain their natural vibrant hue, and its sharp, clean taste provides the classic pickle tang. Apple cider vinegar can also be used, but it will impart a slightly fruitier flavor and a darker color to your pickles.
- Can I use other types of cucumbers?
- While Kirby or Persian cucumbers are recommended for their ideal texture and seed content, you can experiment with other varieties. English or slicing cucumbers can be used, but you might need to scoop out the seeds from the center first, as they tend to be much larger and can make the pickles watery. Always choose small, firm cucumbers for the best results.
- How long do they need to pickle before eating?
- Your refrigerator dill pickles will be ready to enjoy after a minimum of 24 hours in the fridge. However, for a more developed and robust flavor, allow them to pickle for 3 to 5 days. The longer they sit, the more intense the flavors of the dill, garlic, and spices will become.
- What are the benefits of no-canning pickles?
- The primary benefits of no-canning pickles are their exceptional crispness and the ease of preparation. Without the heat processing involved in traditional canning, the cucumbers retain their firm texture. The simple process also makes them perfect for smaller batches and experimentation, as you do not need specialized equipment or extensive knowledge of canning techniques.
- Can I add other spices or herbs?
- The recipe provides a classic flavor profile with 4 sprigs of fresh dill, 4 smashed garlic cloves, 1 tsp mustard seeds, and 1 tsp black peppercorns. While you can certainly experiment with other spices in future batches, for this specific recipe, stick to the listed quantities to achieve the intended taste of these garlic dill spears.
Creating your own refrigerator dill pickles is a testament to how simple ingredients, combined with a straightforward method, can yield incredibly satisfying results. This quick pickling recipe offers maximum flavor and crunch without the fuss.
Embrace the simplicity and deliciousness of homemade refrigerator dill pickles. This quick pickling recipe delivers fresh, crunchy, and tangy results every time. Enjoy the vibrant flavors of these homemade pickles as a snack, a side dish, or an addition to sandwiches and salads. They are a testament to the fact that some of the best foods are made right in your own kitchen.
For more easy recipes, cooking tips, and behind-the-scenes glimpses into our culinary adventures, be sure to follow our community on Facebook. Find us at Our Facebook Page and join the conversation.
Crispy Homemade Fridge Pickles
Ingredients
- 1 lb Cucumbers Kirby or Persian, sliced into spears
- 1 cup Water Filtered preferred
- 1 cup White vinegar Standard 5% acidity
- 1 tbsp Kosher salt Do not use iodized table salt
- 4 sprigs Fresh dill Whole sprigs
- 4 cloves Garlic cloves Peeled and smashed
- 1 tsp Mustard seeds Yellow or brown
- 1 tsp Black peppercorns Whole
Instructions
- Wash the cucumbers thoroughly and slice them into evenly sized spears.
- In a medium saucepan, combine the water, white vinegar, and kosher salt. Heat over medium heat, stirring occasionally, until the salt is completely dissolved. Remove from heat and let the brine cool to room temperature.
- Pack the cucumber spears tightly into a clean 32-ounce glass jar. Tuck the fresh dill sprigs, smashed garlic cloves, mustard seeds, and black peppercorns in between the cucumbers.
- Pour the cooled brine over the cucumbers until they are completely submerged. Leave about half an inch of headspace at the top of the jar.
- Seal the jar with a tight-fitting lid and refrigerate for at least 24 hours before eating. The flavor will continue to develop over 48 to 72 hours.
For more daily recipes and tips, follow us on Facebook!
Click here to join our community!