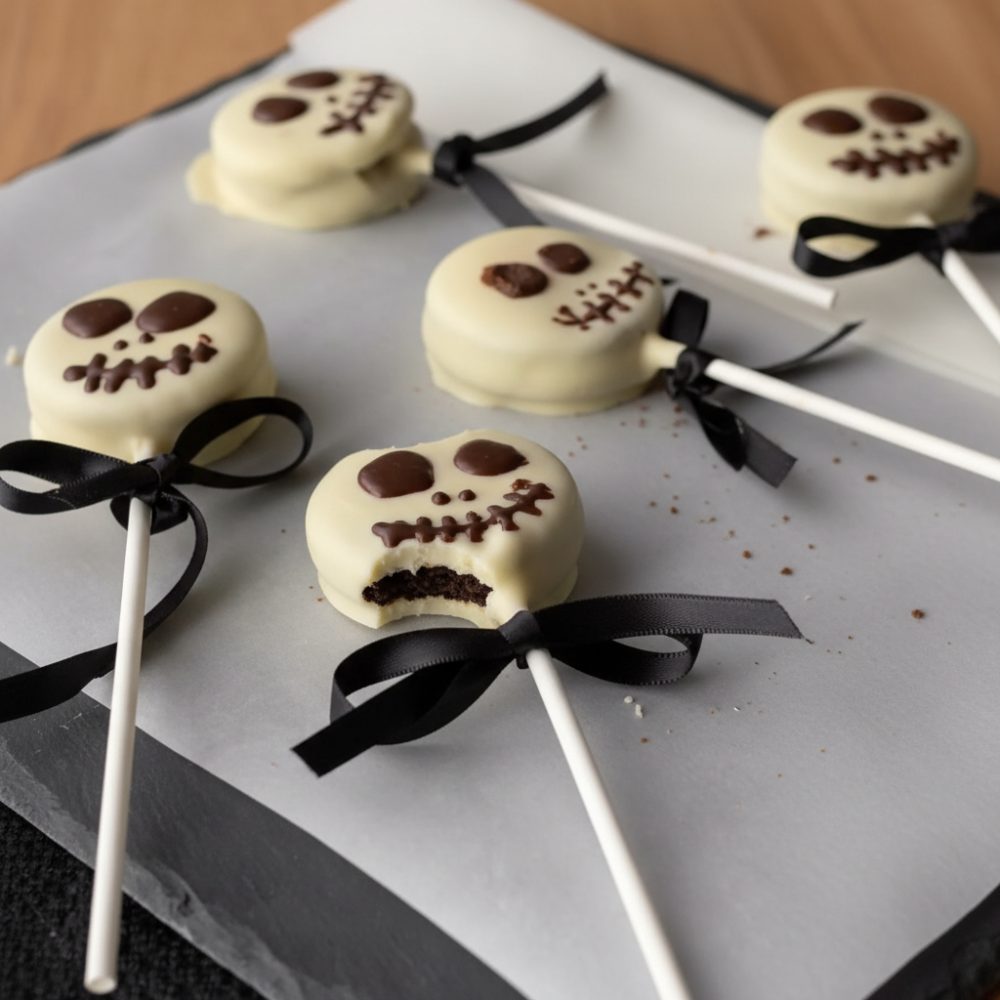
Making your Halloween celebrations memorable does not require complex culinary feats. Sometimes, the most frightful fun comes from the simplest creations. Enter Spooky Skeleton Oreos, an undeniably charming and delightfully easy no-bake dessert that captures the spirit of the season with minimal effort. These kid-friendly Halloween recipes are perfect for bustling parties or a quiet, festive evening at home, transforming a classic cookie into an iconic Halloween treat.
Why These Frightful Desserts Are Perfect for Parties
When planning for Halloween gatherings, the goal is often to find impressive yet manageable Halloween party snacks. Spooky Skeleton Oreos tick every box. They are a fantastic example of DIY Halloween food that involves the whole family, making festive cookie decorating a communal and enjoyable activity. The absence of baking makes these treats incredibly accessible, ideal for busy hosts or those new to kitchen projects. Each white chocolate dipped cookie serves as a canvas for creativity, allowing guests or little ones to personalize their skull face treats. Their robust nature also makes them easy to transport and display, ensuring your dessert table looks perfectly spooky without the stress.
Equipment and Ingredients Needed
Gathering your tools and components beforehand streamlines the entire process, ensuring a smooth and enjoyable decorating session for your Spooky Skeleton Oreos.
Ingredient List
- 1 (15.35-ounce) package OREO sandwich cookies (approximately 36 cookies)
- 24 ounces white candy melts (or white chocolate chips)
- 1 black gel icing pen (fine-tipped)
Step-by-Step Instructions
Creating these chillingly good cookies is a straightforward process. Follow these steps for perfect skull face treats every time.
1. Prep the workspace.
Begin by lining two large baking sheets with parchment paper. This provides a non-stick surface for your dipped cookies and makes cleanup effortless. Arrange your OREO sandwich cookies on the prepared sheets, ensuring they are separated for easy dipping.
2. Melt the white coating.
Place 24 ounces of white candy melts (or white chocolate chips) into a microwave-safe bowl. Heat the candy melts in 30-second intervals, stirring thoroughly after each interval, until completely smooth and melted. Be careful not to overheat the mixture, as this can cause it to seize. A perfectly smooth consistency is key for even white chocolate dipped cookies.
3. Dip the cookies.
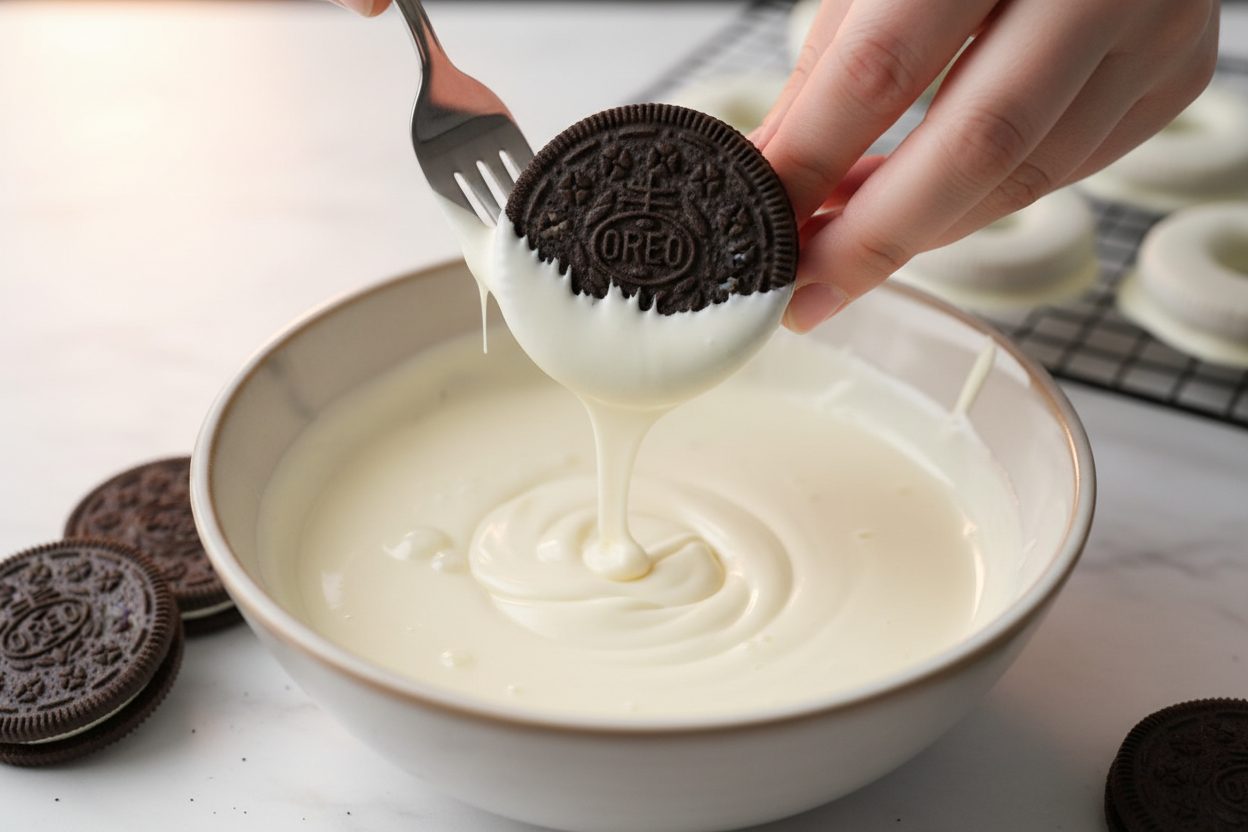
Using a fork or a dipping tool, carefully submerge one OREO cookie into the melted white candy. Ensure the cookie is fully coated. Gently tap the fork against the side of the bowl to remove any excess coating. This prevents pooling and ensures a clean finish. Place the coated cookie back onto the prepared parchment paper-lined baking sheet. Repeat this process for all 36 cookies.
4. Chill to set.
Once all OREO sandwich cookies are dipped, transfer the baking sheets to the refrigerator. Allow the white candy coating to set completely. This typically takes about 15-20 minutes, or until the coating is firm to the touch. Rushing this step can lead to smudged decorations later.
5. Decorate the skull faces.
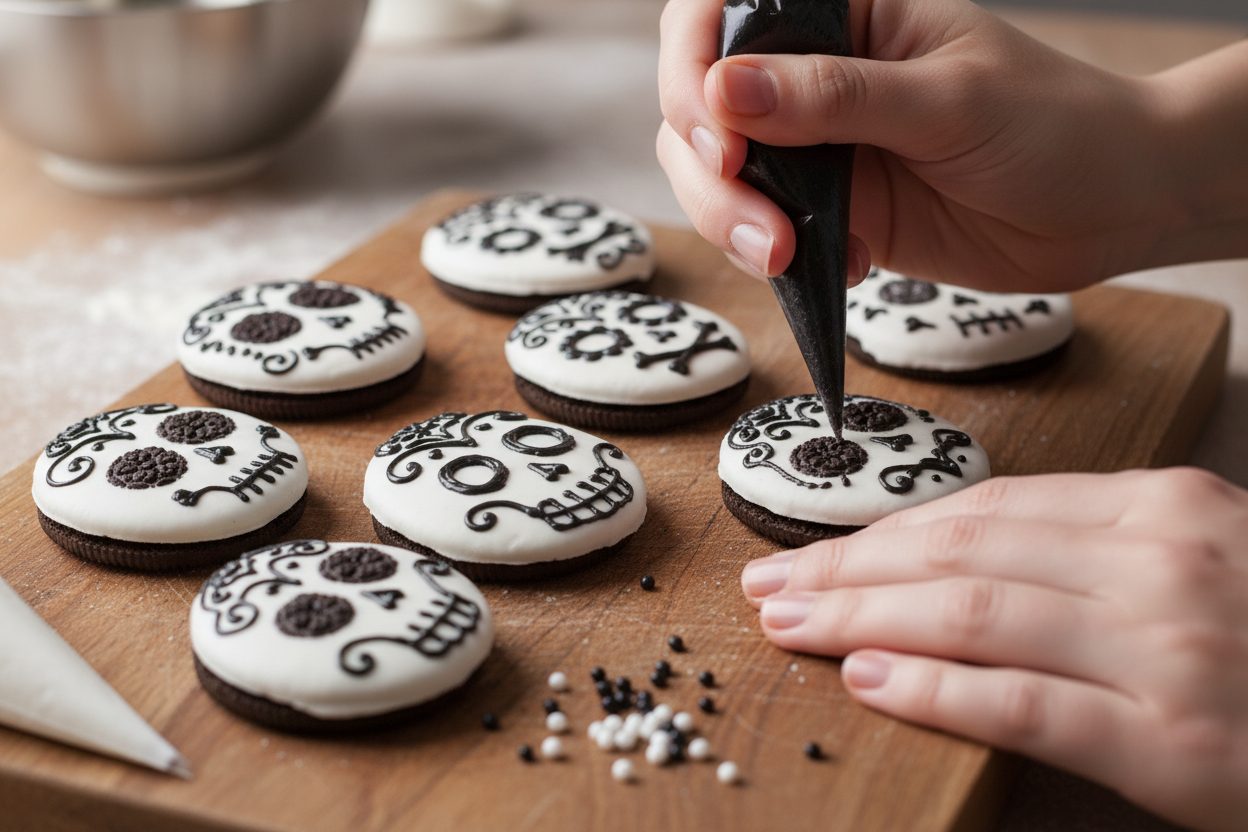
Once the white coating is fully set, it is time to bring your Spooky Skeleton Oreos to life. Take your fine-tipped black gel icing pen. Carefully draw two small oval shapes for the eyes near the top of each cookie. Below the eyes, draw an inverted heart shape or a small triangle for the nose. Finally, create a series of short, vertical lines across a horizontal line to form a skeletal mouth. Allow the icing to dry for a few minutes before handling extensively.
Expert Tips for Smooth Chocolate Coating
Achieving a perfectly smooth, glossy white chocolate dipped cookie requires a few tricks.
For a thinner, more manageable coating, you can add 1 teaspoon of coconut oil to the white candy melts during the melting process. Stir well until fully incorporated. This helps the coating spread more evenly and reduces clumping, resulting in a sleeker finish on your Spooky Skeleton Oreos. Always use a clean, dry bowl and utensils, as even a tiny drop of water can cause chocolate to seize.
Ensure your cookies are at room temperature before dipping. Cold cookies can cause the coating to set too quickly, leading to an uneven texture. Work efficiently but without rushing. If the coating starts to thicken, gently reheat it in the microwave for 10-15 seconds, stirring well.
Fun Variations and Decorating Ideas
While the classic skull face treats are a hit, there are many ways to get creative with your festive cookie decorating.
Consider using different colors of candy melts. Orange, green, or purple dipped cookies can add a vibrant touch to your Halloween party snacks. You could then use the black gel pen to draw spiderwebs, bats, or ghosts on these colored bases. For extra texture and sparkle, sprinkle edible glitter or Halloween-themed sprinkles onto the wet white coating immediately after dipping, before it sets. This adds another dimension to your DIY Halloween food presentation. You might also experiment with edible markers in other colors for more detailed skull face treats or to create different monster expressions.
Storage and Make-Ahead Advice
Spooky Skeleton Oreos are excellent for preparing in advance. Once fully decorated and the icing has dried, store the cookies in an airtight container at room temperature. Layer them between sheets of parchment paper to prevent sticking and preserve the delicate decorations. They will maintain their freshness and appearance for up to 1 week. Avoid refrigerating after decorating, as condensation can affect the texture of the coating and potentially smudge the icing. These easy no-bake desserts are best enjoyed within a few days of making for optimal flavor and crispness.
Frequently Asked Questions
Q: Can I use regular white chocolate instead of candy melts?
A: Yes, you can use good quality white chocolate chips. However, candy melts are formulated to melt smoothly and set firmly, making them easier to work with for dipping. If using white chocolate, ensure it is tempered correctly for a stable and glossy finish, or add a small amount of coconut oil to help with consistency.
Q: What if my black gel icing pen isn’t drawing smoothly?
A: Sometimes gel icing pens can get clogged or too cold. Try warming the tip slightly in your hand or running it under warm water for a few seconds. If it’s too cold, the icing will be stiff. Ensure the pen is kept at room temperature for the best flow.
Q: Can children help make these Spooky Skeleton Oreos?
A: Absolutely. These are among the best kid-friendly Halloween recipes. Younger children can help place cookies on parchment paper and even assist with dipping under supervision. Older children will love the creative aspect of decorating the skull face treats with the gel pen.
These Spooky Skeleton Oreos are a testament to how simple ingredients can create show-stopping Halloween party snacks. Whether you are a seasoned baker or new to the kitchen, these white chocolate dipped cookies are a delightful project that yields impressive and delicious results.
For more festive cookie decorating ideas and everyday recipes, be sure to follow our community on Facebook. You can find us at our official Facebook page. We love sharing our latest culinary adventures and hearing from you!

Easy White Chocolate Skeleton Cookies
Ingredients
- 15.25 oz Double Stuf Chocolate Sandwich Cookies 1 standard package
- 16 oz White Candy Melts Can substitute with high-quality white chocolate chips
- 1 tbsp Coconut Oil Helps thin the coating for easier dipping
- 1 tube Black Decorating Icing Or an edible black marker if the coating is completely dry
Instructions
- Line a large baking sheet with parchment paper to prepare your workspace.
- In a microwave-safe bowl, combine the white candy melts and coconut oil. Microwave in 30-second intervals, stirring in between, until completely smooth.
- Drop each cookie into the melted white coating. Use a fork to flip and fully submerge, then lift it out, tapping gently on the edge of the bowl to remove excess.
- Place the coated cookies onto the prepared baking sheet. Transfer to the refrigerator for 15 minutes or until the coating is completely hardened.
- Using the black decorating icing, draw two large circles for eyes, a small upside-down heart for the nose, and a stitched line for the mouth to create the skull faces. Allow icing to set before serving.
For more daily recipes and tips, follow us on Facebook!
Click here to join our community!