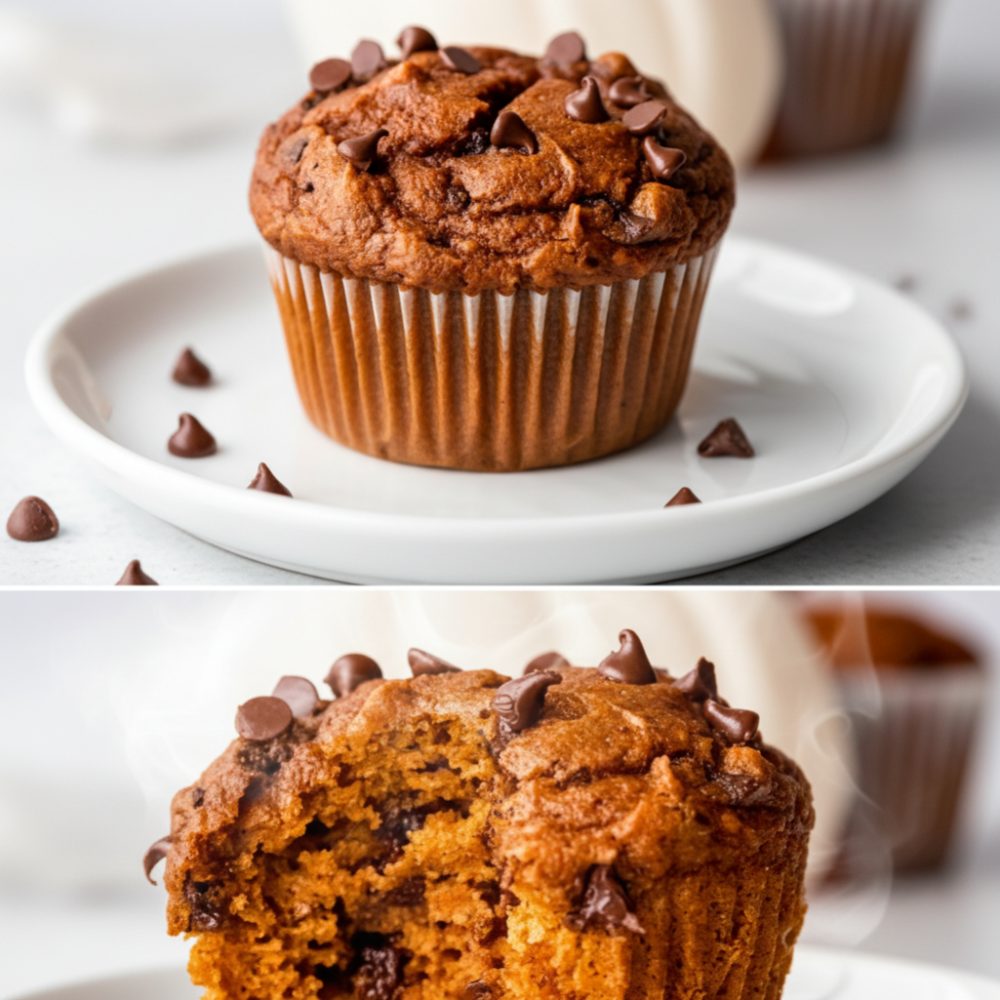
Healthy Fall Baked Goods: A Step-by-Step Guide
As autumn’s crisp air arrives, the craving for warm, comforting flavors becomes undeniable. This season brings a wealth of produce, with pumpkin leading the charge, inviting us into the kitchen for cozy baking sessions. Forget the overly sweet, calorie-laden treats. This guide focuses on creating delicious, nourishing alternatives that satisfy your autumnal desires without derailing your health goals. We explore the art of crafting Pumpkin Protein Muffins, a perfect blend of seasonal taste and beneficial macros. These delightful morsels are an ideal solution for those seeking healthy autumn snacks, a quick protein boost, or a satisfying start to the day.
Introduction to Nutritious Autumn Baking
The changing leaves signal a shift in our culinary preferences, drawing us towards spices, squash, and hearty baked goods. Traditional fall recipes, while comforting, often come with a high sugar and fat content. This recipe for Pumpkin Protein Muffins offers a refreshing change. By incorporating quality protein powder, we transform a classic comfort food into a functional treat. These muffins are not just moist and flavorful; they are designed to support your active lifestyle, making them suitable for anyone looking for a guilt-free indulgence or a nutritious boost. They represent the best of whey protein powder baking, proving that wholesome can also be incredibly tasty.
Why Bake With Seasonal Squash
Seasonal squash, particularly pumpkin, is a cornerstone of autumn cooking for good reason. Beyond its vibrant color and earthy sweetness, pumpkin is packed with nutritional benefits. It is rich in vitamins, particularly Vitamin A, and antioxidants, contributing to overall well-being. Using pumpkin puree adds natural moisture and flavor to baked goods, often reducing the need for excessive fats or sugars. This natural sweetness and creamy texture make it an excellent base for various recipes, from savory dishes to sweet treats. When integrated into muffins, pumpkin elevates the flavor profile, creating a comforting taste reminiscent of the season. It provides a dense, satisfying texture that makes these muffins feel truly substantial, distinguishing them from lighter, airier pastries. The deep, warm notes of pumpkin pair perfectly with a medley of spices, creating a truly harmonious flavor experience.
Essential Ingredients and Tools
Crafting the perfect batch of Pumpkin Protein Muffins requires careful selection of ingredients and the right equipment. Precision ensures consistent results and optimal flavor.
Dry Ingredients
The dry components form the structural base and flavor profile of our muffins. You will need 1 cup (120g) of all-purpose flour. For those following specific dietary needs, a gluten-free flour blend can be used as a direct substitute. A critical addition for enhancing the nutritional value is 1/2 cup (60g) of vanilla or unflavored whey protein powder, contributing to the “muscle building dessert” aspect of these treats. To achieve the perfect rise and texture, include 1 teaspoon of baking powder and 1/2 teaspoon of baking soda. The quintessential autumn flavor profile comes from 1 teaspoon of ground cinnamon, 1/2 teaspoon of ground ginger, 1/4 teaspoon of ground nutmeg, and 1/8 teaspoon of ground cloves. A 1/4 teaspoon of salt balances the sweetness and enhances all the other flavors.
Wet Ingredients
The wet ingredients bind the dry components, providing moisture and richness. Begin with 1 cup (240g) of pure pumpkin puree, ensuring it is not pie filling. Two large eggs act as a binder and add richness. For sweetness, 1/2 cup (120ml) of pure maple syrup provides a natural, unrefined sugar source. To introduce additional moisture and a creamy texture, incorporate 1/4 cup (60ml) of unsweetened almond milk. You will also need 1/4 cup (60ml) of melted coconut oil, or another neutral oil, to contribute to the tender crumb. Finally, 1 teaspoon of vanilla extract enhances the overall aroma and flavor.
The Right Baking Equipment
Having the correct tools makes the baking process smoother and more efficient. For these muffins, you will need:
* A 12-cup muffin tin
* Paper liners
* Two large mixing bowls
* A whisk
* A rubber spatula or wooden spoon
* Measuring cups and spoons
* A wire cooling rack
* A toothpick or small skewer for testing doneness
These basic tools are commonly found in most kitchens and are essential for successful muffin preparation. They ensure each step is executed with ease, leading to perfectly baked muffins every time.
Step-by-Step Instructions
Following these instructions precisely will result in perfectly baked Pumpkin Protein Muffins. Adherence to temperatures and mixing techniques is key for achieving the ideal texture and flavor.
1. Preheat the oven to 350 degrees Fahrenheit and line a 12-cup tin with paper liners.
Before you begin mixing, set your oven to 350°F (175°C). This ensures the oven is at the correct temperature when the muffins are ready to bake, promoting an even rise and thorough cooking. Prepare your muffin tin by placing paper liners in all 12 cups. This prevents sticking and makes cleanup easier.
2. In a large bowl, whisk together the puree, eggs, and maple syrup until smooth.
In a spacious mixing bowl, combine 1 cup (240g) of pumpkin puree, 2 large eggs, 1/2 cup (120ml) of pure maple syrup, 1/4 cup (60ml) of unsweetened almond milk, 1/4 cup (60ml) of melted coconut oil, and 1 teaspoon of vanilla extract. Whisk these wet ingredients together thoroughly until the mixture is smooth and well-combined. This initial step ensures an even distribution of flavor and moisture.
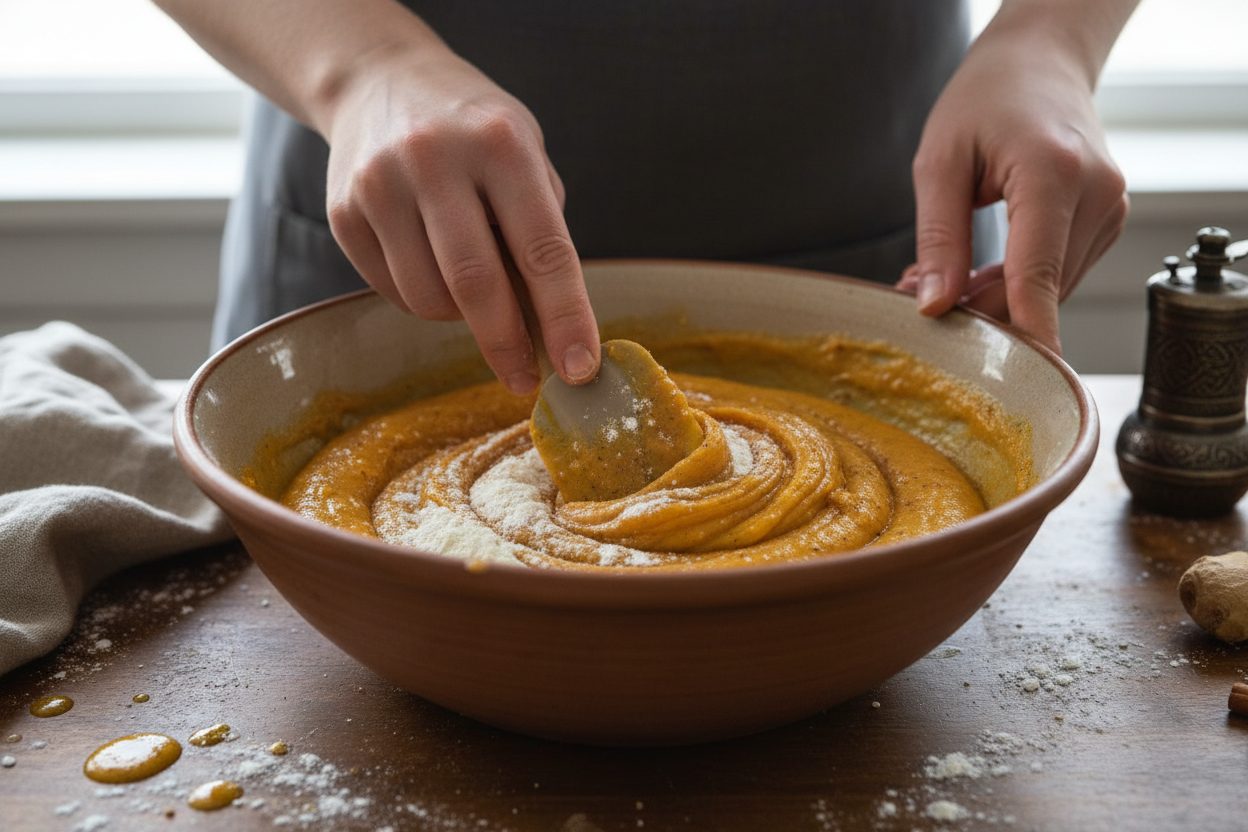
3. In a separate bowl, combine the flour, protein powder, baking powder, and spice blend.
Take a separate medium bowl. Add 1 cup (120g) of all-purpose flour, 1/2 cup (60g) of vanilla or unflavored whey protein powder, 1 teaspoon of baking powder, 1/2 teaspoon of baking soda, 1 teaspoon of ground cinnamon, 1/2 teaspoon of ground ginger, 1/4 teaspoon of ground nutmeg, 1/8 teaspoon of ground cloves, and 1/4 teaspoon of salt. Use a whisk to gently combine these dry ingredients, breaking up any lumps and ensuring the spices are evenly distributed throughout the flour and protein powder. This step is crucial for consistent flavor and texture in the final product.
4. Gently fold the dry mixture into the wet ingredients until just combined, being careful not to overmix.
Pour the dry ingredient mixture into the bowl with the wet ingredients. Using a rubber spatula or wooden spoon, gently fold the two mixtures together. Mix only until the flour streaks have just disappeared. Overmixing can develop the gluten in the flour too much, resulting in tough, dense muffins. A few small lumps in the batter are acceptable and often lead to a more tender muffin.
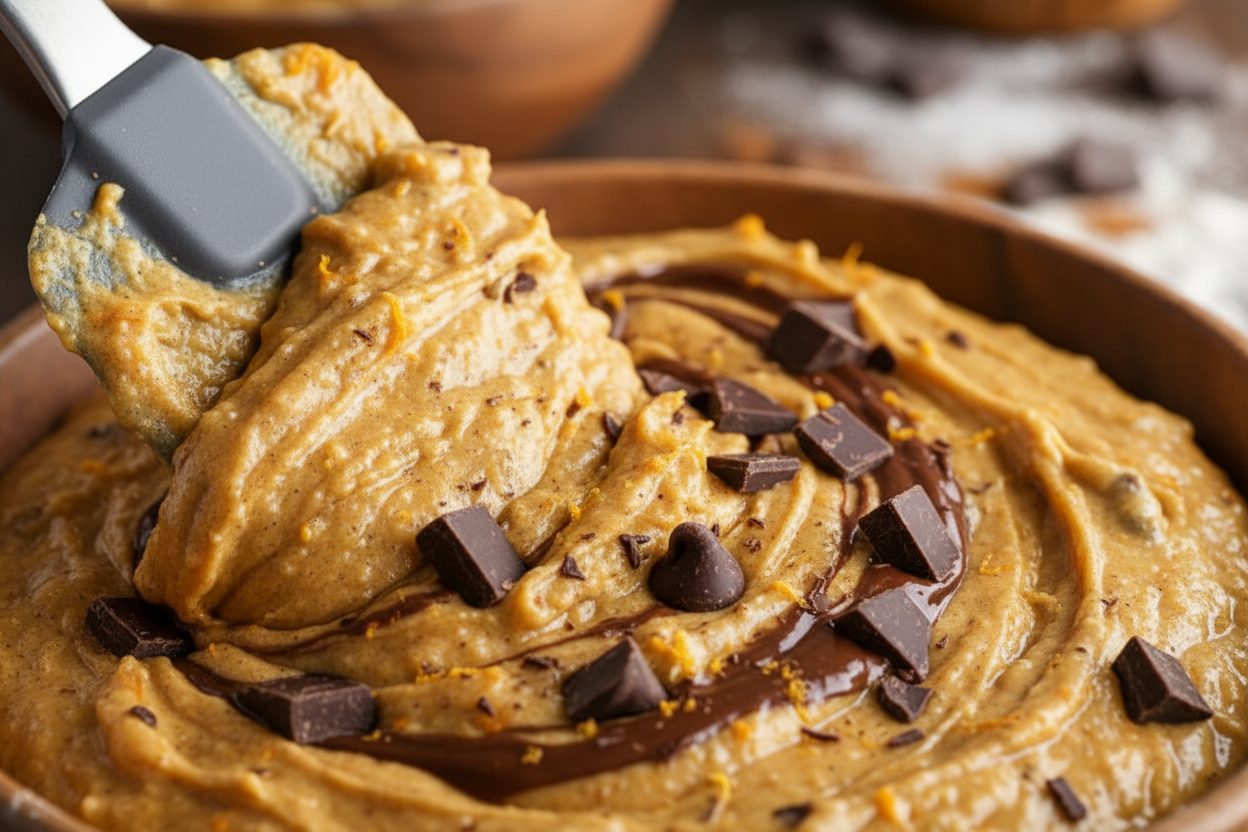
5. Fold in the chocolate chips evenly throughout the batter.
Add 1/2 cup (85g) of chocolate chips to the batter. Gently fold them in until they are evenly distributed. This ensures every bite of your Pumpkin Protein Muffin has a touch of chocolatey goodness. This step enhances the appeal, making them even more desirable as a muscle building dessert.
6. Divide the batter evenly among the prepared cups, filling each about three-quarters full.
Using a scoop or two spoons, distribute the batter evenly among the 12 lined muffin cups. Fill each cup approximately three-quarters full. This allows room for the muffins to rise without overflowing during baking.
7. Bake for 18 to 22 minutes, or until a toothpick inserted into the center comes out clean.
Place the muffin tin in the preheated oven. Bake for 18 to 22 minutes. The exact baking time may vary slightly depending on your oven. To check for doneness, insert a toothpick or a thin skewer into the center of a muffin. If it comes out clean or with a few moist crumbs, the muffins are ready. If wet batter adheres to the toothpick, continue baking for a few more minutes and retest.
8. Let cool in the pan for 5 minutes before transferring to a wire rack to cool completely.
Once baked, remove the muffin tin from the oven. Allow the muffins to cool in the pan for 5 minutes. This brief resting period helps them set and prevents them from breaking apart when removed. After 5 minutes, carefully transfer the muffins from the tin to a wire cooling rack. Let them cool completely on the rack. Cooling thoroughly prevents condensation, keeping the muffins fresh and their texture intact.
Storage and Freezing Tips
Proper storage is essential to maintain the freshness and quality of your Pumpkin Protein Muffins. These convenient healthy autumn snacks can be enjoyed over several days or stored for longer periods.
* Countertop Storage: Once completely cooled, store the muffins in an airtight container at room temperature. They will remain fresh for up to 3 days. Placing a paper towel at the bottom of the container can help absorb excess moisture and prevent sogginess.
* Refrigeration: For slightly extended freshness, place the airtight container in the refrigerator. This can keep the muffins fresh for up to 5 days.
* Freezing: These muffins freeze exceptionally well, making them an excellent option for meal prep or future enjoyment. Wrap each cooled muffin individually in plastic wrap, then place them in a freezer-safe bag or container. They can be frozen for up to 3 months. To thaw, simply remove a muffin from the freezer and let it come to room temperature on the counter for a few hours, or warm it gently in a microwave for 30-60 seconds. This makes them perfect for a quick protein-packed breakfast on busy mornings.
Frequently Asked Questions
Addressing common queries helps ensure a smooth baking experience and encourages adaptation to various dietary needs.
Can I use a vegan alternative?
Yes, modifications can be made for a vegan version. For the 2 large eggs, you can use flax eggs (2 tablespoons ground flaxseed mixed with 6 tablespoons water, allowed to sit for 5 minutes to thicken) or a commercial egg replacer equivalent to two eggs. Ensure your whey protein powder is a plant-based protein powder for a completely vegan option. Use a plant-based milk and ensure chocolate chips are dairy-free. These adjustments make the recipe accessible for gluten-free fall baking enthusiasts and those on a plant-based diet.
How long do these stay fresh?
When stored correctly, these Pumpkin Protein Muffins maintain their best quality for approximately 3 days at room temperature in an airtight container. If refrigerated, they can last up to 5 days. For longer storage, freezing is recommended. Individually wrapped and frozen, they will keep well for up to 3 months. This longevity makes them an excellent candidate for advance preparation, ensuring you always have a wholesome snack or breakfast on hand.
Conclusion
These Pumpkin Protein Muffins offer a delicious and nutritious way to enjoy the flavors of autumn. They are more than just a treat; they are a thoughtfully crafted option for anyone seeking healthy autumn snacks, a protein-rich breakfast, or even a satisfying post-workout bite. With their wholesome ingredients and balanced profile, they provide a comforting experience without compromising on health goals. Embrace the season with these delightful, spiced squash-inspired muffins.
For more wholesome recipes, baking tips, and culinary inspiration, be sure to follow our community on Facebook. Join us at our Facebook page for daily updates and conversations with fellow food enthusiasts.

Spiced Chocolate Chip Protein Bites
Ingredients
- 1 cup Pumpkin puree unsweetened, not pie filling
- 0.5 cup Whey protein powder vanilla flavored
- 1 cup Whole wheat pastry flour sifted
- 0.5 cup Chocolate chips semi-sweet
- 2 large Eggs room temperature
- 0.25 cup Maple syrup pure grade A
- 1 tsp Baking powder check expiration date
- 1 tbsp Pumpkin pie spice store-bought or homemade
Instructions
- 1. Preheat the oven to 350 degrees Fahrenheit and line a 12-cup tin with paper liners.
- 2. In a large bowl, whisk together the puree, eggs, and maple syrup until smooth.
- 3. In a separate bowl, combine the flour, protein powder, baking powder, and spice blend.
- 4. Gently fold the dry mixture into the wet ingredients until just combined, being careful not to overmix.
- 5. Fold in the chocolate chips evenly throughout the batter.
- 6. Divide the batter evenly among the prepared cups, filling each about three-quarters full.
- 7. Bake for 18 to 22 minutes, or until a toothpick inserted into the center comes out clean.
- 8. Let cool in the pan for 5 minutes before transferring to a wire rack to cool completely.
For more daily recipes and tips, follow us on Facebook!
Click here to join our community!