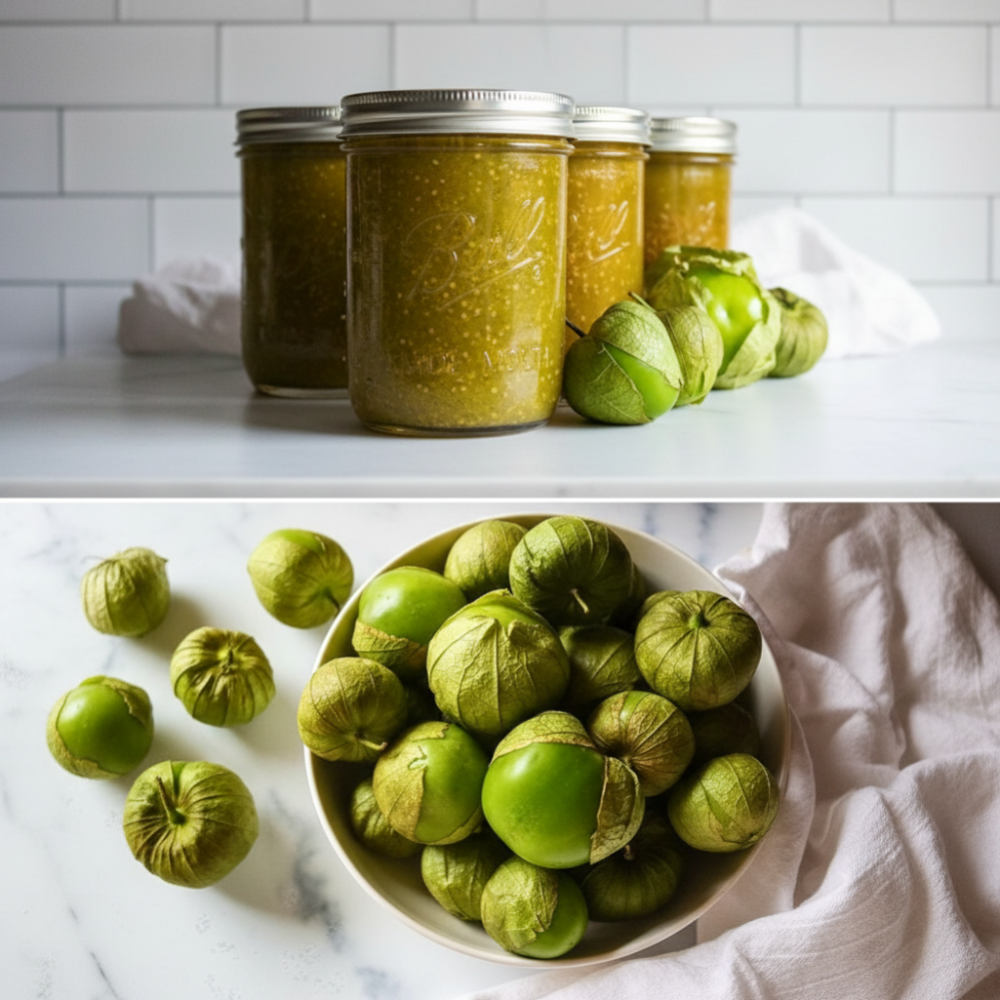
When summer’s bounty overflows with vibrant green tomatillos, the thought of letting any go to waste feels almost criminal. Transforming that fresh harvest into a shelf-stable, zesty sauce is a smart way to enjoy the flavors of the season long after the garden sleeps. This ultimate guide focuses on `Canning Tomatillo Enchilada Sauce`, offering a safe and reliable method for `preserving tomatillos` so you can savor homemade goodness all year. Imagine whipping up a batch of enchiladas on a cold winter night, using sauce prepared months earlier. This practical approach to `mexican food preservation` ensures you always have a delicious, ready-to-use staple in your pantry.
Necessary Ingredients
Crafting a delicious and safe `green enchilada sauce recipe` for canning begins with precise measurements and quality ingredients. Adhering to these specifications is crucial for both flavor and preservation success.
- 5 lbs fresh tomatillos: Choose firm, unblemished tomatillos with intact papery husks.
- 1 cup chopped yellow onion: Provides a foundational aromatic sweetness.
- 4 cloves garlic: Adds pungent depth essential to this sauce.
- 0.5 cup chopped cilantro: Contributes fresh, herbaceous notes.
- 1 tbsp cumin: A warm, earthy spice that defines many Mexican dishes.
- 1 tsp red chile flakes: Offers a subtle heat. Adjust according to preference, but maintain the quantity for canning safety.
- 0.5 cup bottled lemon juice: This ingredient is mandatory for safety in canning. Do not substitute with fresh lemon juice or lime juice. We will discuss why later.
- 1 tsp salt: Enhances all the flavors.
Each ingredient plays a vital role in creating a balanced flavor profile and ensuring the sauce is suitable for `water bath canning green sauce`.
Equipment Checklist
Proper equipment is as important as the ingredients for successful `Canning Tomatillo Enchilada Sauce`. Gather these items before you begin:
- Water bath canner: A large pot with a lid and a rack, designed to hold jars submerged in boiling water.
- Half-pint or pint mason jars: Clean, sterilized canning jars with no chips or cracks.
- New canning lids: Lids are for single use only to ensure a proper seal.
- Canning bands: Reusable bands to secure the lids during processing.
- Large pot: For simmering the sauce.
- Blender or food processor: To achieve a smooth sauce consistency.
- Jar lifter: Essential for safely handling hot jars.
- Canning funnel: Helps in cleanly filling jars without mess.
- Bubble remover/headspace tool: A non-metallic utensil for removing air bubbles and measuring headspace.
- Clean kitchen towels: For wiping jar rims and general cleanup.
Having all your tools ready beforehand streamlines the canning process, making it more efficient and less stressful.
Preparation and Cooking
This stage transforms your fresh tomatillos into a rich, flavorful sauce, ready for preservation. Careful preparation is key.
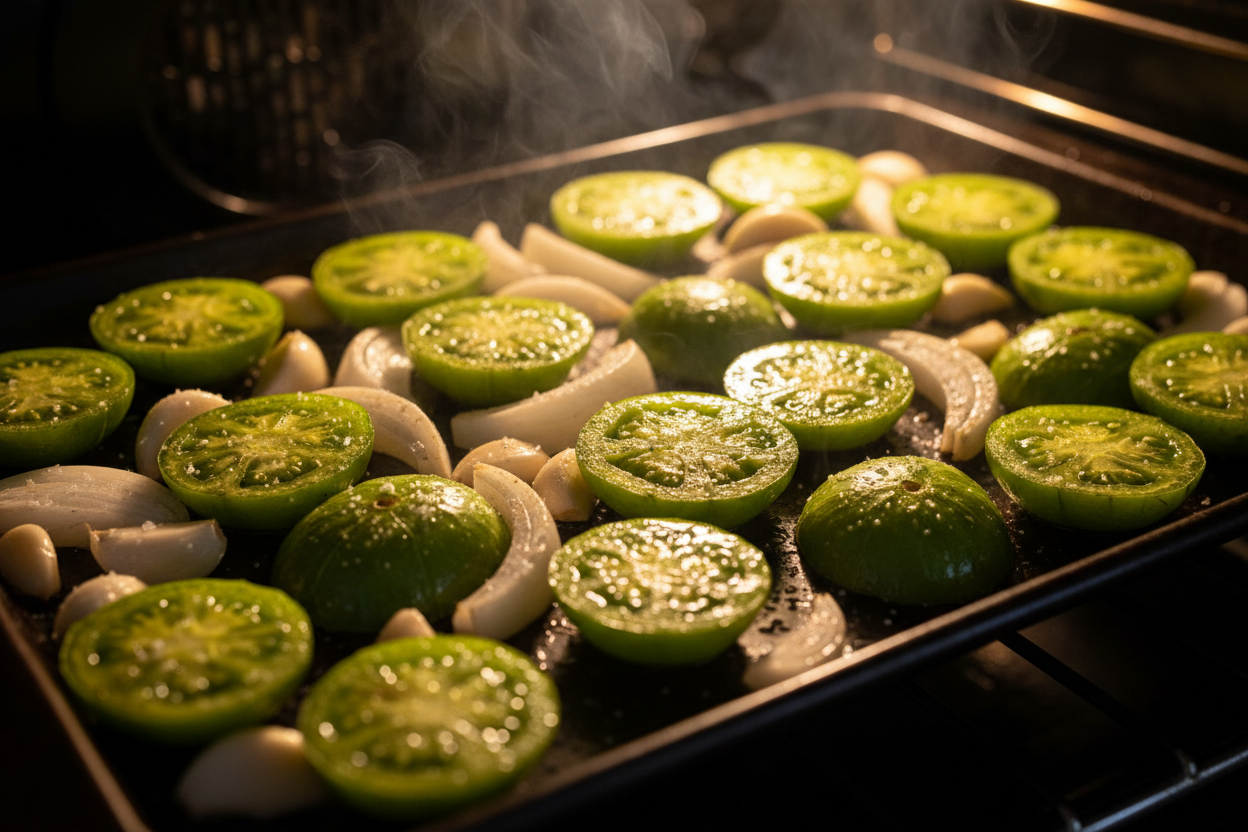
Start by preparing your tomatillos. Remove the papery husks and rinse the tomatillos thoroughly under cool water to remove the sticky residue. Pat them dry. Next, arrange the 5 lbs of husked tomatillos on a baking sheet. You can roast them whole or halved. Roasting deepens their flavor and softens them, making them easier to blend. Place the baking sheet in an oven preheated to 400°F (200°C) and roast for about 15-20 minutes, or until the tomatillos are softened and lightly charred in spots. This step is crucial for developing the characteristic roasted flavor of good `green enchilada sauce`.
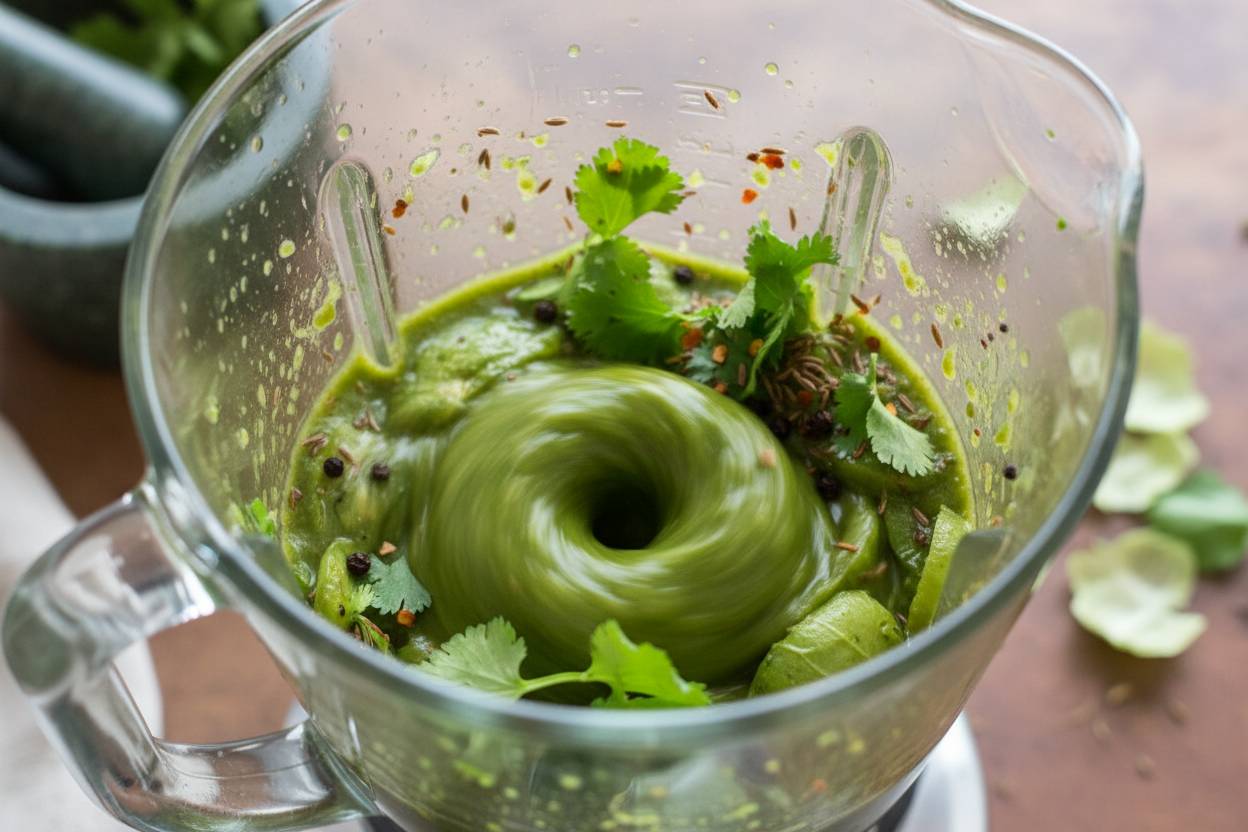
While the tomatillos roast, finely chop 1 cup of yellow onion and mince 4 cloves of garlic. Once the tomatillos are roasted and slightly cooled, combine them in a blender or food processor with the chopped onion, minced garlic, and 0.5 cup of chopped cilantro. Blend until the mixture reaches your desired consistency. For a smoother sauce, blend longer; for a chunkier sauce, pulse.
Transfer the blended tomatillo mixture to a large pot. Add 1 tbsp of cumin, 1 tsp of red chile flakes, and 1 tsp of salt. Bring the mixture to a gentle simmer over medium heat. Continue to simmer, stirring occasionally, for 15 minutes. This simmering time allows the flavors to meld and the sauce to thicken slightly.
After the 15-minute simmer, remove the pot from the heat. This is the critical moment to add your `0.5 cup of bottled lemon juice`. Stir it in thoroughly. Adding the lemon juice at the end prevents it from evaporating during simmering, ensuring its full acidity remains in the sauce, which is vital for canning safety.
The Preservation Process
This is where your `green enchilada sauce recipe` becomes a shelf-stable pantry staple. Adhering to precise steps for `water bath canning green sauce` is paramount for food safety.
Begin by sterilizing your canning jars. Wash half-pint or pint mason jars in hot, soapy water, rinse them well, then keep them hot. You can do this by leaving them in the hot water bath canner while it heats up, or by running them through a dishwasher cycle that includes a heated dry. Prepare your new lids by placing them in a small saucepan with simmering water, keeping them warm until ready to use. This softens the sealing compound, promoting a better seal.
Using a canning funnel, carefully ladle the hot tomatillo enchilada sauce into the hot, sterilized jars. Fill each jar, leaving a 0.5-inch headspace at the top. This headspace is essential for proper sealing and to allow for expansion during processing.
Next, use a non-metallic bubble remover or a clean chopstick to remove any air bubbles trapped in the sauce. Gently slide the tool around the inside of the jar, pressing against the sauce to release bubbles. After removing bubbles, recheck the headspace. If it has decreased significantly, add a little more hot sauce to maintain the 0.5-inch gap.
Wipe the rims of the jars thoroughly with a clean, damp cloth. Any food residue on the rim can prevent a proper seal. Place a warm, new lid on each jar, centering it carefully. Screw on the canning bands fingertip-tight. This means tightening until you feel resistance, then giving it just a slight extra turn. Do not overtighten, as this can prevent air from escaping during processing, leading to seal failure.
Carefully lower the filled jars onto the rack in your `water bath canner`. Ensure the jars are covered by at least 1-2 inches of water. Bring the water to a rolling boil. Once boiling vigorously, start your timer. Process half-pint or pint jars for 20 minutes. Remember to adjust processing time for altitude if you live above 1,000 feet. For altitudes 1,001-3,000 feet, add 5 minutes; for 3,001-6,000 feet, add 10 minutes; for 6,001-8,000 feet, add 15 minutes.
Once the processing time is complete, turn off the heat and let the canner sit undisturbed for 5 minutes. This allows the jars to acclimate to the temperature change, reducing the risk of seal failure. Carefully remove the jars from the canner using a jar lifter and place them on a clean towel on your countertop, ensuring there is space between each jar. Let them cool undisturbed for 12-24 hours. As they cool, you will hear the satisfying *ping* of the lids sealing.
After 12-24 hours, check the seals. Press down on the center of each lid. If it does not flex, the jar is sealed. If a lid flexes, the jar has not sealed. Unsealed jars should be refrigerated immediately and consumed within a few days. For sealed jars, remove the bands, wipe the jars clean, label them with the contents and date, and store them.
Food Safety and Storage Tips
Food safety is paramount when `preserving tomatillos` or any low-acid food. The inclusion of `bottled lemon juice` is not optional; it is a critical safety measure for `Canning Tomatillo Enchilada Sauce`.
Tomatillos, like most vegetables, are considered low-acid foods. This means their natural pH is above 4.6, a level where the dangerous bacteria *Clostridium botulinum* can thrive and produce toxins in an anaerobic (oxygen-free) environment, such as a sealed canning jar. To safely preserve low-acid foods using a water bath canner, their acidity must be increased to a pH of 4.6 or below. This is where `bottled lemon juice` comes in.
Bottled lemon juice has a standardized acidity (typically 5% citric acid), making it a reliable and predictable acidifier for canning. Unlike fresh lemon or lime juice, which can vary greatly in acidity depending on the specific fruit, ripeness, and variety, bottled juice offers consistent safety. Never substitute fresh citrus juice for bottled when a recipe specifies it for canning. This consistency is non-negotiable for preventing botulism, a potentially fatal foodborne illness.
For your `homemade salsa verde pantry` items, once jars are properly sealed and stored, they are shelf-stable. Store your `canned tomatillo recipes` in a cool, dark, dry place, away from direct sunlight or heat sources. A properly sealed and stored jar of canned tomatillo enchilada sauce will maintain its quality for up to one year. Always inspect jars before opening; discard any that show signs of spoilage, such as a bulging lid, leakage, or an off odor.
Delicious Ways to Serve
With your `homemade salsa verde pantry` stocked, the possibilities for delicious meals are endless. Your `Canning Tomatillo Enchilada Sauce` is incredibly versatile.
The most obvious application is, of course, enchiladas. Use this vibrant `green enchilada sauce recipe` generously over rolled corn or flour tortillas filled with shredded cooked beef, chicken, or cheese. Bake until bubbly and golden. Top with a dollop of sour cream, fresh cilantro, and crumbled cotija cheese for a truly authentic experience. The bright, tangy notes of the tomatillo sauce perfectly complement the richness of the fillings.
Beyond enchiladas, this sauce shines in many other `canned tomatillo recipes`. Use it as a simmering sauce for chicken or beef in a slow cooker, creating tender, flavorful meat perfect for tacos or burritos. It can also serve as a flavorful base for a hearty chili or a unique twist on chilaquiles. For a simpler delight, warm the sauce and serve it as a dip with crispy corn tortilla chips. It also makes a fantastic topping for huevos rancheros or breakfast burritos, adding a tangy kick to your morning meal.
The depth of flavor from the roasted tomatillos, cumin, and red chile flakes ensures that every dish it graces is elevated. Having this sauce on hand means you are always just a few steps away from a satisfying, flavorful meal.
Frequently Asked Questions
Q: Can I reduce the amount of bottled lemon juice?
A: No. The amount of `0.5 cup bottled lemon juice` specified in this `green enchilada sauce recipe` is critical for ensuring adequate acidity for safe water bath canning. Reducing it could compromise the safety of the product, increasing the risk of botulism. Always adhere strictly to the recommended amounts of acidifiers for canning.
Q: How long does this `Canning Tomatillo Enchilada Sauce` last once canned?
A: When properly processed and sealed, and stored in a cool, dark place, your `canned tomatillo recipes` will maintain excellent quality for up to one year. After one year, the quality may start to diminish, but if the seal remains intact, it is generally still safe to consume.
Q: What if a jar does not seal?
A: If, after 12-24 hours, you find a jar has not sealed (the lid flexes when pressed), do not attempt to reprocess it. Instead, treat it as fresh sauce. Refrigerate the unsealed jar immediately and consume its contents within a few days.
Q: Can I add other vegetables or spices to this `green enchilada sauce recipe` for canning?
A: Modifying tested canning recipes, especially those for low-acid foods like vegetables, can be risky. Adding other vegetables might change the density or acidity of the sauce, affecting heat penetration during processing and potentially compromising safety. While small adjustments to spices (e.g., slightly increasing cumin or chile flakes) might be acceptable if the core ingredients and acid level remain the same, it is always safest to stick to the provided recipe for `mexican food preservation`. For untested modifications, pressure canning might be required, or the product must be stored in the refrigerator or freezer.
Q: Why do I need to remove air bubbles from the jars?
A: Removing air bubbles ensures that the hot sauce fully contacts the inside of the jar and lid. Trapped air can lead to false headspace readings, poor heat penetration, and can interfere with the sealing process. It is a simple but important step in `water bath canning green sauce`.
Enjoy the rewarding experience of `preserving tomatillos` and the convenience of a well-stocked pantry.
For more delicious `canned tomatillo recipes` and food preservation tips, follow our Facebook page.
Shelf-Stable Tomatillo Enchilada Sauce
Ingredients
- 5 lbs Fresh tomatillos Husked and washed
- 1 cup Yellow onion Chopped
- 4 cloves Garlic Peeled
- 0.5 cup Cilantro Chopped
- 0.5 cup Bottled lemon juice Must use bottled
- 1 tbsp Cumin Ground
- 1 tsp Red chile flakes Dried
- 1 tsp Salt Canning salt preferred
Instructions
- Remove husks from tomatillos and wash thoroughly to remove the sticky residue.
- Roast the tomatillos, onion, and garlic on a baking sheet at 400 degrees Fahrenheit for 15 minutes until softened.
- Transfer the roasted vegetables to a blender. Add cilantro, cumin, red chile flakes, salt, and bottled lemon juice. Blend until smooth.
- Pour the mixture into a large pot and bring to a simmer over medium heat. Simmer for 15 minutes.
- Ladle the hot sauce into sterilized pint jars, leaving half an inch of headspace. Wipe rims, apply lids and bands until fingertip tight.
- Process the jars in a boiling water bath canner for 20 minutes. Turn off heat, let sit for 5 minutes, then remove jars to cool completely.
For more daily recipes and tips, follow us on Facebook!
Click here to join our community!