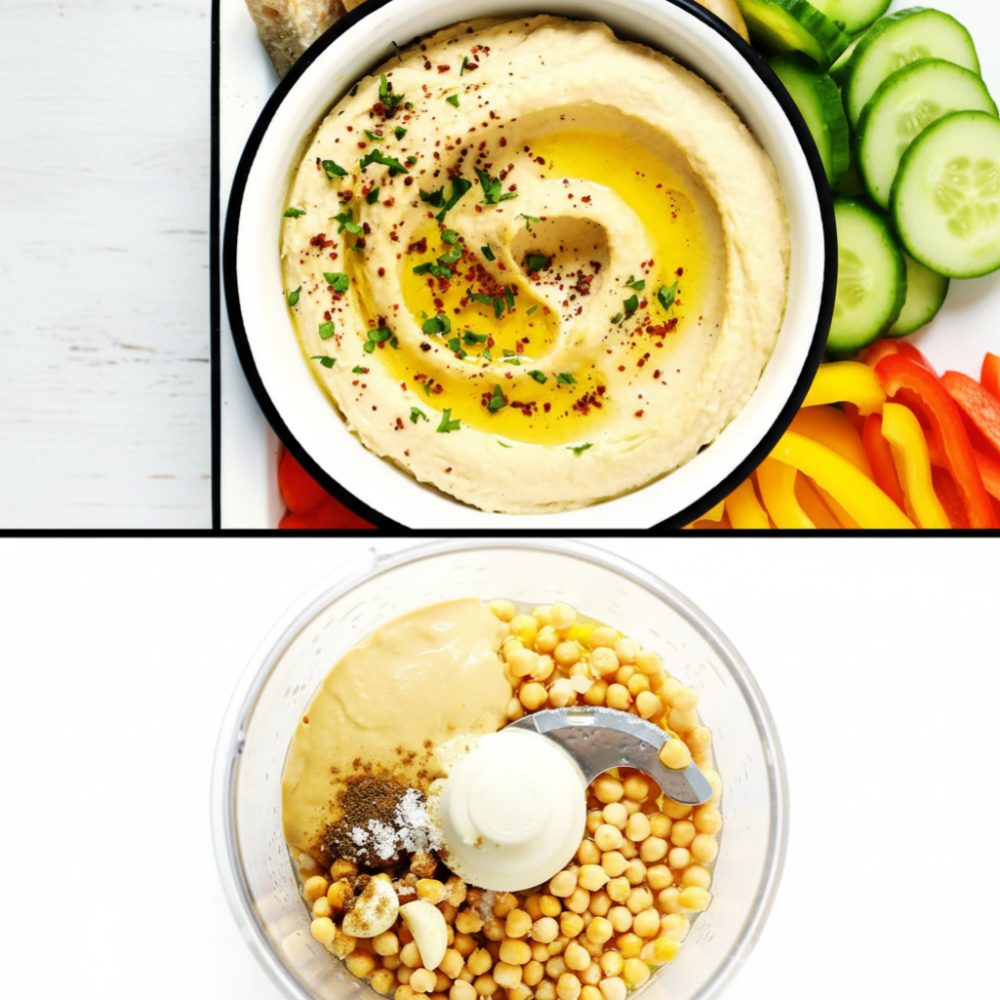
Making your own homemade hummus is a rewarding experience, transforming simple ingredients into a rich, creamy, and flavorful dip. Forget store-bought versions; this recipe delivers an authentic chickpea dip that is both satisfying and incredibly fresh. It is a versatile healthy vegetable dip, perfect for snacking, entertaining, or adding a protein boost to any meal. This guide will show you how to create a batch of creamy hummus from scratch, ensuring a smooth texture and vibrant taste that will impress everyone.
Why Make Your Own Garbanzo Spread?
Opting to prepare your own hummus offers several significant advantages over purchasing pre-made varieties. First, you gain complete control over the ingredients. This means you can adjust the flavors to your preference and avoid any unwanted additives or preservatives often found in commercial products. Crafting your own garbanzo bean recipe also proves to be more cost-effective in the long run. Chickpeas and tahini are relatively inexpensive staples, making a large batch of hummus considerably cheaper than buying small containers repeatedly.
Beyond cost, the freshness and superior flavor of homemade hummus are undeniable. The vibrant taste of freshly processed garlic, quality tahini, and just-blended chickpeas creates a depth of flavor that packaged versions rarely achieve. It is a truly satisfying way to enjoy a classic. Furthermore, making your own hummus is an easy DIY snack that allows for immediate enjoyment. You can customize the consistency, from thick and robust to light and airy, ensuring it perfectly suits your palate. The satisfaction of serving a dish you prepared yourself adds another layer of enjoyment to this already delicious spread.
Essential Ingredients for the Best Texture
Achieving the perfect texture and flavor for your homemade hummus relies on a few key ingredients. Here is what you will need, along with insights into why each component is crucial:
* **Chickpeas:** Use one 15-ounce can of chickpeas. Draining and rinsing them thoroughly is important, and reserving some of the liquid, known as aquafaba, can be beneficial for achieving ultimate smoothness. Chickpeas provide the bulk and creamy base for the dip.
* **Tahini:** This sesame paste, measured at 1/4 cup, is non-negotiable for authentic hummus. Good quality tahini should be smooth, pourable, and have a rich, nutty flavor without bitterness. It contributes to the characteristic creamy texture and distinct taste of the dip.
* **Garlic:** Two cloves of fresh garlic, peeled, add a pungent, aromatic kick. Adjust this quantity to your taste; some prefer a milder garlic flavor, while others enjoy a more robust presence.
* **Cumin:** A half teaspoon of ground cumin infuses the hummus with its earthy, warm notes, complementing the chickpeas and tahini beautifully.
* **Salt:** Start with 1/2 teaspoon of salt and adjust to taste. Salt is essential for balancing and enhancing all the other flavors.
* **Extra Virgin Olive Oil:** You will need 1/4 cup of olive oil for blending, plus extra for drizzling. A good quality extra virgin olive oil contributes to the overall richness and mouthfeel.
* **Cold Water or Reserved Aquafaba:** Have 2-4 tablespoons on hand. This liquid is gradually added during blending to achieve your desired consistency. Aquafaba, the liquid from the can of chickpeas, often helps create an even creamier result.
* **Sweet Paprika:** For garnish, 1/2 teaspoon adds a touch of color and a mild, smoky sweetness.
* **Fresh Parsley:** One tablespoon of chopped fresh parsley for garnish adds a fresh, herbaceous note and visual appeal.
These ingredients, when combined and processed correctly, create a balanced and irresistibly smooth tahini spread.
Step-by-Step Instructions
Crafting your own homemade hummus is straightforward. Follow these steps for a consistently delicious result:
- Drain and rinse chickpeas. Open your 15-ounce can of chickpeas. Place them in a colander and rinse thoroughly under cold running water. This removes excess sodium and starch. If you plan to use aquafaba for extra smoothness, reserve 2-4 tablespoons of the liquid from the can before rinsing the chickpeas.
- Process tahini, garlic, cumin, salt, and olive oil. In the bowl of a food processor, combine 1/4 cup of tahini, 2 peeled cloves of garlic, 1/2 teaspoon of ground cumin, 1/2 teaspoon of salt, and 1/4 cup of extra virgin olive oil. Process these ingredients together for about 1-2 minutes, or until the mixture is very smooth and creamy. Scrape down the sides of the bowl as needed. This initial blending helps emulsify the tahini and oil, creating a light and airy base.
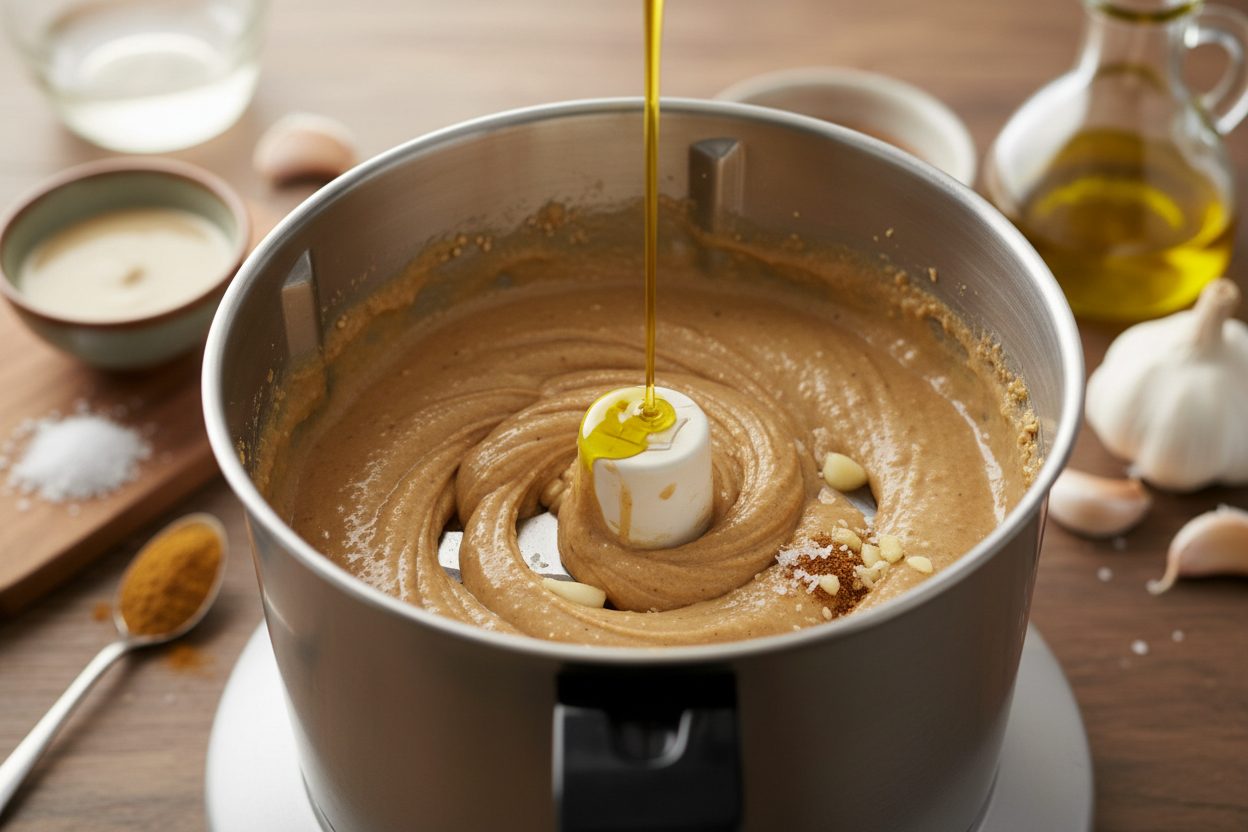
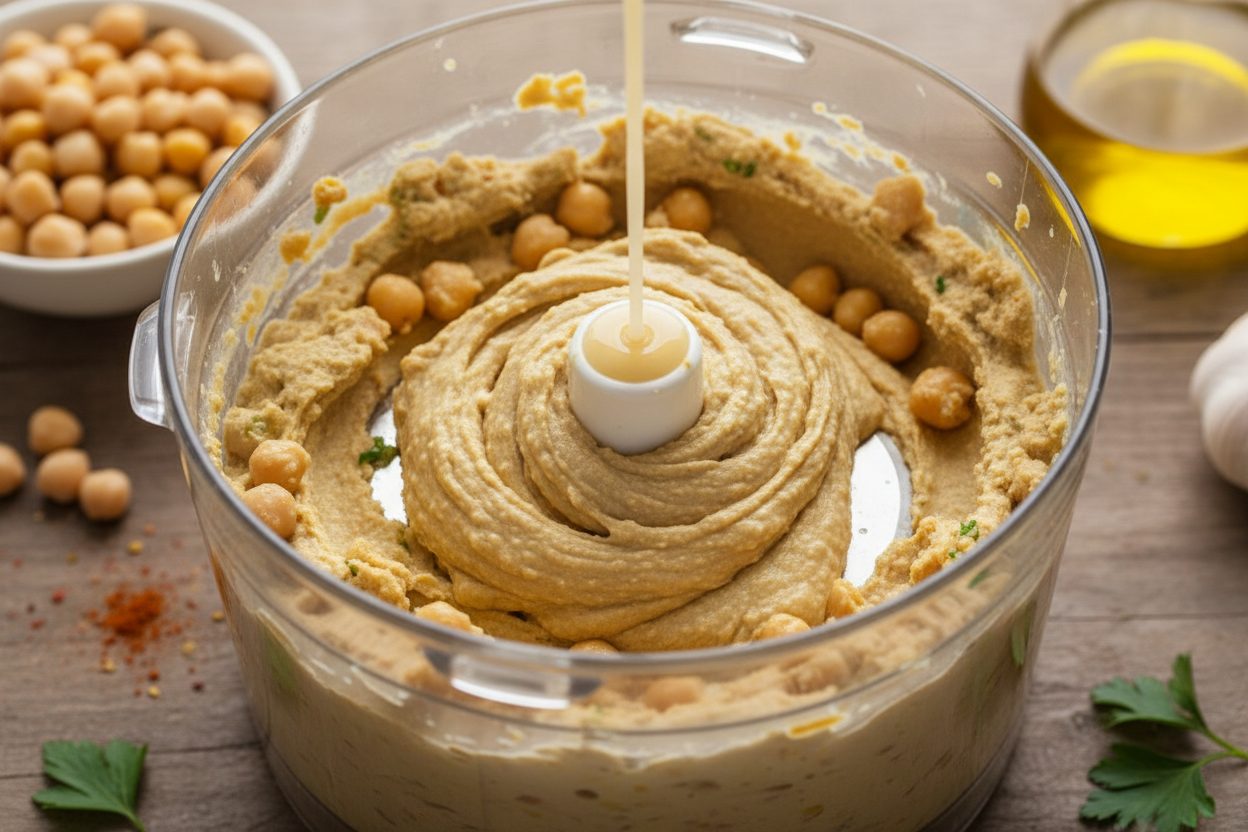
- Add chickpeas and blend. Add the drained and rinsed 15-ounce can of chickpeas to the food processor. Begin processing again. While the processor is running, slowly add 2-4 tablespoons of cold water or reserved aquafaba, one tablespoon at a time, until the hummus reaches your desired smooth and creamy consistency. Continue blending for 3-5 minutes, scraping down the sides frequently, to ensure a truly silky texture. The longer you blend, the smoother your hummus will become.
- Garnish with paprika and parsley. Transfer the finished hummus to a serving bowl. Using a spoon, create a small swirl in the center. Drizzle generously with additional extra virgin olive oil. Sprinkle 1/2 teaspoon of sweet paprika and 1 tablespoon of chopped fresh parsley over the top for both flavor and visual appeal.
- Serve with cucumber and bell pepper sticks. Present your freshly made homemade hummus with an assortment of crisp dippers. Prepare 1 cucumber and 1-2 bell peppers (any color) by cutting them into convenient sticks. These fresh vegetables offer a refreshing crunch that perfectly complements the rich and creamy dip.
Pro Tips for Extra Smoothness
Achieving that ultra-smooth, restaurant-quality hummus texture is simpler than you might think with a few expert techniques:
- Peel the Chickpeas: For the absolute smoothest hummus, gently pinch each cooked chickpea to remove its thin outer skin. While this step is optional and time-consuming, it eliminates any remaining fibrous bits, resulting in an incredibly silky dip.
- Use Aquafaba: Instead of plain cold water, use the reserved liquid (aquafaba) from the canned chickpeas. This starchy liquid helps create an even creamier emulsion and adds richness to the texture.
- Blend Thoroughly: Do not rush the blending process. After adding all ingredients, process the hummus for at least 3-5 minutes. The friction from continuous blending helps break down the chickpeas completely and whips air into the mixture, making it lighter and smoother. Scrape down the sides of the food processor bowl frequently to ensure everything is incorporated evenly.
- Add Cold Water Gradually: Incorporate the 2-4 tablespoons of cold water or aquafaba very slowly while the food processor is running. Adding it gradually allows you to control the consistency precisely and ensures proper emulsification.
Serving Suggestions (Veggie Sticks & More)
This homemade hummus is incredibly versatile and makes for an excellent addition to almost any meal or snack spread. As a prime example of a healthy vegetable dip, its natural companions are fresh, crisp vegetables. Serve it generously with the suggested 1 cucumber, cut into sticks, and 1-2 bell peppers, also cut into sticks. The cool, refreshing crunch of these veggies provides a wonderful contrast to the creamy dip.
Beyond these classic pairings, this authentic chickpea dip can elevate many dishes. It is a fantastic base for sandwiches and wraps, adding moisture, flavor, and a protein boost. Spread a generous layer on whole-grain bread or tortillas before adding your favorite fillings. Hummus also makes a delicious accompaniment to grain bowls or salads, offering a creamy component that ties the ingredients together. For a light yet satisfying appetizer, this recipe fits perfectly within a spread of vegan appetizers. Consider serving it alongside olives, cherry tomatoes, and perhaps a drizzle of extra olive oil and a sprinkle of sumac for an extra pop of flavor and color.
Storage and Make-Ahead Advice
One of the many benefits of making your own homemade hummus is its excellent shelf life and the ability to prepare it in advance. This makes it a perfect component for meal prepping or for entertaining without last-minute stress.
Once your hummus is prepared and garnished, transfer it to an airtight container. Press a piece of plastic wrap directly onto the surface of the hummus before sealing the container. This prevents a skin from forming and helps maintain its fresh flavor and texture. Store the container in the refrigerator. Properly stored, your authentic chickpea dip will remain fresh and delicious for up to 5-7 days.
If you are making it ahead for an event, consider preparing the hummus up to two days in advance. Before serving, give it a good stir. If it has thickened too much in the refrigerator, you can loosen it with a tablespoon or two of cold water or extra virgin olive oil until it reaches your desired consistency. Re-garnish with fresh paprika, parsley, and an extra drizzle of olive oil just before serving to refresh its appearance and flavor.
Frequently Asked Questions
Making homemade hummus often brings up a few common questions. Here are some answers to help you perfect your technique:
Q: Can I use dried chickpeas instead of canned ones?
A: Yes, absolutely. Using dried chickpeas often yields an even better flavor and texture. You will need to soak 1 cup of dried chickpeas overnight, then cook them until very tender, which usually takes 1-2 hours. Ensure they are very soft before blending for the smoothest result.
Q: Why is my hummus bitter?
A: Bitterness in hummus is most often attributed to the tahini. Lower quality tahini can sometimes have a bitter aftertaste. Ensure you are using a good quality, fresh tahini. Over-processing garlic can also contribute to a stronger, more pungent flavor that some perceive as bitter. Taste your hummus as you go and adjust garlic accordingly.
Q: Can I freeze hummus?
A: Yes, hummus freezes quite well. Transfer it to an airtight, freezer-safe container, leaving about an inch of headspace at the top as it will expand slightly. You can drizzle a thin layer of olive oil on top before freezing to help preserve moisture and prevent discoloration. It can be stored in the freezer for up to 3-4 months. Thaw it in the refrigerator overnight and stir well before serving. The texture might be slightly different after thawing, but it will still be delicious.
Q: What if I do not have a food processor?
A: While a food processor is ideal for achieving a perfectly smooth consistency, you can use a high-speed blender. You may need to add a bit more liquid and stop frequently to scrape down the sides, pushing the mixture towards the blades. It will take more effort and time, but it is certainly possible to make delicious hummus without a food processor.
Embrace the simplicity and deliciousness of this homemade hummus. It is a fantastic way to enjoy a wholesome, flavorful snack or meal.
For more easy recipes, cooking tips, and culinary inspiration, be sure to visit our Facebook page. Follow our Facebook page to stay updated on our latest creations and join our growing community of food lovers.
Creamy Chickpea Dip with Vegetable Sticks
Ingredients
- 15 oz Chickpeas canned, drained and rinsed
- 1/4 cup Tahini well stirred
- 1 clove Garlic peeled and smashed
- 1/2 tsp Cumin ground
- 1/2 tsp Salt kosher
- 3 tbsp Olive oil extra virgin
- 1 cup Cucumber sliced into sticks
- 1 cup Red bell pepper sliced into sticks
- 1 cup Yellow bell pepper sliced into sticks
- 1 tbsp Fresh parsley finely chopped
- 1/4 tsp Paprika for garnish
Instructions
- Drain and rinse the chickpeas, reserving 2 tablespoons of the liquid in a small bowl.
- In a food processor, combine the tahini, garlic clove, ground cumin, kosher salt, and olive oil. Blend until smooth.
- Add the chickpeas to the food processor and blend continuously for 2 minutes until creamy, adding the reserved liquid if a thinner consistency is desired.
- Transfer the dip to a serving bowl, drizzle with a little extra olive oil, and garnish with paprika and fresh parsley.
- Serve immediately alongside the cucumber, red bell pepper, and yellow bell pepper sticks.
For more daily recipes and tips, follow us on Facebook!
Click here to join our community!